Electronics / Camera Lenses
User Manual for Sigma 105mm F1.4 DG HSM Art Lens
Comprehensive user guide for the Sigma 105mm F1.4 DG HSM Art lens. Includes instructions on mounting, focusing modes, tripod collar usage, protective cover installation, and maintenance.
Table of contents
Manual images
Click an image to enlargeQuick guide from the manual
This lens is a high-performance optical instrument. Before use, ensure the lens mount is clean and the camera firmware is updated, especially for Nikon E-type compatibility. Never look directly at the sun through the lens, as this can cause permanent eye damage. Always attach the lens cap when not in use to prevent the lens from concentrating sunlight, which could cause a fire.
Description of parts
The lens features several key components for operation:
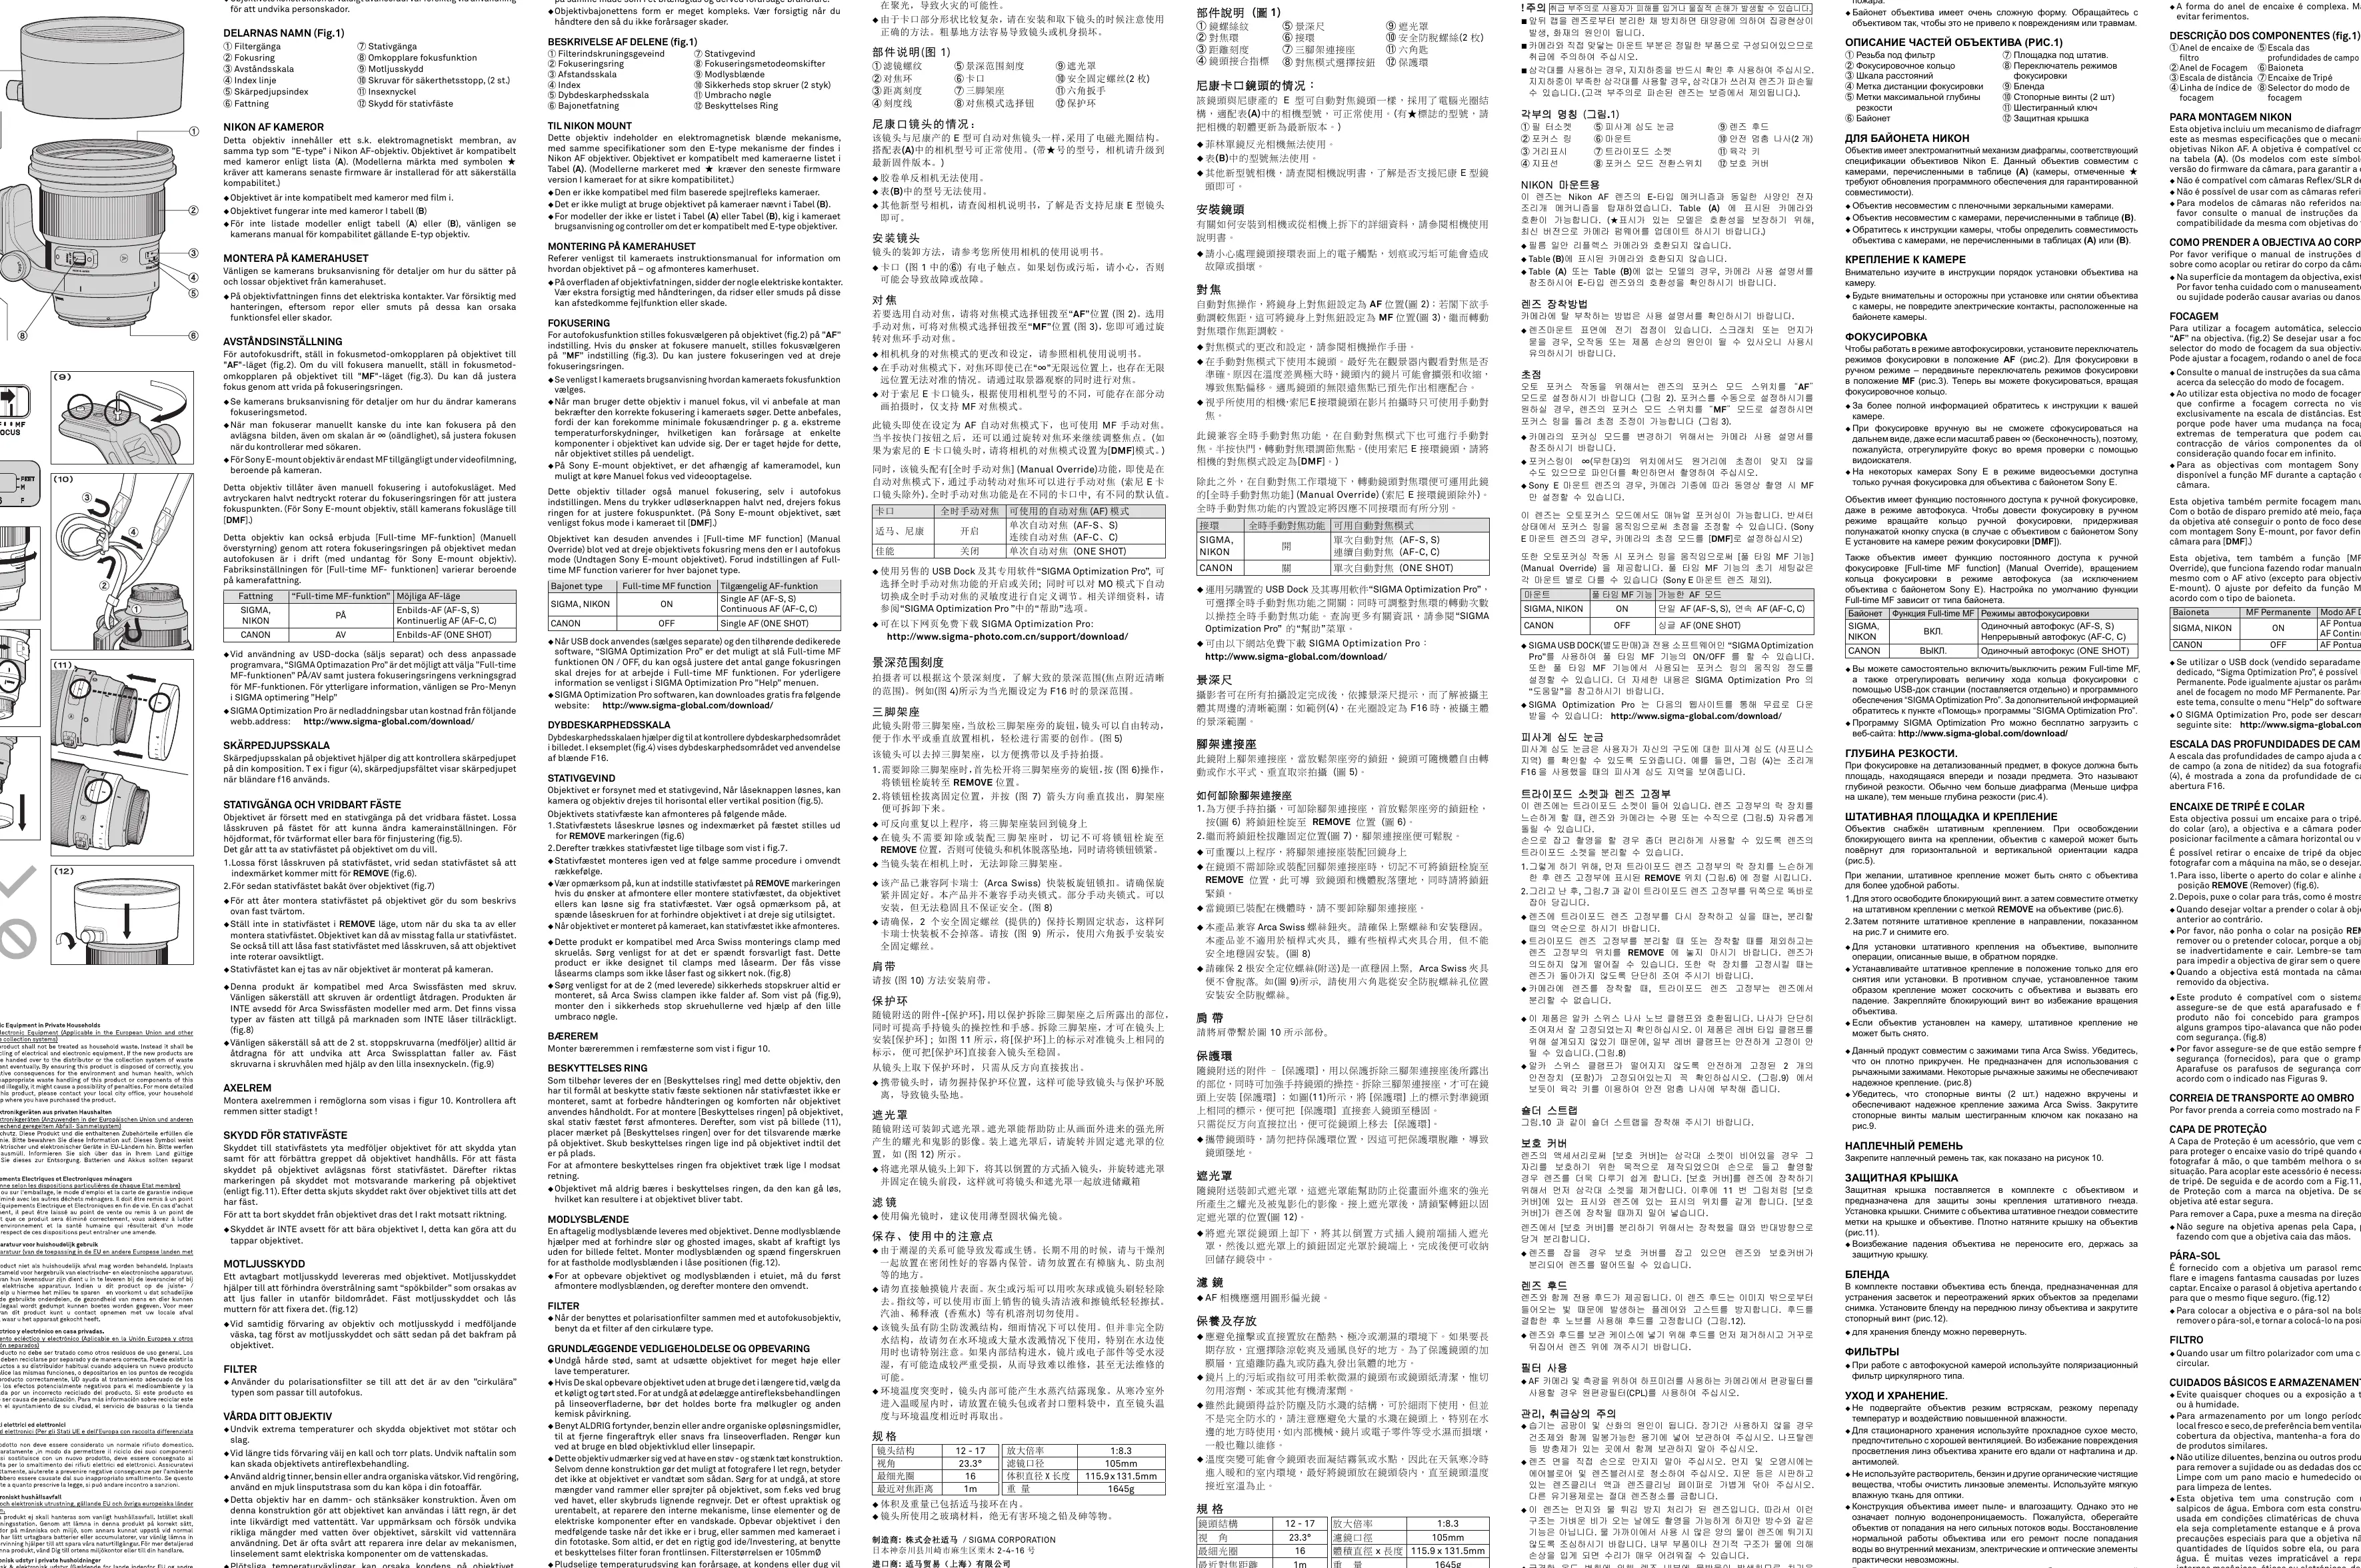
- Filter attachment thread
- Focus ring
- Distance scale and focus index line
- Depth of field read-out index
- Mount
- Tripod socket and collar
- Focus mode switch
- Lens hood
- Safety stopper screws and hex key
- Protective cover
Mounting to the camera
Refer to your camera's instruction manual for specific details on attaching or detaching the lens. Be careful when handling the lens mount surface, as electrical contacts are located there; scratches or dirt on these contacts can cause malfunctions.
Focusing
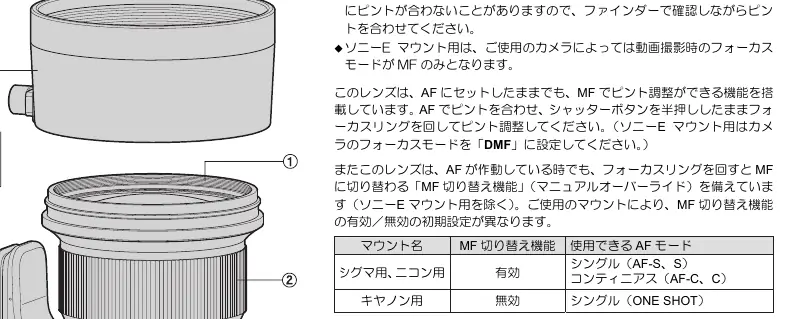
For autofocus, set the focus mode switch on the lens to the AF position. For manual focus, set the switch to the MF position and adjust the focus by rotating the focus ring. This lens also supports Full-time MF (Manual Override) by rotating the focus ring while in autofocus mode (except for Sony E-mount). Note that for Sony E-mount, video shooting may be limited to MF depending on the camera model.
Tripod socket and collar
The lens includes a tripod socket. To rotate the camera for horizontal or vertical orientation, loosen the locking knob on the collar. To remove the tripod collar for hand-held photography:
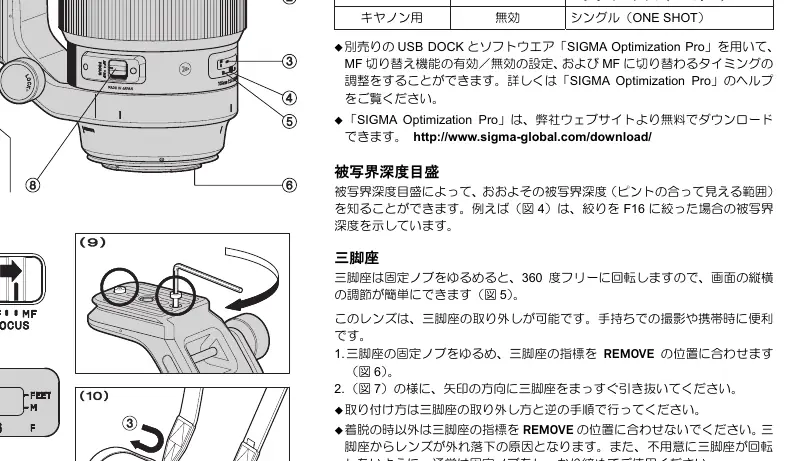
- Loosen the tripod collar locking knob.
- Align the index mark of the collar with the REMOVE position.
- Pull the tripod collar straight back to remove it.
When re-attaching, reverse this procedure. Ensure the locking knob is tightened to prevent unintentional rotation. This product is compatible with Arca Swiss screw-knob clamps; ensure the safety stopper screws are installed to prevent the lens from falling.
Protective cover
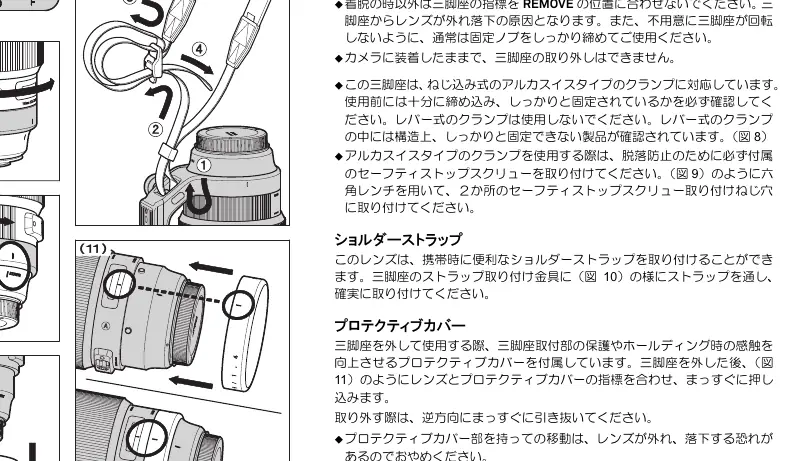
The protective cover protects the tripod socket area and improves handling. To install, remove the tripod collar, align the mark on the cover with the mark on the lens, and push the cover straight onto the lens until it clicks into place.
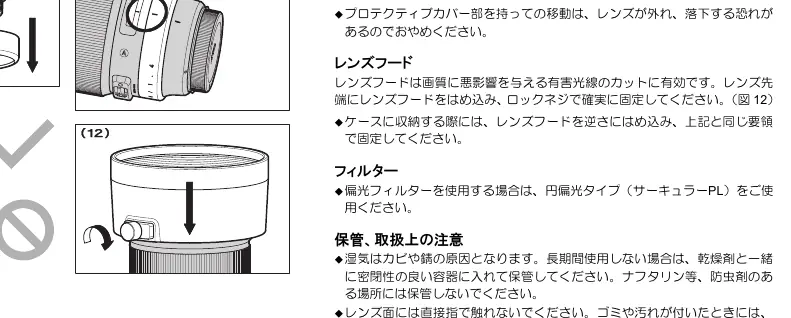
Lens hood
The detachable lens hood helps prevent flare and ghosting from stray light. Attach the hood to the front of the lens and lock the knob to secure it in place. For storage, remove the hood and replace it in the reverse position.
Care and storage
Avoid shocks, extreme temperatures, and humidity. For long-term storage, choose a cool, dry, and well-ventilated place. Do not use thinner, benzine, or organic cleaning agents. Clean the lens elements using a soft, moistened lens cloth or lens tissue. While the lens has a dust and splash-proof construction, it is not waterproof; avoid heavy rain or water splashes.
Technical specifications
The lens construction consists of 12-17 elements. The angle of view is 23.3 degrees, with a minimum aperture of F16. The minimum focusing distance is 1m, and the filter size is 105mm. The lens weighs 1645g.
Practical help
Common problems
Lens not focusing correctly
Check that the focus mode switch on the lens is set to AF and that the camera settings are correct.
Tripod collar feels loose or rotates unintentionally
Ensure the locking knob on the tripod collar is fully tightened.
Lens hood does not attach securely
Ensure the hood is aligned correctly and the locking knob is tightened.
Before use
- Check that the lens mount is clean and free of debris.
- Verify the camera firmware is updated for E-type lens compatibility (Nikon).
- Set the focus mode switch to the desired position (AF or MF).
- Ensure the tripod collar is locked if using a tripod.
- Attach the lens hood to prevent flare.
Images and diagrams
- Fig 1: Identification of lens parts including filter thread, focus ring, and tripod socket.
- Fig 2-3: Operation of the AF/MF focus mode switch.
- Fig 5-7: Procedure for removing and attaching the tripod collar.
- Fig 11: Installation of the protective cover.
- Fig 12: Attachment of the lens hood.
Model compatibility
- Nikon mount: Compatible with E-type electromagnetic diaphragm cameras.
- Sony E-mount: MF only during video shooting on some models.
- Arca Swiss: Compatible with screw-knob clamps; not designed for lever-type clamps.

Manual page author
Michael Turner
Technical manual editor
Reviews PDF manuals for structure, safety notes, and practical product details so readers can find the right information quickly.