Lighting / Fixtures
Installation Guide for Simply Retrofits 120-277V LED Area Light
Quick installation guide for Simply Retrofits 120-277V LED Area Light. Includes mounting methods, wiring instructions, and safety precautions for professional installation.
Table of contents
Manual images
Jump to the sectionQuick guide from the manual
This document provides installation instructions for the Simply Retrofits LED Area Light. It is intended for use by qualified electricians to ensure safe and proper setup. The luminaire supports multiple mounting methods depending on the specific model and site requirements.
Safety and Warnings
- Installation, inspection, and maintenance must be performed by a qualified electrician in accordance with local electrical codes.
- Ensure electrical power is completely disconnected before and during installation or maintenance.
- The luminaire must be connected to a system with an equipment-grounding conductor.
- Verify that the supply voltage matches the rated luminaire voltage.
- Do not install in environments where ambient temperatures exceed the rating on the luminaire nameplate or where hazardous atmospheres exist.
- Keep the lens tightly closed during operation.
- Use supply wires rated for at least 90 degrees Celsius.
Installation Procedures
The manual details various mounting configurations, including:
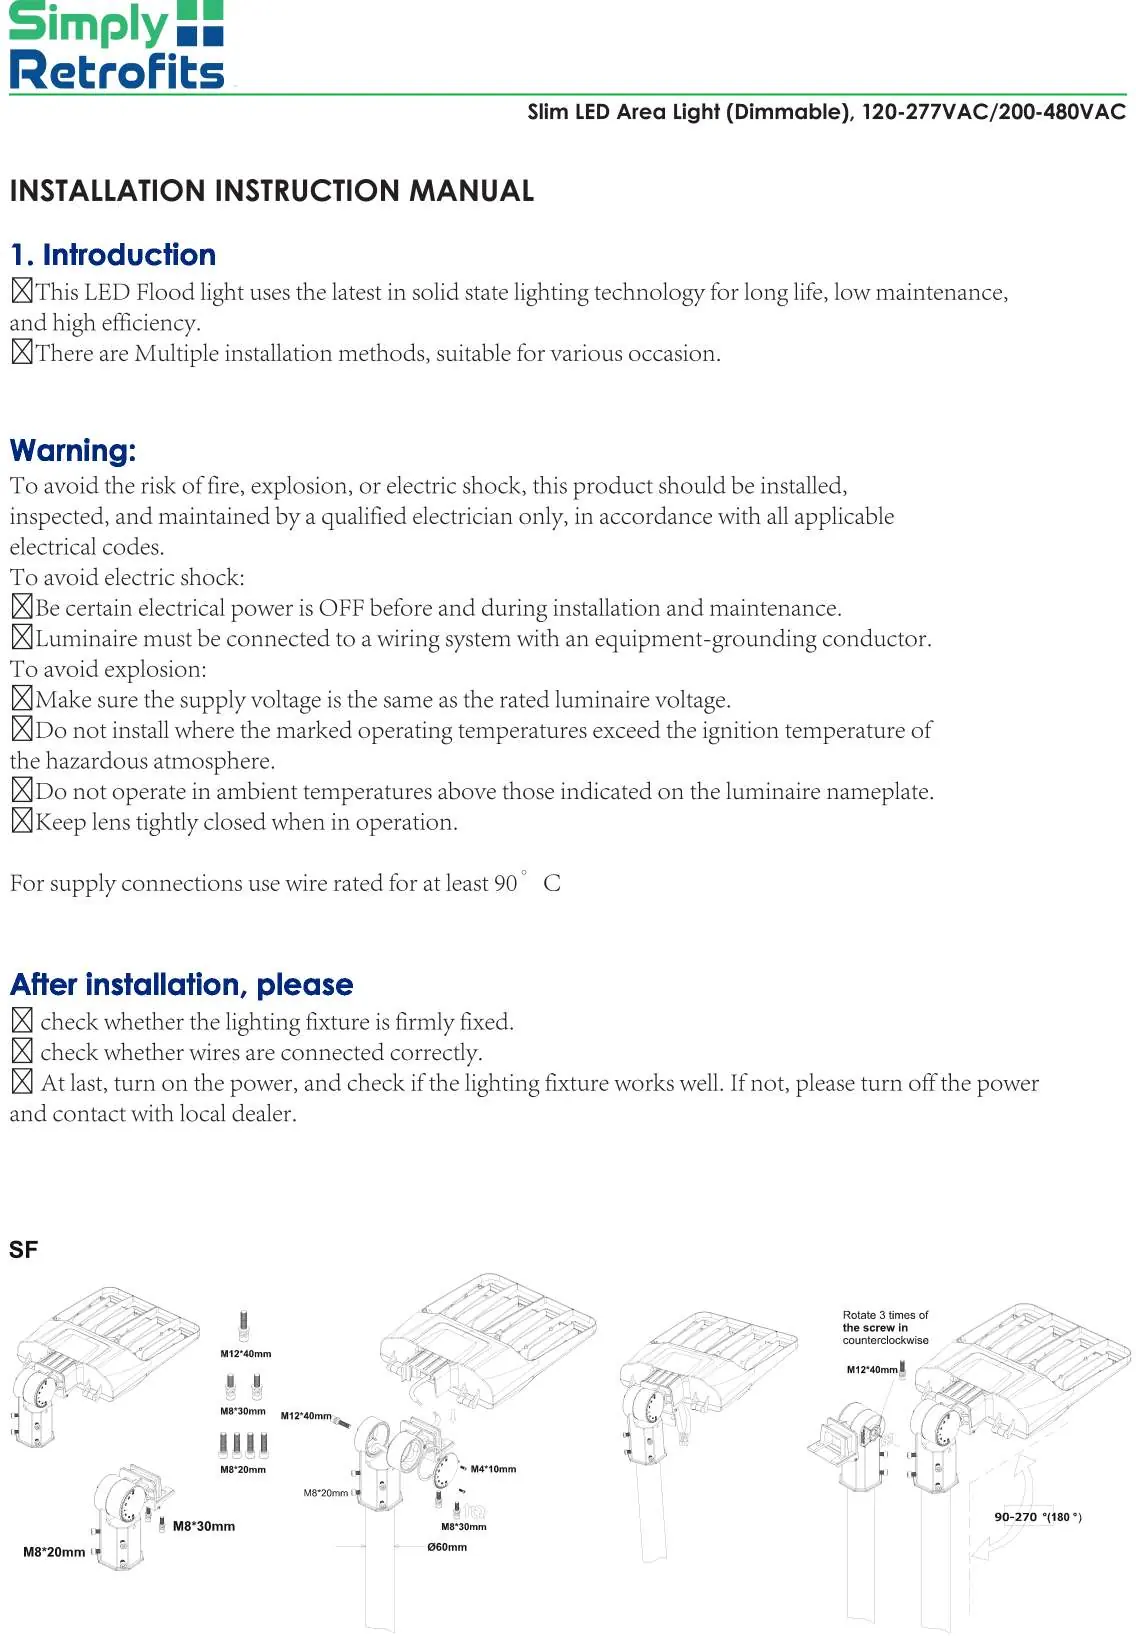

- SF Mounting: Involves securing the fixture using M12 and M8 bolts. Ensure the fixture is firmly fixed and wires are connected correctly.
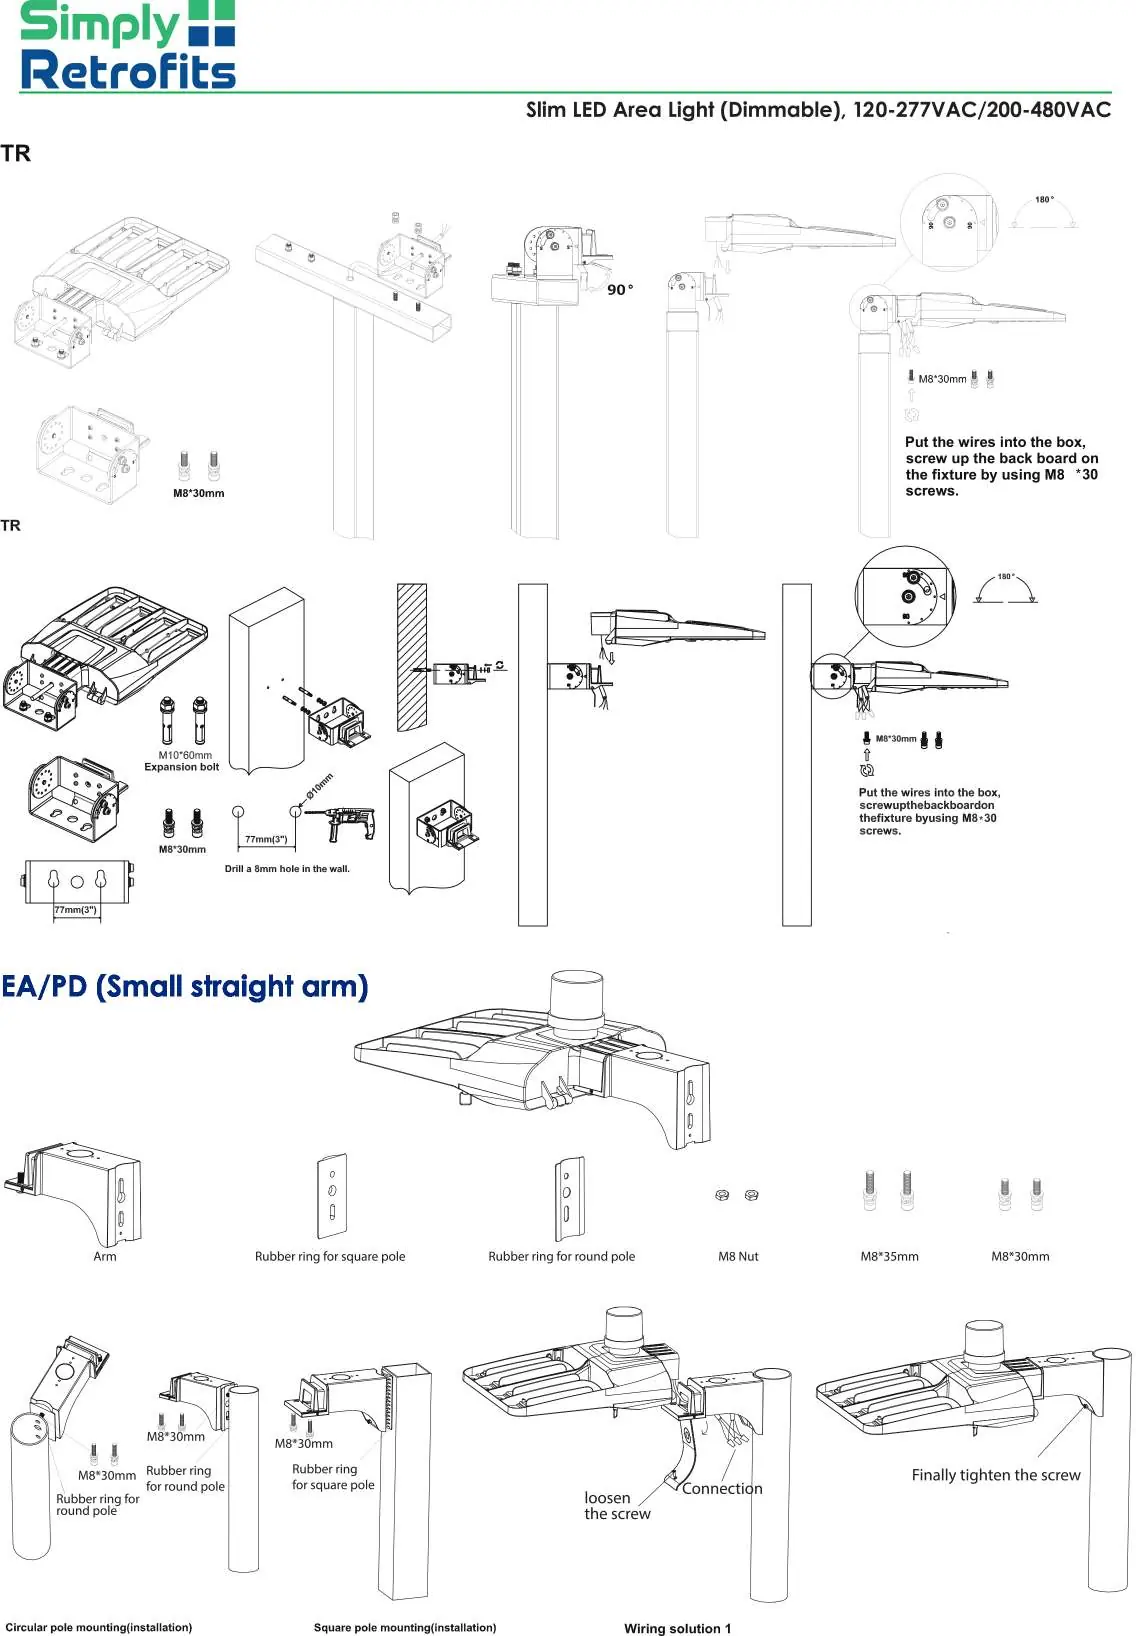
- TR Mounting: Requires drilling 8mm holes for expansion bolts (M10x60mm) to secure the bracket to the wall or pole.
- EA/PD (Small straight arm) Mounting: Utilizes specific rubber rings for round or square poles to ensure a secure fit.
After completing the physical installation, verify that the fixture is stable, all wiring connections are secure, and the unit functions correctly. If the light fails to operate, turn off the power immediately and contact your local dealer.
Manufacturer information
Simply Retrofits
Practical help
Common problems
Fixture does not turn on after installation
Turn off power immediately, check all wiring connections for errors, and contact your local dealer if the issue persists.
Fixture is loose or unstable
Verify that all mounting bolts (M12, M8, or M10 expansion bolts) are tightened securely according to the specific mounting method used.
Before use
- Ensure power supply is OFF.
- Verify supply voltage matches luminaire rating.
- Confirm availability of an equipment-grounding conductor.
- Check that ambient temperature is within specified limits.
- Ensure all required mounting hardware (bolts, rubber rings) is present.
Images and diagrams
- SF diagrams show bolt placement and rotation requirements for secure mounting.
- TR diagrams illustrate wall mounting using expansion bolts and wire routing into the junction box.
- EA/PD diagrams demonstrate the use of rubber rings for adapting the arm to round or square poles.
Model compatibility
- Suitable for various mounting occasions (pole or wall).
- Requires specific rubber rings for round vs. square pole installations.

Manual page author
Emily Carter
User documentation editor
Prepares concise manual descriptions and highlights the most useful setup, operation, and maintenance information for readers.