Automotive / Electrical Accessories
Installation Guide for SSV WORKS 230-FRT3-SWE12 Alpha12 Switcher Box Mounting Kit
Comprehensive installation guide for the SSV WORKS 230-FRT3-SWE12 Alpha12 Switcher Box Mounting Kit designed for the 2021+ Ford F150 Raptor (Gen 3). Includes parts list, required tools, and step-by-step instructions for console...
Quick answers from the manual
Quick answer
- This guide provides installation instructions for the SSV WORKS 230-FRT3-SWE12 Alpha12 Switcher Box Mounting Kit in a 2021+ Ford F150 Raptor. It covers console disassembly, controller mounting, and brain module installation. p. 1, 3, 4, 5
Key actions
- Remove overhead console and drill a 5/8" hole in the sunglass holder cavity. p. 3
- Mount the brain module in the engine bay above the fusebox. p. 5
First start
- The 15-button controller MUST be plugged in to the module before connecting the power and ground cables to the battery. p. 5
Show 2 more answers Show less
Technical specifications
| Parameter | Value | Meaning | Pages |
|---|---|---|---|
| Drill Bit Size | 5/8" | Required for drilling the hole in the sunglass holder cavity. | p. 3 |
Where to find it in the PDF
- Parts Contents p. 2
- Installation - Panels and Dash Disassembly p. 3
- Installation - Controller Mounting p. 4
- Installation - Brain Module p. 5
Table of contents
Manual images
Click an image to enlargeQuick guide from the manual
This document provides installation instructions for the SSV WORKS 230-FRT3-SWE12 Alpha12 Switcher Box Mounting Kit, specifically for the 2021-Up Ford F150 Raptor (Gen 3). The installation involves disassembling the overhead console, mounting the controller, and installing the brain module in the engine bay.
Parts Contents
- Ford F150 Overhead Fascia [B-D3184]
- Ford F150 ALPHA12 Brain Mount Bracket [B-MB3192]
- Ford F150 ALPHA12 Fender Bracket [B-MB3191]
- M5x10 Pan Head Screws (x4) [B-S1158]
- M6-1x12mm Hex Head Screws (x2) [B-S2870]
- #7-19x.75” Phillips Screws (x2) [B-S1656]
- 4-40x.375 Thread Cutting Screws (x4) [B-S3262]
- M4x9 Flat Washers (x2) [B-W1225]
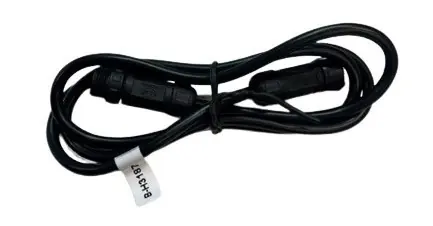
- SW-E12, 4-Pin Extension Cable, 6 ft. [B-H3197]
Tools Needed
- Phillips Screw Driver
- Pry Tool
- Drill
- 5/8” Drill Bit
- T10 Torx Driver
- 8, 10, 12 & 13mm Wrench
Panels and Dash Disassembly
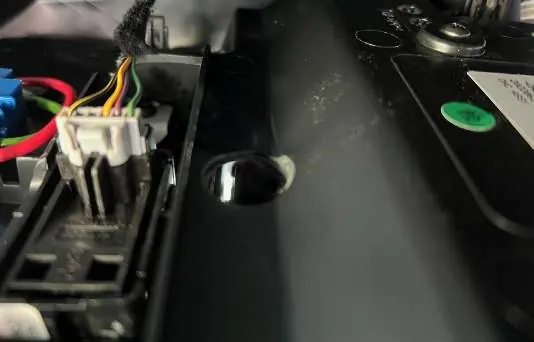

- Use a plastic pry tool to carefully remove the overhead console, working all around the console.
- Note the 4 clips securing the console to the headliner.
- Pull down the console and unplug the connectors.
- Remove the sunglass holder.
- Drill a 5/8” hole towards the front of the sunglass holder cavity (front is the windshield side).
Controller Mounting
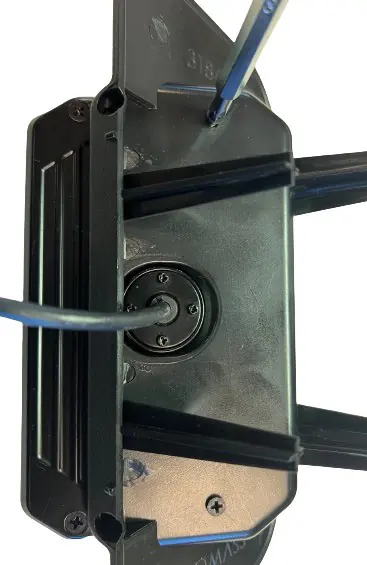
- Mount the ALPHA12 controller to the F150 Raptor fascia using the 4-40x.75” thread cutting screws (x4).
- The fascia mounts behind the overhead console and is secured to the 2 posts.
- Route the controller cable through the drilled hole and run it towards the passenger side A-pillar.
- Secure the F150 Raptor Fascia to the sunglass holder cavity using the #7-19x.75 Phillips screws and M4 flat washers (x2 each).
- Plug the connectors and re-install the overhead console.
Brain Module Installation
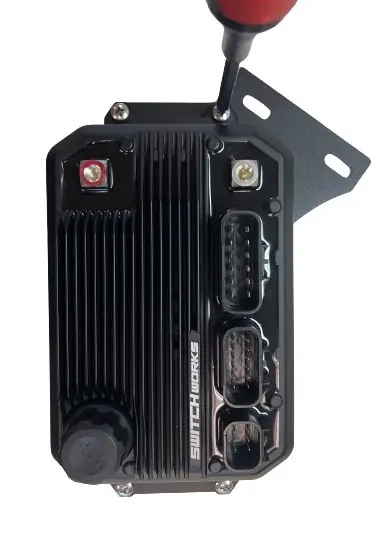
- Mount the brain module in the engine bay above the fusebox.
- Mount the brain module to the B-MB3192 bracket using the supplied M5x10mm screws (x4).
- Mount the fender bracket (B-MB3191) to the fender wall (above the fusebox) using factory bolts.
- Attach the module bracket to the fender bracket using the supplied M6-1x12mm hex head bolts (B-S2870).
- Connect accessories to the High and Low current harnesses and plug them into the brain module.
- Important: The 15-button controller must be plugged into the module before connecting power and ground cables to the battery.
- Snap on the terminal cover to the module’s + terminal.
Practical help
Common problems
Controller not functioning after installation
Ensure the 15-button controller is plugged into the module before connecting power and ground cables to the battery.
Before use
- Verify all parts listed in the Parts Contents are present.
- Ensure you have all required tools: Phillips screwdriver, pry tool, drill, 5/8" drill bit, T10 Torx driver, and 8/10/12/13mm wrenches.
- Read all safety instructions before beginning installation.
- Confirm vehicle compatibility (2021-Up Ford F150 Raptor Gen 3).
Show more Show less
Specs in practice
- Drill hole size
- 5/8" hole required in the sunglass holder cavity.
- Extension cable
- SW-E12, 4-Pin, 6 ft. length included.
Images and diagrams
- Overhead console removal using a pry tool.
- Drilling location for the 5/8" hole in the sunglass holder.
- Brain module mounting location in the engine bay above the fusebox.
Model compatibility
- Designed specifically for 2021-Up Ford F150 Raptor (Gen 3).

Manual page author
David Miller
Documentation analyst