Garden / Gazebos & Canopies
User Manual for Sunjoy 20x12 Hardtop Gazebo A1020436A100
Comprehensive assembly and maintenance guide for the Sunjoy 20x12 Hardtop Gazebo (A1020436A100). Includes step-by-step installation instructions, parts list, safety warnings, and care tips.
Quick answers from the manual
Quick answer
- This manual provides assembly instructions for the Sunjoy 20x12 Hardtop Gazebo (A1020436A100). It requires 4 adults for assembly and includes a full parts list, hardware breakdown, and maintenance guidelines. p. 1, 3, 26
Key actions
- Assemble with at least 4 adults p. 2, 3
- Clear snow when thicker than 2 inches p. 2
First start
- Prepare a level surface, clear the area, and verify all parts against the list before starting. p. 2, 3
Show 3 more answers Show less
Problems and fixes
Surface rust
Use rust-inhibiting paint or remove with cooking oil/WD-40.
p. 26Maintenance and reset
- Periodically check and ensure all bolts are tightened. p. 2, 26
Where to find it in the PDF
- Warnings p. 2
- Parts List p. 6, 7, 8, 9
- Assembly Steps p. 10, 25
- Maintenance & Warranty p. 26
Table of contents
Manual images
Click an image to enlargeQuick guide from the manual
This manual provides instructions for the assembly and maintenance of the Sunjoy 20x12 Hardtop Gazebo. The structure is intended for decorative and sunshade purposes only and is not designed to withstand harsh weather conditions such as high winds, heavy rain, or snow. Assembly requires at least 4 adults and should be performed on level ground. Do not assemble on sandy, muddy, or loose soil.
Assembly preparation and tools
Before beginning, ensure all parts are present by comparing them with the packaging contents list. Keep all parts in a cleared area on the floor. Do not dispose of packing materials until assembly is complete. The following tools are required for assembly (not included):
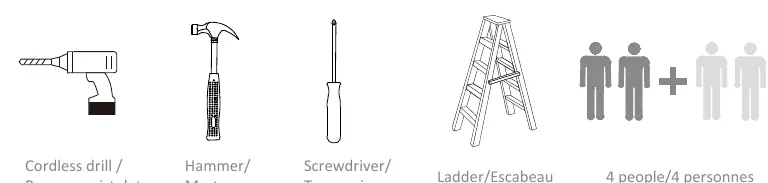
- Cordless drill
- Hammer
- Screwdriver
- Ladder
Important assembly tips:
- When assembling wooden parts, do not over-torque bolts to avoid splitting the wood.
- Use a level to ensure the assembly is properly leveled before proceeding.
- Check that the assembly is square before tightening bolts.
- Periodically check and ensure all nuts and bolts are tightened during use.
Assembly steps
The assembly process consists of 31 steps, detailed in the manual with corresponding hardware and parts. Key phases include:
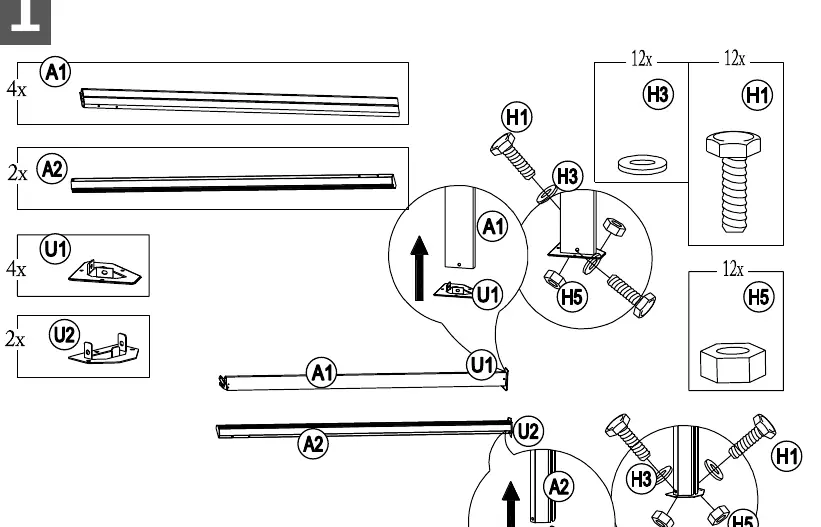
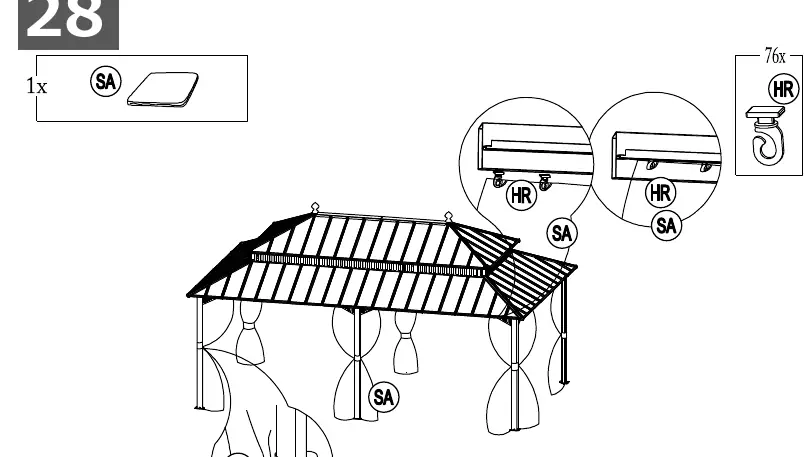
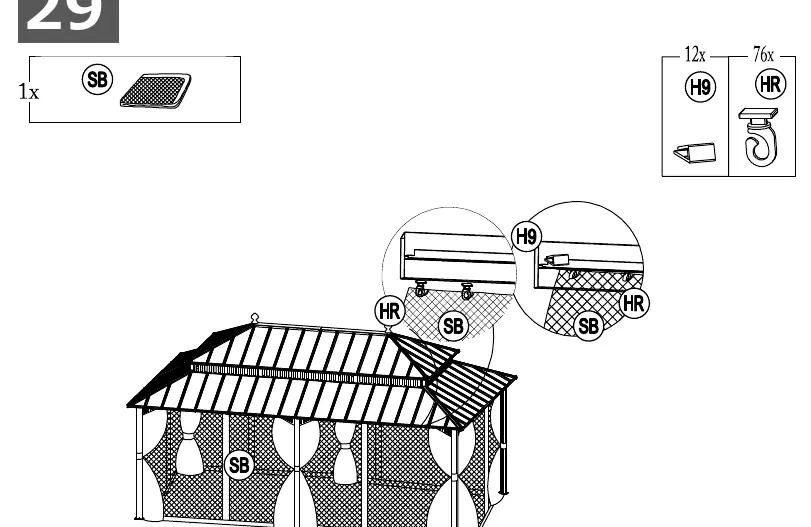
- Base and Frame: Initial assembly of posts and cross beams (Steps 1-7).
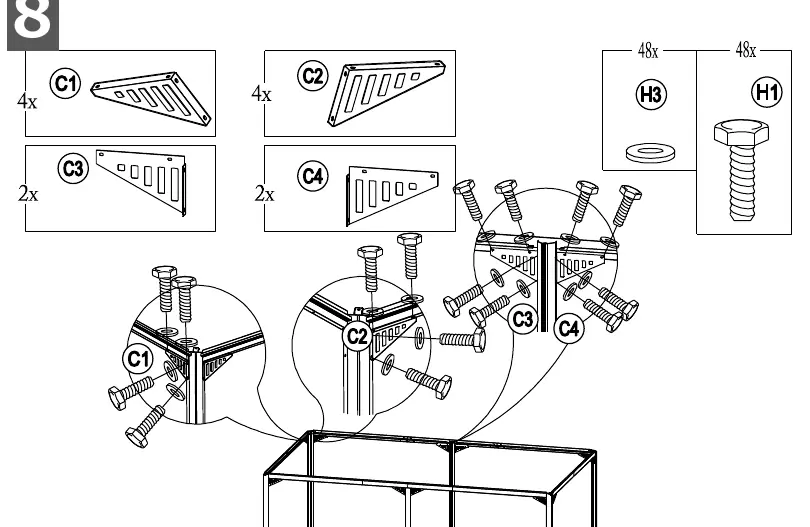
- Support Brackets: Installation of triangle support brackets (Step 8).
- Roof Structure: Assembly of roof rafters, frames, and panels (Steps 9-22).
- Roof Panels: Installation of roof panels (Steps 23-26).
- Finishing: Installation of curtains, mosquito netting, and final securing (Steps 27-31).
Maintenance and care
To maintain the gazebo and prevent rust:
- Steel components are treated with rust-inhibiting paint. If scratches occur, touch them up immediately with rust-inhibiting paint (not included).
- Surface rust can be removed with a light application of cooking oil or WD-40.
- Do not use bleach, acid, or abrasive cleaners on the roof or frame parts.
- Clear snow from the roof when it is thicker than 2 inches using a plastic snow rake to avoid damage.
Warranty information
Sunjoy Group provides a 1-year limited manufacturer's warranty for the original purchaser, covering defects in workmanship and materials, provided the item was factory-sealed and maintained with care. The warranty does not cover commercial use, acts of nature, vandalism, misuse, or improper assembly. Proof of purchase is required for claims.
Practical help
Common problems
Surface rust on steel components
Touch up scratches immediately with rust-inhibiting paint or remove surface rust with a light application of cooking oil or WD-40.
Missing parts
Contact customer support at [email protected].
Unstable structure
Ensure the gazebo is installed on level ground and all bolts are periodically checked and tightened.
Before use
- Check state and local regulations for required permits.
- Ensure at least 4 adults are available for assembly.
- Verify all parts against the packaging contents list.
- Prepare a cleared, level area for assembly.
- Gather required tools: cordless drill, hammer, screwdriver, and ladder.
Show more Show less
Specs in practice
- Assembly team
- At least 4 adults are recommended for safe assembly.
Images and diagrams
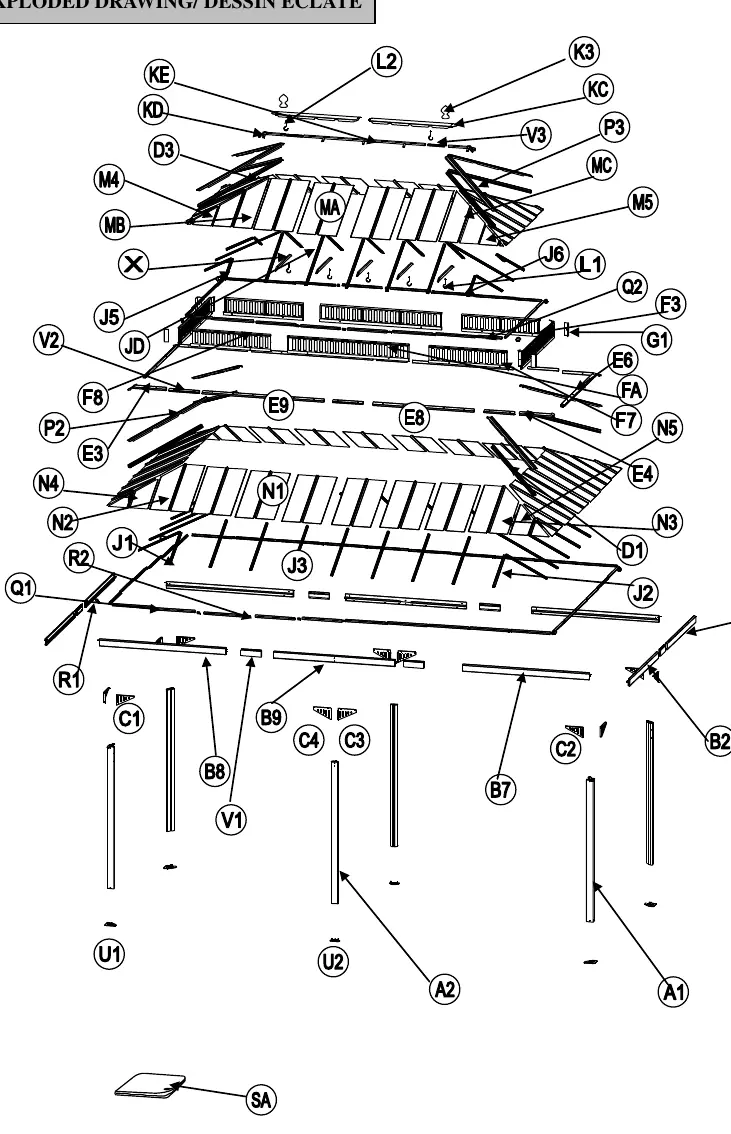
- Exploded drawing on page 5 provides an overview of all components.
- Steps 1-31 illustrate the sequential assembly process with specific hardware requirements.
Model compatibility
- Not designed for harsh weather, including high winds, rain, and snow.
- Do not assemble on sandy, muddy, or loose soil as stakes will not provide sufficient anchorage.

Manual page author
Michael Turner
Technical manual editor