Garden / Gazebos & Canopies
Sunjoy 12x12 Hardtop Gazebo User Manual
Quick guide for the Sunjoy 12x12 Hardtop Gazebo (Item #A10204384000). Includes assembly instructions, parts list, safety warnings, and maintenance tips.
Table of contents
Manual images
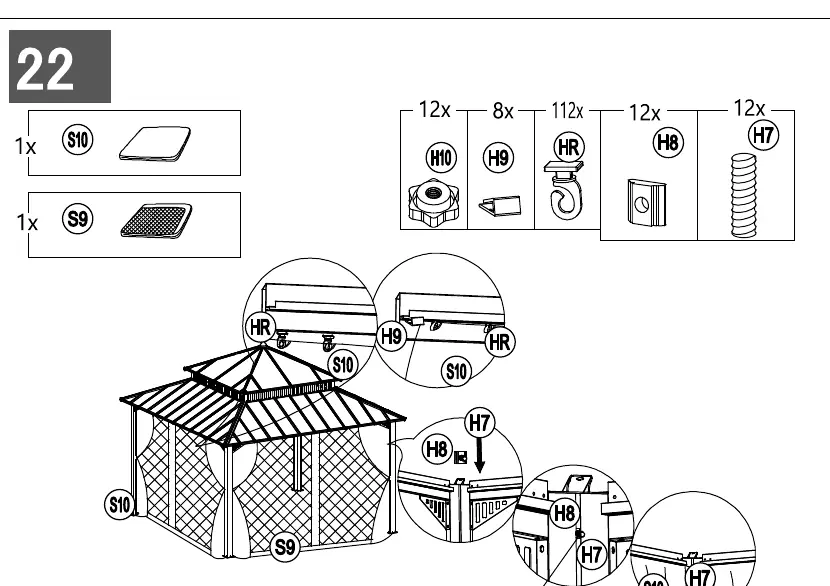
Click an image to enlargeQuick guide from the manual
This gazebo is intended for decorative and sunshade purposes only. It is not designed to withstand harsh weather, including high winds, heavy rain, or snow. Assembly requires at least 4 adults. Ensure the gazebo is installed on level ground. Do not assemble on sandy, muddy, or loose soil as stakes will not provide sufficient anchorage.

Tools required for assembly
- Cordless drill
- Hammer
- Screwdriver
- Ladder
Assembly preparation
Before beginning, read the manual thoroughly. Verify all parts are present by comparing them with the packaging contents list. Place all parts in a cleared area on the floor. Do not dispose of packing materials until assembly is complete. When assembling wooden parts, do not overtorque bolts to avoid splitting the wood.
Assembly steps
The assembly process involves 23 steps, detailed in the manual. Key phases include:
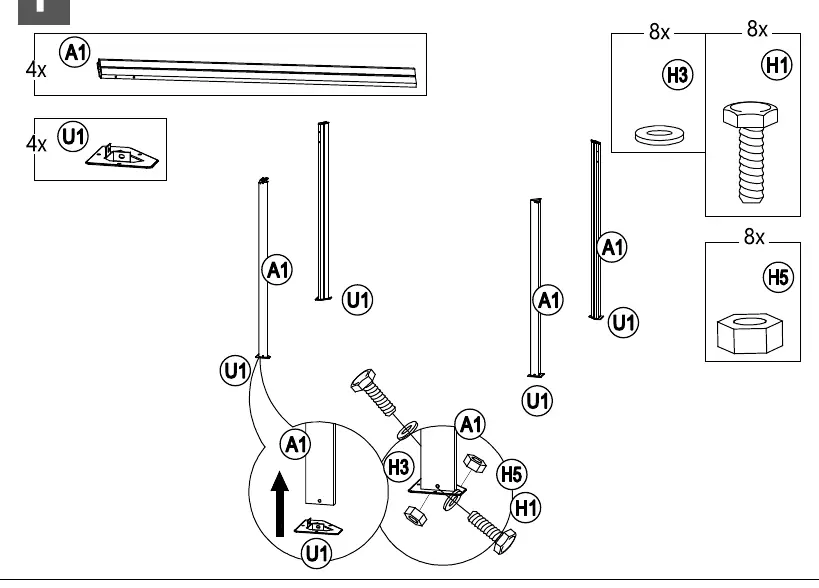
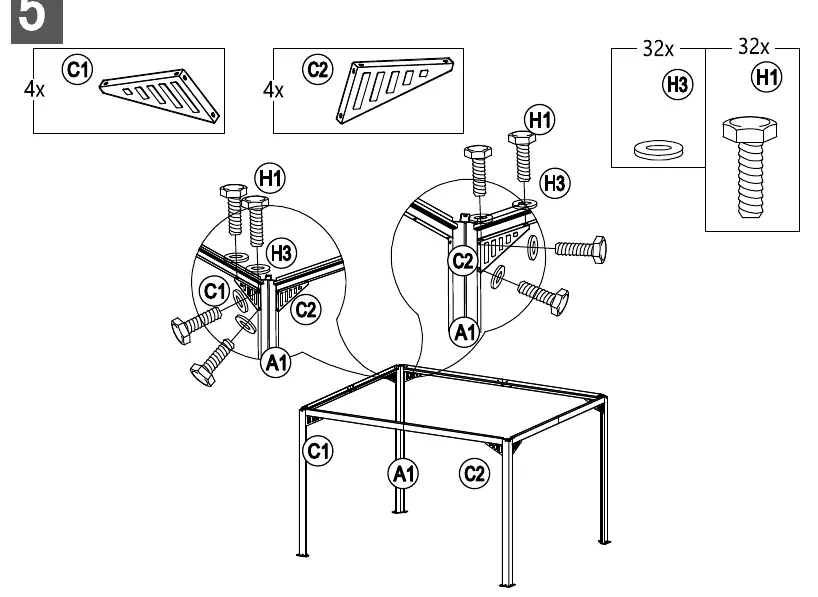
- Frame Assembly: Constructing the base posts and cross beams.
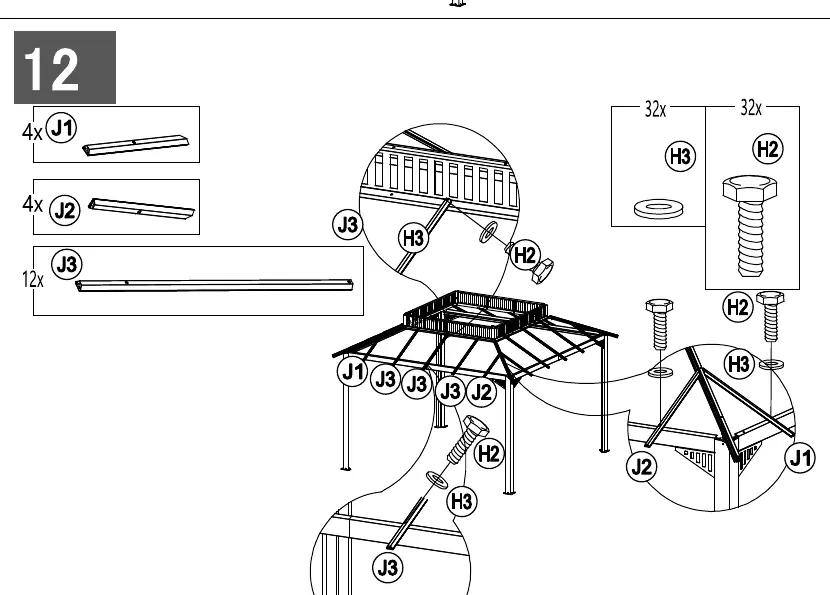
- Roof Structure: Installing rafters, frames, and connectors.
- Roof Panels: Attaching the PC roof panels and caps.
- Finishing: Installing curtains, mosquito netting, and anchoring the structure to the ground using the provided stakes.
Always check that the assembly is level and square before tightening bolts. Use the provided hardware pack, which includes various bolts (M6*20, M6*35), nuts, and washers.
Maintenance and care
- Rust prevention: Steel components are treated with rust-inhibiting paint. If scratches occur, touch them up immediately with rust-inhibiting paint. Surface rust can be removed with cooking oil or WD-40.
- Snow removal: Remove snow from the roof when it is thicker than 2 inches using a plastic snow rake to avoid damage.
- Cleaning: Do not use bleach, acid, or abrasive cleaners on the roof or frame.
- Periodic checks: Regularly check and tighten all nuts and bolts during use.
Practical help
Common problems
Surface rust on steel components
Remove with a light application of cooking oil or WD-40. Touch up scratches immediately with rust-inhibiting paint.
Missing parts
Contact customer support at [email protected].
Snow accumulation
Remove snow from the roof when it exceeds 2 inches using a plastic snow rake.
Before use
- Ensure at least 4 adults are available for assembly.
- Verify all parts are present against the packaging contents list.
- Choose a level ground location.
- Have a cordless drill, hammer, screwdriver, and ladder ready.
- Check state and local regulations for installation permits.
Images and diagrams
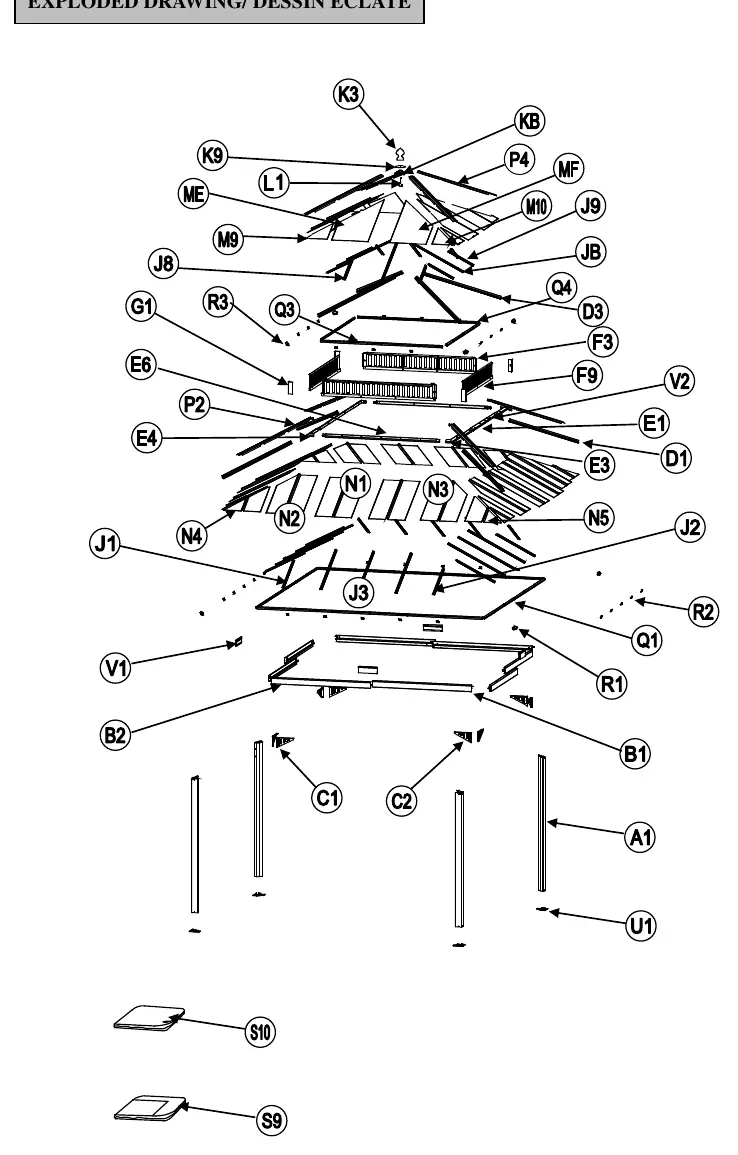
- Exploded Drawing: Illustrates the overall assembly order of roof panels, beams, and posts.
- Hardware Pack: Identifies specific bolts (H1, H2), nuts (H5), and washers (H3) required for each step.
Model compatibility
- Not designed for high winds, heavy rain, or heavy snow.
- Do not assemble on sandy, muddy, or loose soil.

Manual page author
Emily Carter
User documentation editor
Prepares concise manual descriptions and highlights the most useful setup, operation, and maintenance information for readers.