Electronics / Televisions
User Manual for TCL 115QM891G Google TV
Quick guide for the TCL 115QM891G Google TV. Includes setup instructions, stand and wall mount installation, remote control usage, port connections, and troubleshooting tips.
Table of contents
Manual images
Click an image to enlargeQuick Start Guide
This guide provides essential information for setting up your TCL 115QM891G Google TV. Before beginning, ensure you have a Phillips head screwdriver and an internet connection for streaming features. For support, visit support.tcl.com/us or call 1-877-300-9509.
TV Stand Installation
We recommend having three people to safely install the stands. The TV can be installed in a high or low position.
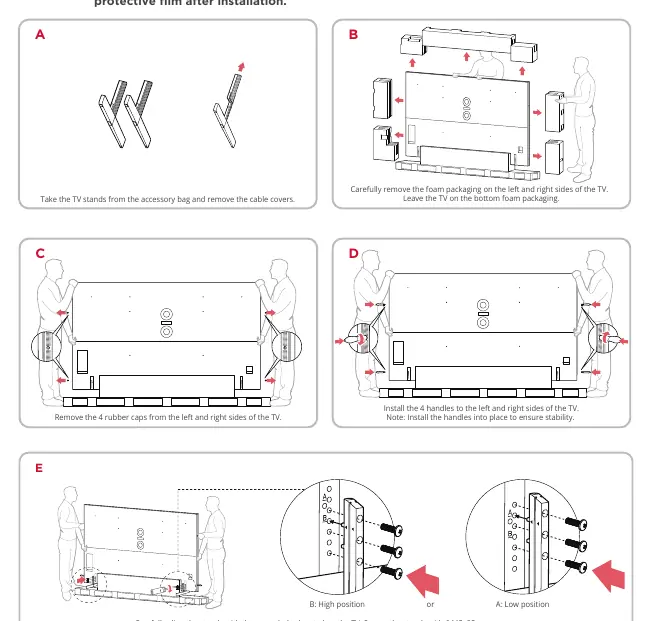
- Take the TV stands from the accessory bag and remove the cable covers.
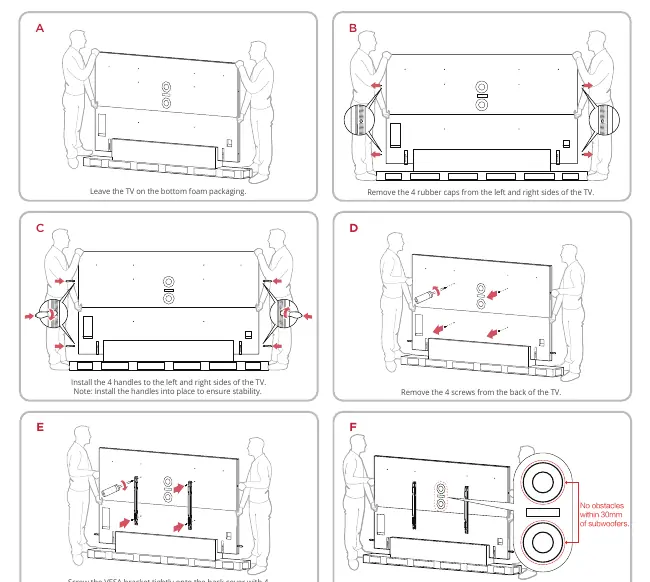
- Remove the foam packaging on the left and right sides of the TV, leaving the TV on the bottom foam packaging.
- Remove the 4 rubber caps from the sides of the TV.
- Install the 4 handles to the sides of the TV to ensure stability.
- Align the stands with the screw holes and secure them with the 6 included M5x25mm screws.
- Route the cables and install the cable covers before lifting the TV to its desired location.
Wall Mount Installation
Do not install the table stands if the TV is wall-mounted. This product should only be mounted by a professional installer.
- Purchase a compatible VESA 1000x600 wall mount (requires 4 M8x16mm screws).
- Ensure the wall mount can bear at least five times the TV's net weight.
- Remove the 4 rubber caps and 4 screws from the back of the TV.
- Screw the VESA bracket tightly onto the back cover.
- Follow the instructions provided with your wall mount to hang the TV.
Remote Control
The remote is intuitive for navigating menus and watching TV.

- Power: Turn TV on and off.
- Google Assistant Button: Press to activate the microphone for voice search.
- Settings: Display the dashboard menu.
- Backlight: The backlight turns on automatically when the remote is picked up. To turn it off, press and hold the SETTINGS and BACK buttons simultaneously for 3 seconds.
Connections and Ports
The TV features various ports for external devices:
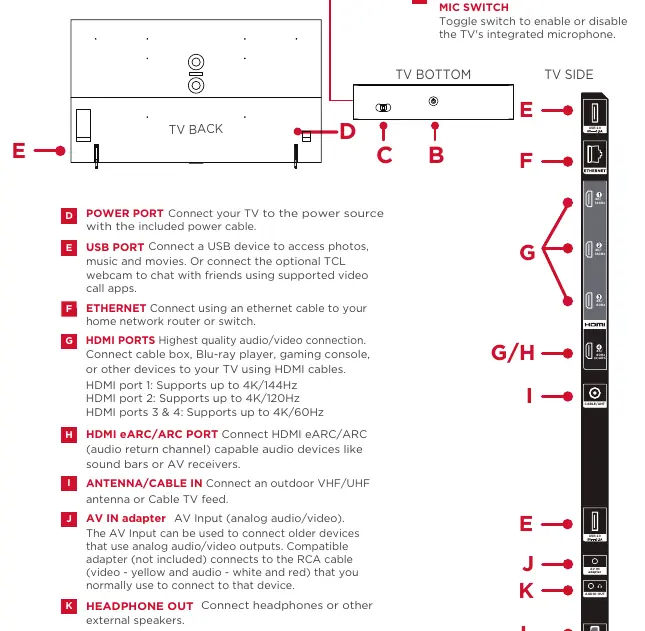
- HDMI Ports: HDMI 1 supports up to 4K/144Hz; HDMI 2 supports up to 4K/120Hz; HDMI 3 & 4 support up to 4K/60Hz.
- USB Port: Connect USB devices for media or optional TCL webcam.
- Ethernet: Connect to your home network router.
- Antenna/Cable In: Connect an outdoor VHF/UHF antenna or cable feed.
- AV In: Use an adapter for older analog devices.
- Optical Out: Connect to an external digital audio system.
Troubleshooting
- Cannot connect to WiFi: Verify the password (case sensitive), relocate the router away from interference, or reboot the router.
- Cable box/antenna issues: Use HDMI if possible. Ensure connections are secure and perform a full channel scan in the menu.
- Forgot parental control password: Use 0423 to reset.
- Voice control: Ensure the hands-free mic switch (on the TV) is turned on and the TV is connected to the internet.
Important Safety Information
To ensure safety and product longevity:
- Maintain at least 1 inch of ventilation space on the top and sides, and 2 inches at the rear.
- Do not place the TV on soft surfaces like carpeting, which may block ventilation slots.
- Unplug the TV during lightning storms or when unused for long periods.
- The power button puts the TV into low-power standby; to completely shut off power, disconnect the power cord from the outlet.
Official resources from the manual
Manufacturer information
TCL
Practical help
Common problems
Cannot connect to wireless network (WiFi)
Verify the password is correct (case sensitive), move the router away from interference sources (cordless phones, baby monitors), or reboot the router by disconnecting power for 2 minutes.
Problems connecting cable box or antenna
Use an HDMI connection if possible. Otherwise, ensure coax connections are tight and perform a full channel scan in the TV menu.
Forgot parental control password
Use the master reset code 0423.
Hands-free voice control not working
Ensure the physical mic switch on the TV is set to 'on' and the TV is connected to the internet.
Before use
- Remove the energy guide label from the screen.
- Ensure three people are available for stand installation.
- Check that the TV stand or wall mount is of adequate strength.
- Install the included batteries in the remote control.
- Ensure proper ventilation (1 inch top/sides, 2 inches rear).
Specs in practice
- VESA 1000x600
- Mounting hole pattern: 1000mm horizontal by 600mm vertical.
Images and diagrams
- Stand installation: Shows high vs low position and screw locations.
- Wall mount: Shows VESA bracket attachment and screw removal.
- Remote control: Identifies buttons for power, settings, and Google Assistant.
- Ports: Identifies location of HDMI, USB, Ethernet, and Antenna inputs.
Model compatibility
- 144Hz refresh rate is only supported when VRR (Variable Refresh Rate) is enabled.
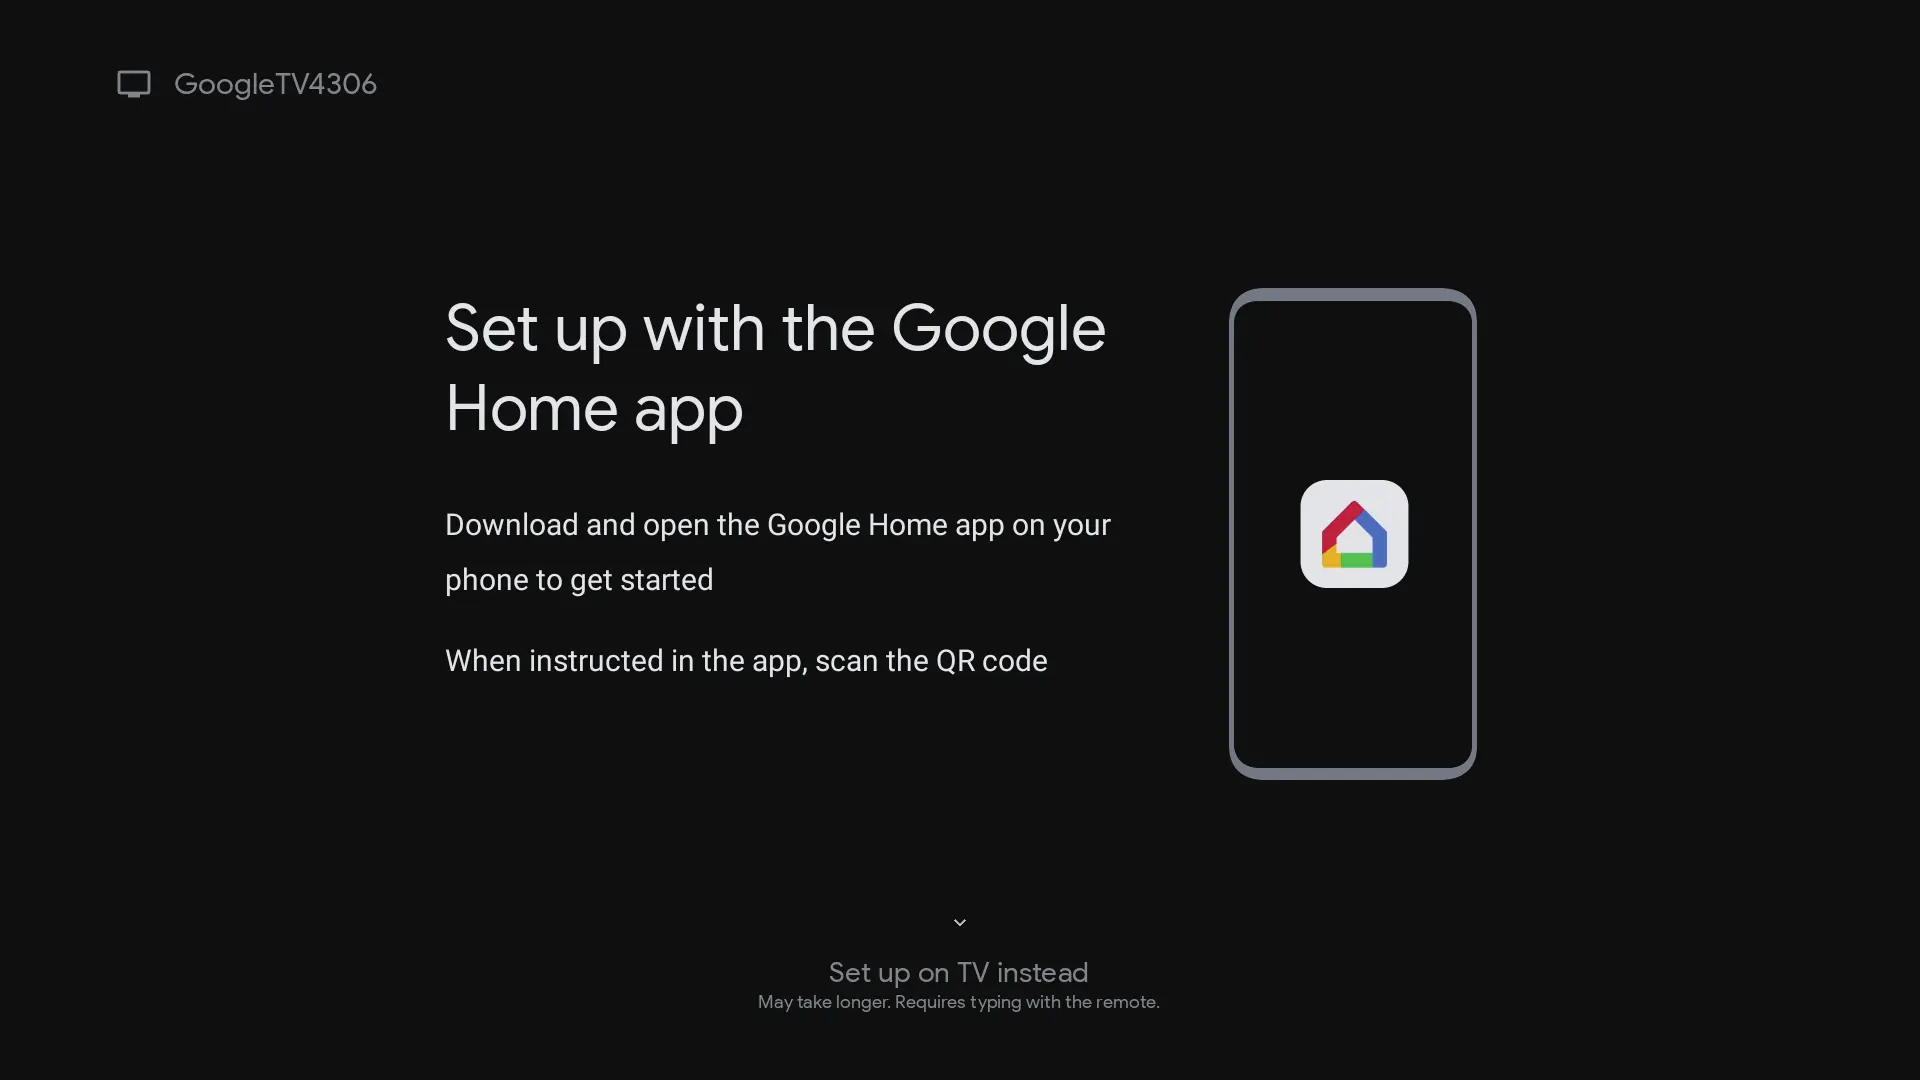
- Requires Google Account and internet connection for smart features.
- TV is designed for table use on a firm, flat surface.

Manual page author
Emily Carter
User documentation editor
Prepares concise manual descriptions and highlights the most useful setup, operation, and maintenance information for readers.