Garden / Gazebos & Canopies
User Manual for 11FT x 13FT Gazebo
Quick guide for the 11FT x 13FT Gazebo. Includes assembly instructions, safety warnings, parts list, and maintenance tips for proper installation.
Table of contents
Manual images
Click an image to enlargeImportant Information for Assembly
This gazebo requires 5 adults or more for safe installation. Before beginning, ensure you have a level surface and at least 6 feet of clearance from any obstructions such as fences, garages, houses, overhanging branches, laundry lines, or electrical wires. Do not fully tighten screws until the entire assembly is complete to ensure proper alignment.
Safety Warnings
- Retain these instructions for future reference.
- Some parts may have sharp edges; handle with care.
- Periodically check and tighten all bolts to ensure the structure remains stable.
- Keep small parts away from children and pets to prevent choking hazards.
Tools and Equipment Required
The following tools are not included but are necessary for assembly:
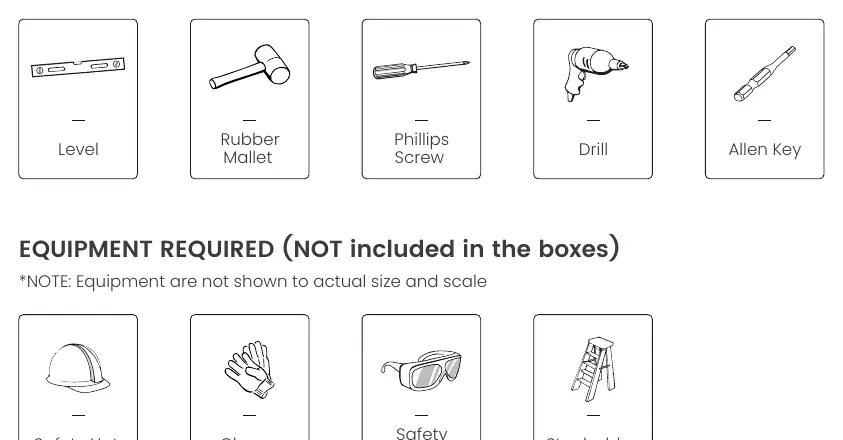
- Level
- Rubber Mallet
- Phillips Screwdriver
- Drill
- Allen Key
- Safety Gear: Safety Hat, Gloves, Safety Goggles, Stepladder
Assembly Overview
The assembly process is divided into 18 steps. Key phases include:
- Frame Construction: Assembling the posts and main support beams.
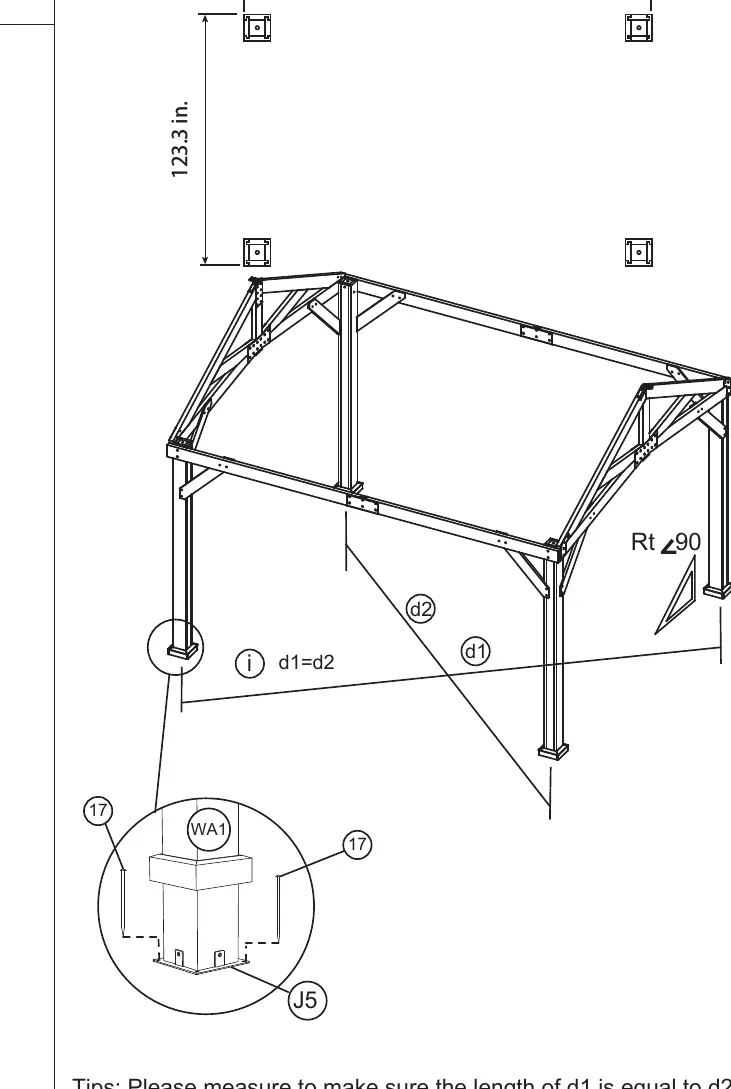
- Squaring the Frame: A critical step (Step 6) where you must measure diagonals (d1 and d2) to ensure the frame is square. If they are not equal, loosen the screws on the beams and adjust until the frame is square and the posts are at right angles to the ground.
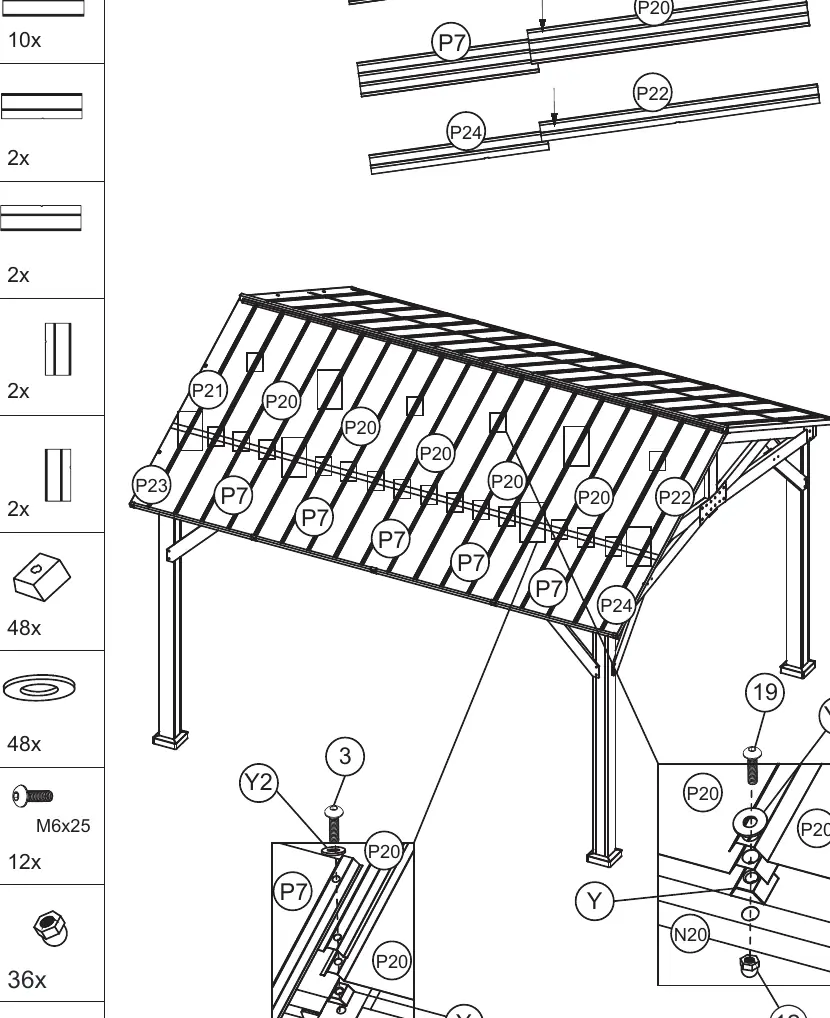
- Roof Structure: Installing the roof support beams and panels.
- Finalization: Securing all panels and hardware.
Maintenance and Warranty
The product includes a one-year warranty covering defects in material and workmanship for frames, bolts, and nuts. Damage caused by negligence or exposure to chemicals is not covered. Ensure the gazebo is kept on level ground and maintained regularly by checking bolt tightness.
If you have questions or concerns, please contact the manufacturer via email at [email protected] or by text at +1 323-400-0363.
Manufacturer information
The Home Depot
Practical help
Common problems
Frame is not square
Loosen the screws on the beams (WH1-WH4), adjust the frame until diagonals d1 and d2 are equal, and ensure posts are at right angles to the ground.
Difficulty aligning beams during assembly
Ensure screws are not fully tightened until the entire assembly is complete.
Missing parts or damage
Contact the manufacturer via email or text with clear photos of the damage or the specific part number needed.
Before use
- Verify all parts and hardware against the inventory list.
- Ensure 5 or more adults are available for assembly.
- Select a level ground location.
- Ensure 6 feet of clearance from all obstructions.
- Gather all required tools (drill, level, mallet, etc.).
Specs in practice
- Assembly Team
- 5 adults or more are recommended for safe installation.
Images and diagrams
- Step 6 is critical for structural integrity: measure diagonals d1 and d2 to ensure the frame is square.
- Steps 1-18 provide a sequential guide for connecting posts, beams, and roof panels.
- Step 9 notes: Only screw in Q9; leave Q8 unscrewed until later steps to allow for beam alignment.
Model compatibility
- Warranty is valid for 1 year from the date of purchase.
- Warranty is non-transferable and requires the original order number.

Manual page author
David Miller
Documentation analyst
Organizes user manual content into clear summaries, with attention to model details, product context, and everyday usability.