Garden / Gazebos & Canopies
Assembly Instructions for The Home Depot 10x12ft Metal Garden Shed
Comprehensive assembly guide for the 10x12ft metal garden shed. Includes a detailed parts list, hardware requirements, and step-by-step installation procedures for the base, walls, roof, and doors.
Table of contents
Manual images
Click an image to enlargeImportant Assembly Information
This manual provides detailed instructions for assembling the 10x12ft metal garden shed. Before beginning, ensure you have a flat, level surface for the installation. It is highly recommended to wear the provided gloves (F9) during assembly to protect against sharp metal edges. Verify all parts against the inventory list before starting.
Parts Inventory
The shed consists of numerous metal panels, frame components, and hardware. Key components include:
- Frame Parts: 1L, 1R, 2LF, 2LB, 2RF, 2RB, 3L, 3R, 4B, 4, 5, 6L, 6R, 7F, 7B, 7A, 8A, 8L, 8R, 9, 9F, 9B, 10, 11, 11L, 11R, 12.
- Wall and Roof Panels: W3, W5, W7, W12, W15, C2, M1, M2, 19, 19L, 19R, 20, 21L, 21R, 22, 23, 24, 25, 26, 27, 38.
- Hardware: S4 (self-tapping screws), S6, S7, S8, S9, S34, S35, F1-F18.
Assembly Steps
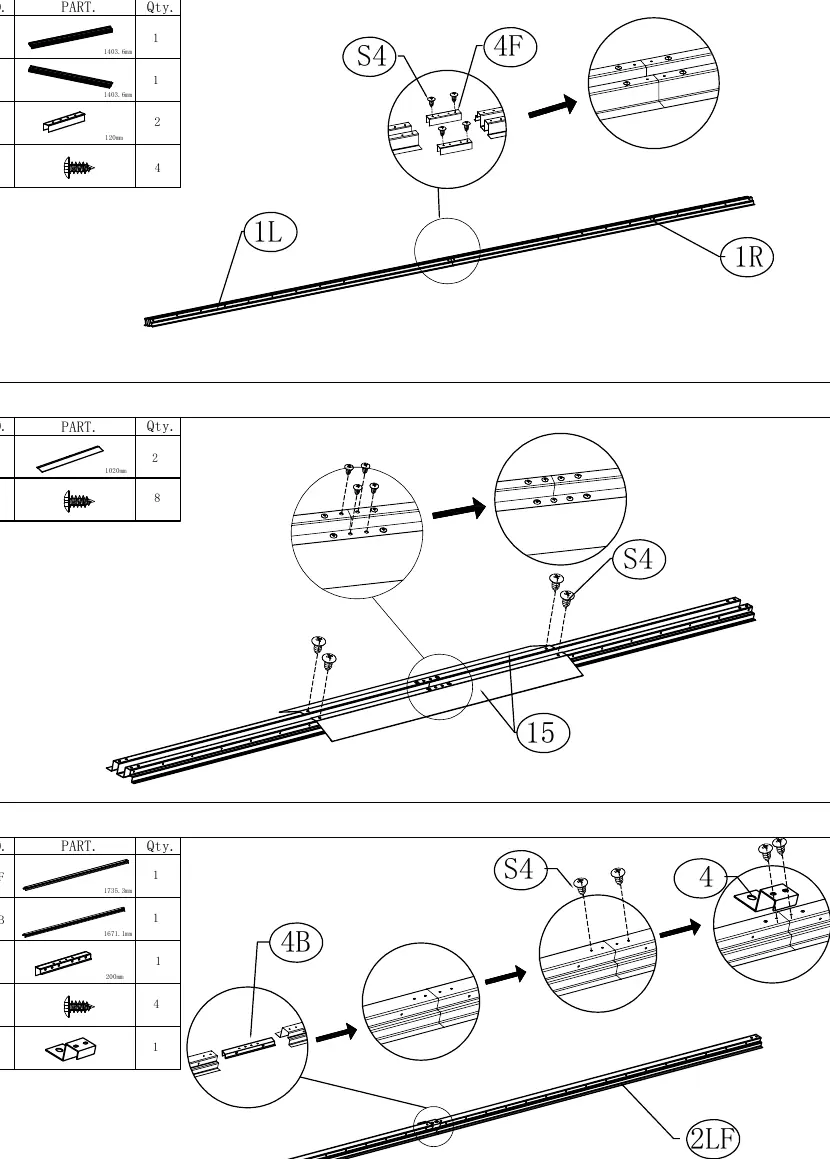
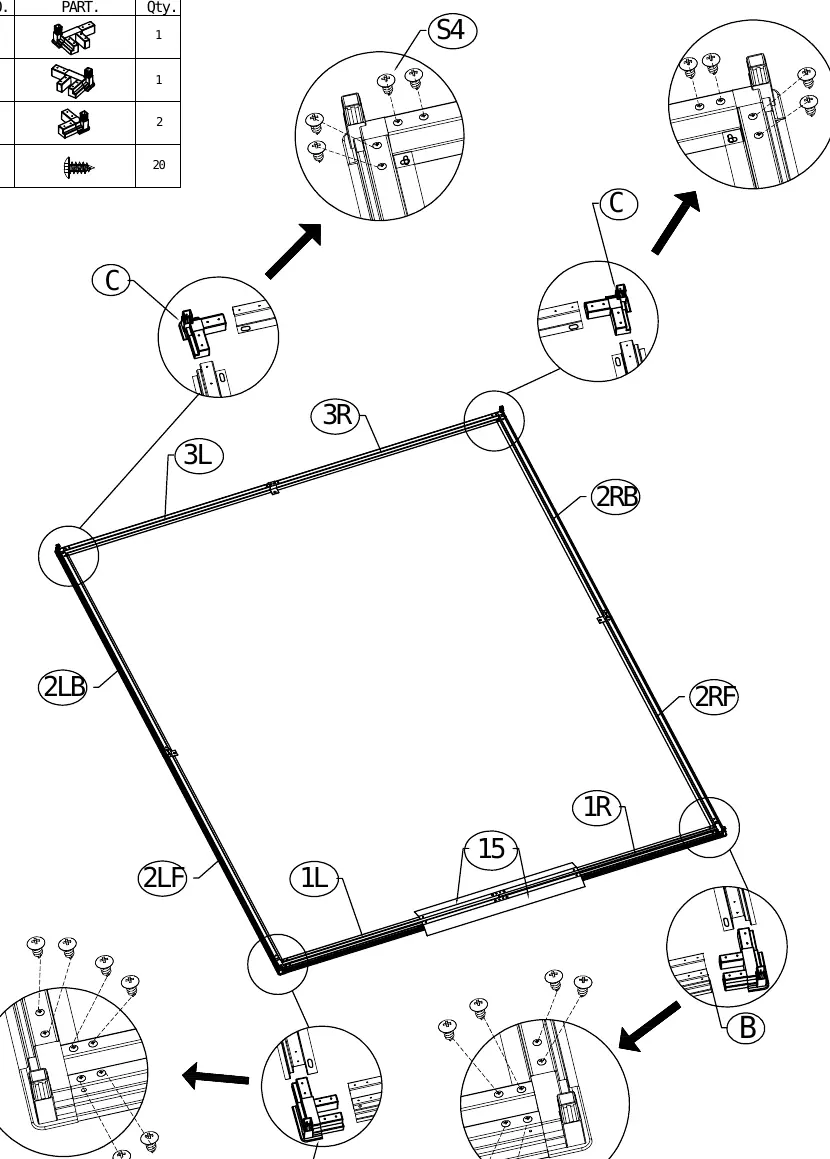
1. Base Frame Assembly
Begin by assembling the base frame using parts 1L, 1R, 2LF, 2LB, 2RF, 2RB, 3L, 3R, 4B, and 4. Secure the corners using the provided hardware. Ensure the frame is square before proceeding.
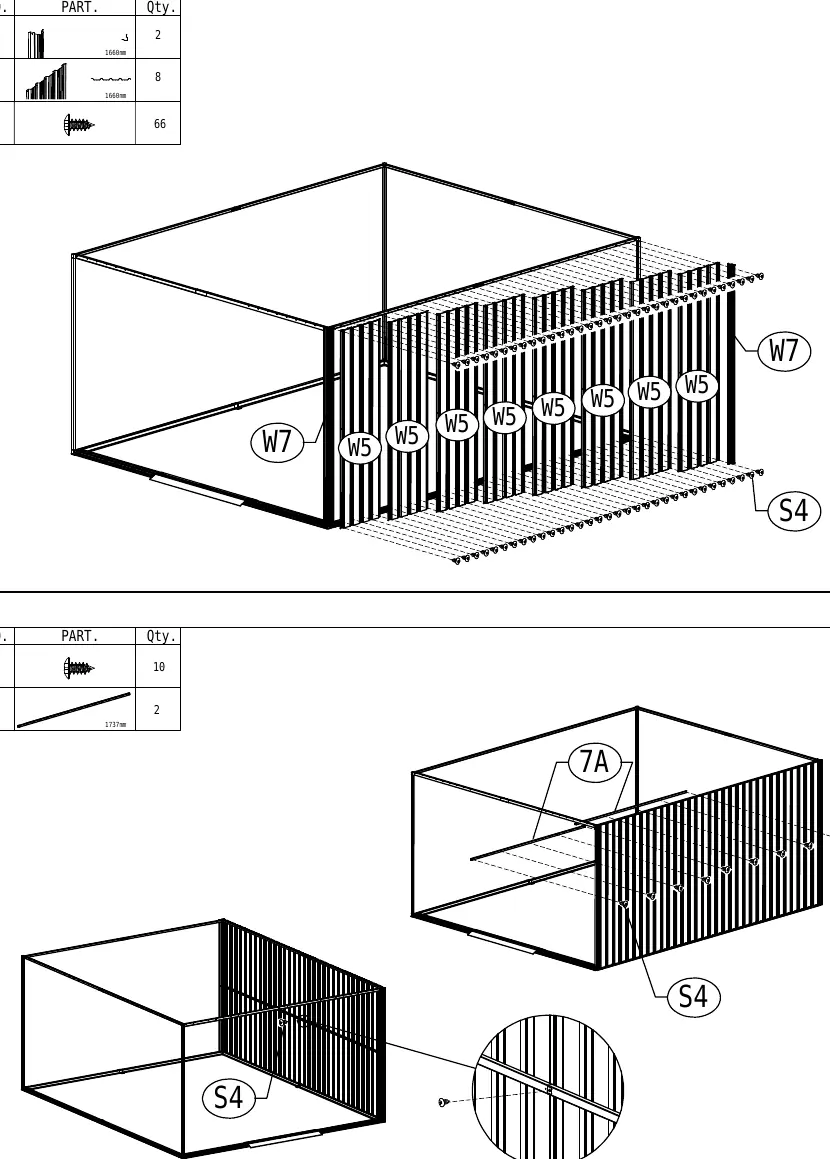
2. Wall Installation
Install the vertical supports (5) and attach the wall panels (W3, W5, W7, C2) to the base frame. Use the specified screws (S4) to secure each panel. Ensure panels are aligned correctly before tightening.
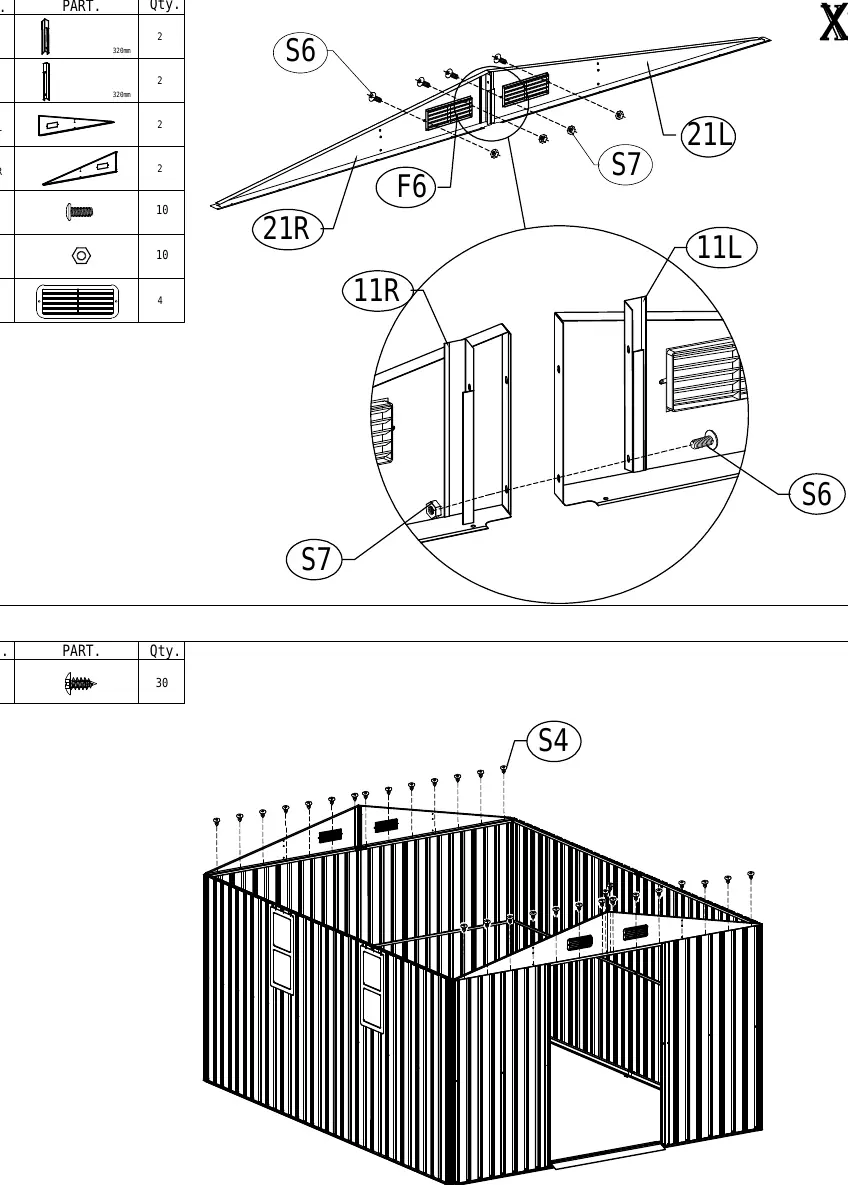
3. Roof Structure
Assemble the roof trusses using parts 9, 9F, 9B, 11, 24, 25, 26, 27. Attach the roof panels (W12, W15, 19L, 19R, 20) to the frame. Use washers (F7) with screws (S4) to ensure a weather-tight seal.
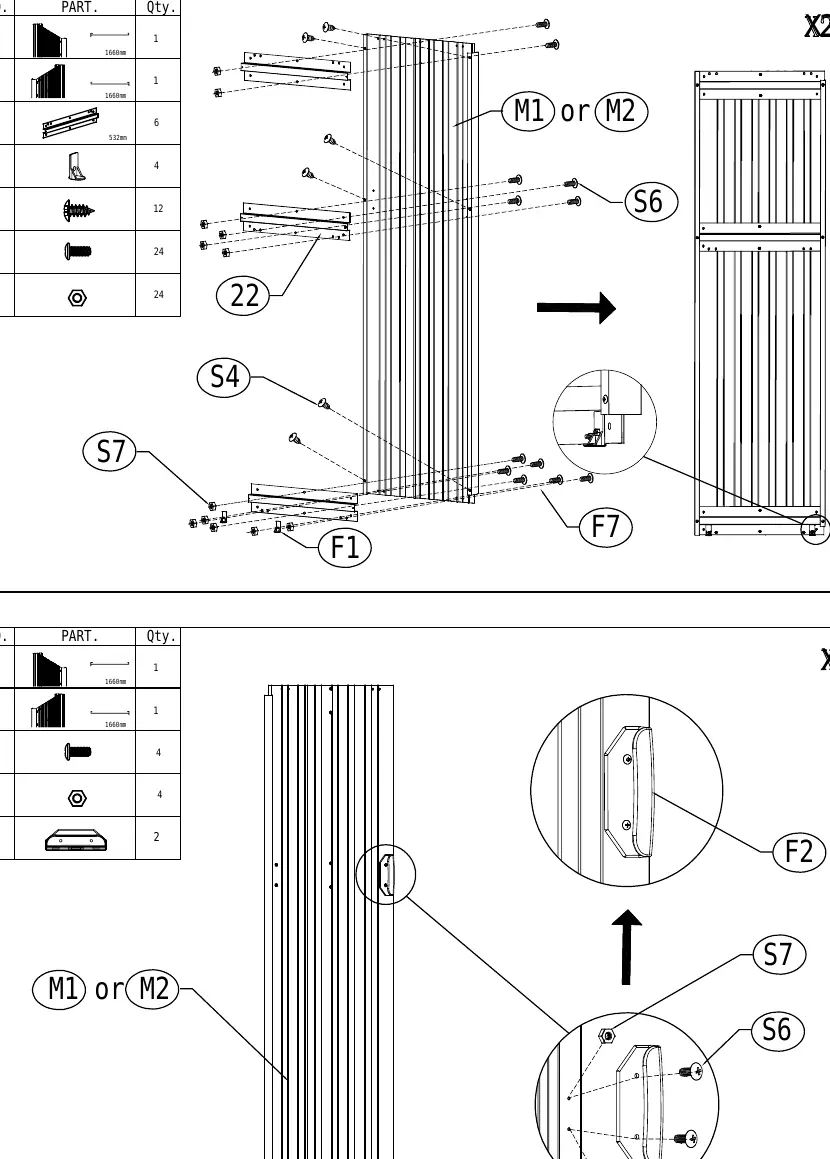
4. Door Installation
Assemble the door panels (M1, M2) with the door tracks (22) and handles (F2). Attach the completed door assembly to the front frame of the shed.
Safety and Maintenance
Always anchor the shed to the ground to prevent wind damage. Periodically check all screws and bolts to ensure they remain tight. Keep the shed clean and free of debris to prevent rust and corrosion.
Manufacturer information
The Home Depot
Practical help
Common problems
Difficulty aligning panels
Ensure the base frame is perfectly square and level before installing wall panels. If the base is uneven, the panels will not align.
Missing hardware
Check the parts list on pages 3-5 to identify the specific screw or bolt type. Ensure you have not used the wrong screw in a previous step.
Before use
- Clear and level the ground area for the shed.
- Inventory all parts against the list on pages 3-5.
- Wear the provided gloves (F9) to prevent cuts from metal edges.
- Have a screwdriver and wrench ready.
- Ensure you have enough space to assemble the shed.
Images and diagrams
- The manual uses exploded view diagrams to show the connection of panels and frame components.
- Arrows in diagrams indicate the direction of assembly or movement.
Model compatibility
- Designed for flat, level surfaces only.

Manual page author
Michael Turner
Technical manual editor
Reviews PDF manuals for structure, safety notes, and practical product details so readers can find the right information quickly.