Lighting / Fixtures
Installation Guide for Thorn Contrast 3 LED Projector
Comprehensive installation and configuration guide for the Thorn Contrast 3 LED projector. Includes detailed wiring diagrams for DALI, DMX, Bluetooth, and manual dimming versions, along with mounting, tilting, and cable sealing...
Table of contents
Manual images
Click an image to enlargeQuick Installation Guide
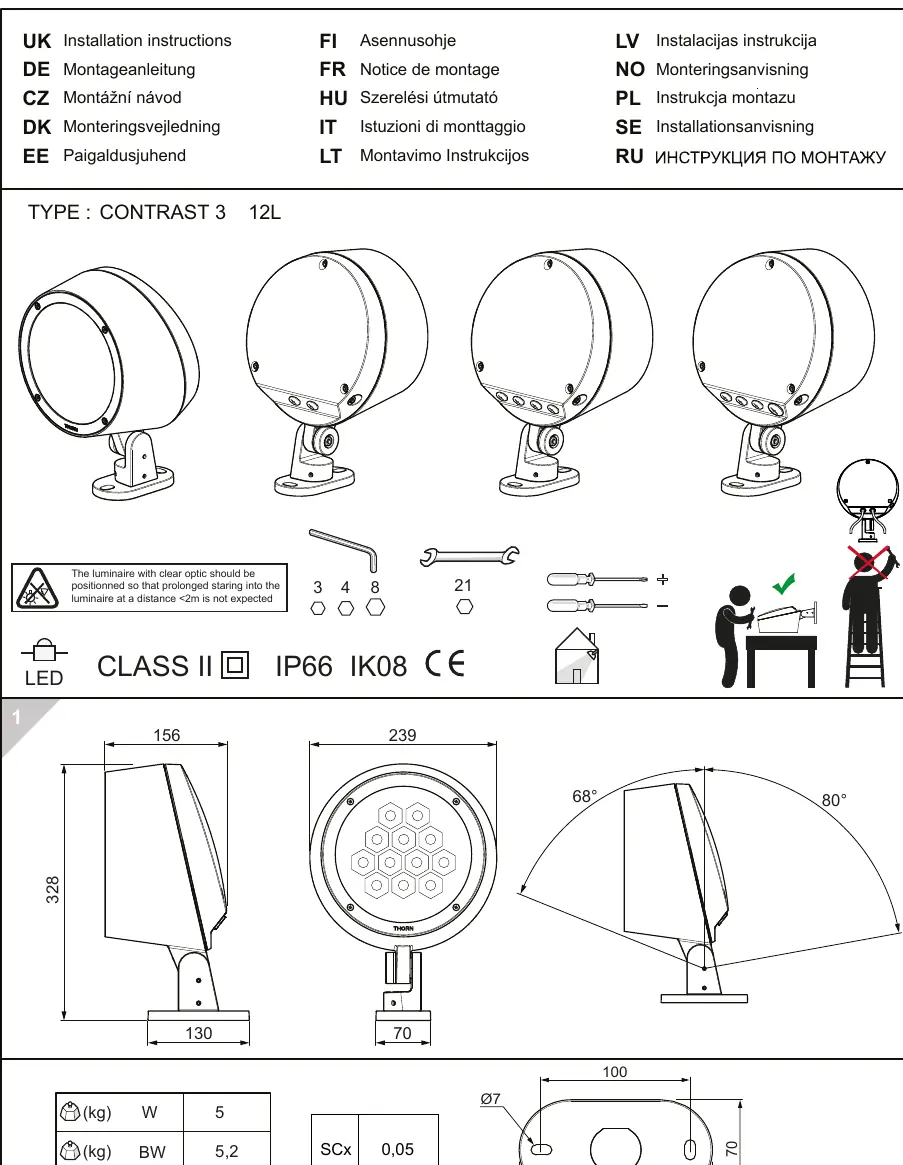
The Thorn Contrast 3 is a versatile LED projector available in several control variants (DALI, Manual Dimming, Bluetooth, and DMX). Proper installation is critical to maintain the IP66 rating. Always ensure the power is switched off before installation or maintenance.
Cable Gland Assembly
To ensure the IP66 rating, the cable gland must be assembled correctly based on the cable diameter:
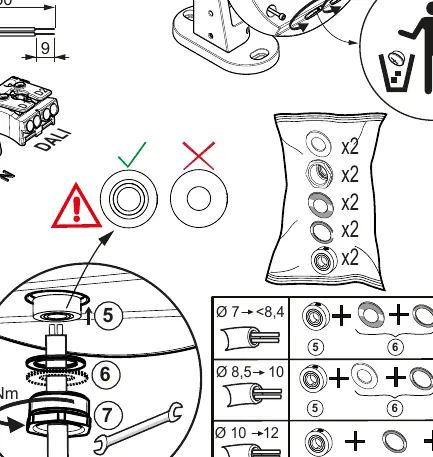
- Cable Diameter 7-8.4mm: Use seals 5, 6, and 7.
- Cable Diameter 8.5-10mm: Use seals 5 and 6.
- Cable Diameter 10-12mm: Use seal 5 only.
- Tightening: The cable gland must be tightened to 6Nm.
Wiring Variants
HFX DALI Version
Connect the power supply to the L and N terminals. Connect the DALI control signal to the D1 and D2 terminals.
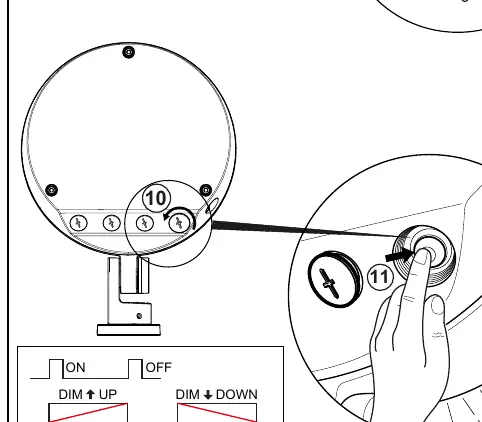
W SWD Manual Dimming
This version allows local control. Use the integrated buttons to toggle ON/OFF and adjust brightness (DIM UP/DIM DOWN).
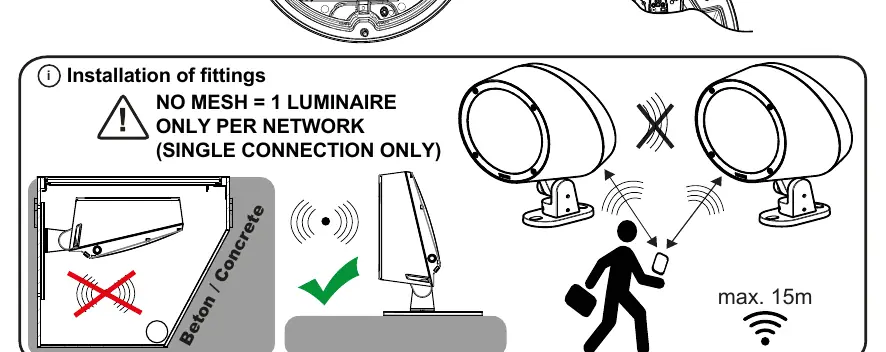
BC Wireless Bluetooth
This version supports 1-to-1 connection only. No mesh communication is supported between luminaires. Use the Tridonic app to configure settings. Ensure the luminaire is not installed in a way that blocks the signal (e.g., inside concrete).
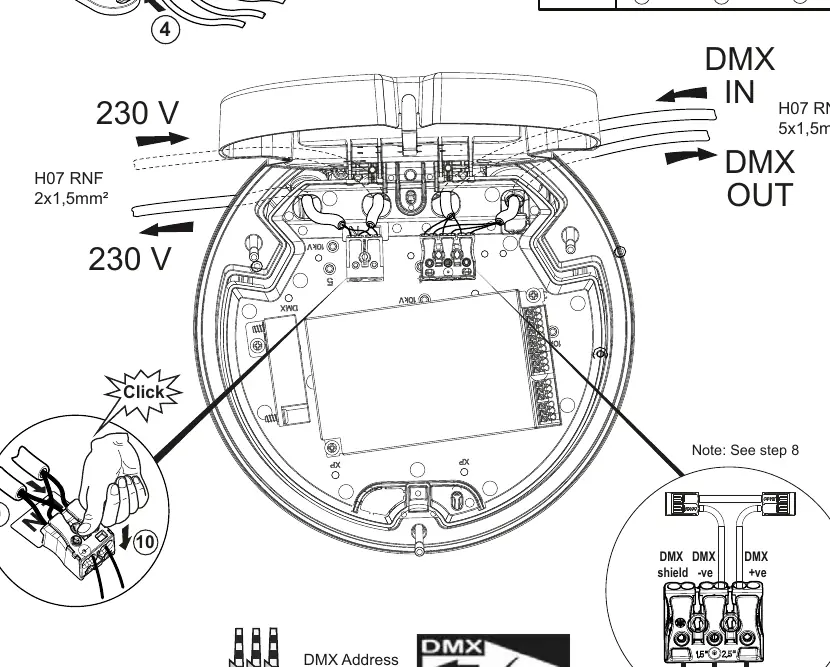
RDMX Version (RGBW)
For DMX control, connect the DMX IN and DMX OUT cables. A 120-ohm resistor must be installed at the end of the DMX line. A maximum of 32 fittings can be connected in a single line, with a maximum cable length of 200m.
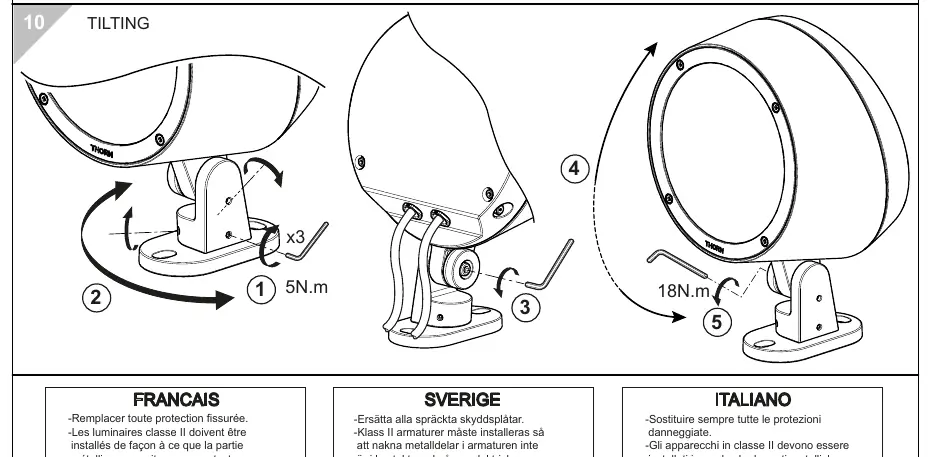
Tilting and Adjustment
The projector can be tilted to direct the light. Loosen the adjustment screws, set the desired angle, and tighten the screws to 18Nm to secure the position. Ensure the luminaire is positioned so that prolonged staring into the light at a distance of less than 2m is not expected.
Safety Warnings
- Class II: The luminaire is double insulated.
- Modification: Any modification to the luminaire is strictly forbidden.
- Maintenance: Replace any cracked protective shields immediately.
- Voltage: The luminaire operates at mains voltage; disconnect before any intervention.
Practical help
Common problems
Water ingress or moisture inside the housing
Ensure the cable gland is tightened to 6Nm and the correct combination of seals (5, 6, 7) is used based on the cable diameter.
Bluetooth connection failure
Ensure you are using a 1-to-1 connection. The system does not support mesh networking between luminaires.
DMX signal instability
Ensure a 120-ohm resistor is installed at the end of the DMX line and that the maximum limit of 32 fittings is not exceeded.
Before use
- Verify that the mains power is switched off.
- Check that the cable diameter is between 8mm and 12mm.
- Select the correct cable gland seals based on the cable diameter.
- Tighten the cable gland to 6Nm.
- Ensure the luminaire is mounted securely and the tilt angle is locked at 18Nm.
Images and diagrams
- The cable gland diagram illustrates the selection of seals (5, 6, 7) based on the cable diameter (7-12mm) to ensure a watertight seal.
- The DMX wiring diagram shows the daisy-chain configuration with the required 120-ohm termination resistor.
Model compatibility
- BC Version: Supports 1-to-1 connection only; no mesh networking.
- RDMX Version: Supports up to 32 fittings per line, maximum 200m cable length.

Manual page author
Emily Carter
User documentation editor
Prepares concise manual descriptions and highlights the most useful setup, operation, and maintenance information for readers.