Health / Laboratory Equipment
Operation Manual for VanGuard 1200CM Series Compound Microscope
Comprehensive operation manual for the VanGuard 1200CM Series compound microscope. Includes assembly instructions, setup procedures for brightfield and phase contrast models, maintenance guides, and troubleshooting steps.
Table of contents
Manual images
Click an image to enlargeQuick Start Guide
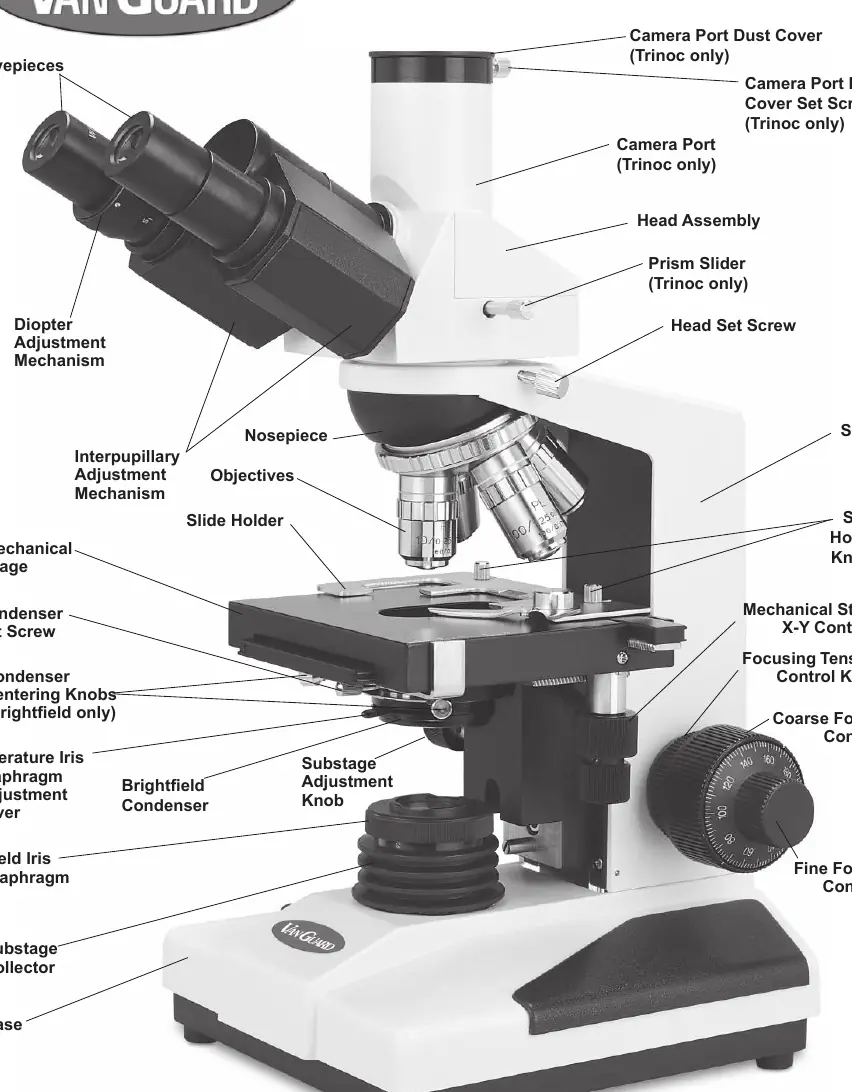
This manual covers the operation of the VanGuard 1200CM Series compound microscopes. Before use, ensure the microscope is placed on a stable surface. Assembly involves attaching the head, eyepieces, objectives, and condenser. For optimal performance, ensure the condenser and illuminator are centered. If using a phase contrast model, follow the specific alignment procedure for the annulus rings. Always use immersion oil with the 100X objective and clean it immediately after use to prevent damage.
Assembly
Follow these steps to assemble your microscope:
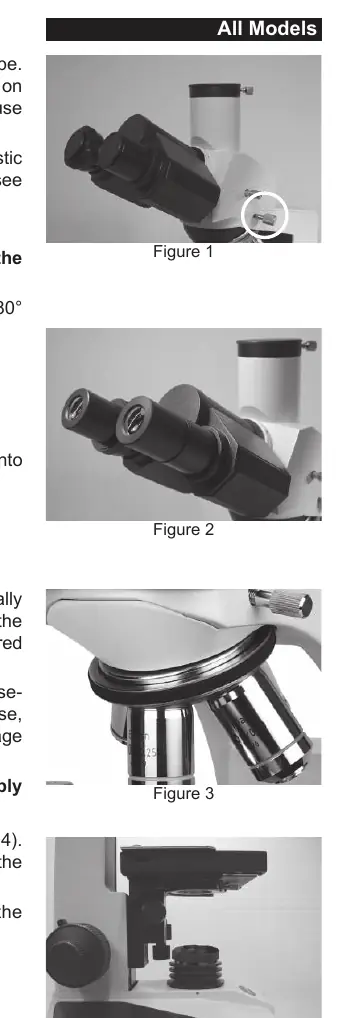
- Head Installation: Loosen the head set screw, rotate the head 180 degrees so the eyepieces face forward, and retighten the screw.
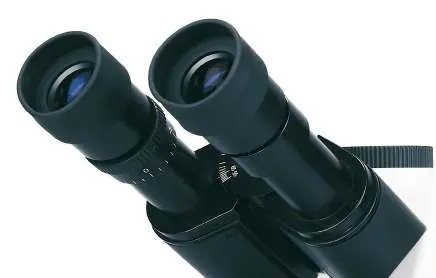
- Eyepieces: Remove dust caps and insert eyepieces into the eyetubes.
- Objectives: Thread objectives clockwise into the nosepiece, preferably in numerical order.
- Condenser: Raise the stage to maximum height. Loosen the condenser set screw, slide the condenser into the mount, and tighten the screw.
Setup and Alignment
Proper alignment is critical for image quality:
- Condenser Centering: Rotate to the 10X objective, raise the substage, open the aperture iris, and close the field iris. Use the centering knobs (or set screws on phase contrast models) to center the resulting white hexagon in the field of view.
- Illuminator Centering: Usually pre-centered, but if needed, remove the substage collector and adjust the bulb filament to the center of the opening.
- Phase Contrast Alignment: Use the phase contrast centering telescope to align the annulus rings until they are superimposed.
Using the Microscope
Key operational features include:
- Lighting: Use the variable lighting control on the left side to adjust brightness.
- Focusing: Use the coaxial coarse and fine focus controls. The up-stop mechanism prevents the stage from crashing into the objective.
- Mechanical Stage: Use the X-Y controls for precise sample positioning.
- Camera Port: On trinocular models, pull the prism slider to divert light to the camera port. Note that this disables the eyepieces.
- Filters: Use the swing-out filter holder to insert blue, green, or neutral density filters.
Maintenance
Regular care ensures longevity:

- Bulb Replacement: Unplug the microscope and allow it to cool. Access the bulb via the door on the bottom. Do not touch the glass bulb with bare hands; use a tissue.
- Fuse Replacement: If the lamp fails to turn on, check the fuse holder on the bottom of the base.
- Cleaning: Use only lens cleaner on optical components. Never wipe dry. Use rubbing alcohol for non-optical parts, but avoid contact with gears and lubricants.
Troubleshooting
If you encounter issues:
- No Light: Check power switch, plug, fuse, bulb, and variable lighting control setting.
- Not Enough Light: Check bulb centering, condenser centering, and cleanliness of optics.
- Stage Drifting: Adjust the focus tension control knob.
- Can't Focus: Ensure the up-stop is not set too low, use immersion oil for the 100X objective, and verify the slide is not upside down.
Specifications
The 1200CM series features a 360-degree rotating head, 10X widefield eyepieces, and a 20W variable halogen light source. Stage dimensions are 125mm x 135mm. The unit operates on 110V power and uses a 0.5A, 250V fuse.
For parts, accessories, or service, contact VanGuard Microscopes at 1-800-423-8842.
Practical help
Common problems
No light
Check power switch, plug, fuse, bulb, and ensure variable lighting control is turned up.
Not enough light
Center the bulb and condenser, adjust condenser height, and clean optics.
Stage drifting down
Increase focus tension using the control knob located inside the right-hand focus knob.
Cannot focus on specimen
Check up-stop mechanism, ensure immersion oil is used for 100X objective, and verify slide orientation.
Before use
- Verify all components are present according to the parts list
- Place microscope on a stable, level surface
- Ensure the head is securely tightened
- Check that the fuse is intact
- Clean optical surfaces with lens cleaner only
Images and diagrams
- Figure 5: Condenser installation and orientation
- Figure 6: Condenser centering process
- Figure 15-17: Maintenance access for bulb and fuse replacement
Model compatibility
- 110V power supply
- Phase contrast models require specific annulus ring alignment
- Trinocular models feature a 100/100 sliding prism for camera use

Manual page author
David Miller
Documentation analyst
Organizes user manual content into clear summaries, with attention to model details, product context, and everyday usability.