Health / Laboratory Equipment
User Manual for Vanguard 1400INi Series Inverted Microscope
Quick start and maintenance guide for the Vanguard 1400INi Series Inverted Microscope. Includes assembly instructions, troubleshooting, and technical specifications.
Table of contents
Manual images
Click an image to enlargeQuick guide from the manual
The Vanguard 1400INi Series is an inverted microscope designed for biological cultures and specimens in well plates, petri dishes, slides, and vials. This manual covers the 1491INi and 1493INi models. Before use, ensure the microscope is properly assembled and the voltage matches your local power supply (110V standard, 220V optional).
Basic Assembly


- Stand and Head: Place the stand on a stable surface. Remove protective covers from the head mount and the bottom of the head assembly. Secure the head assembly onto the stand using the head set screw.
- Eyepieces: Remove dust caps from the eyetubes and insert the eyepieces.
- Objectives: Remove objectives from storage containers and thread them clockwise into the nosepiece. It is recommended to install them in order of increasing magnification.
- Condenser: Loosen the condenser set screws, insert the condenser into the mount, rotate until the 'AS' mark faces forward, and tighten the set screws.
- Power: Connect the power cord to the back of the microscope and plug it into a power source.
Microscope Operation
Focusing: Use the coaxial coarse and fine focus controls. The coarse knob is for initial adjustment, while the fine knob allows for precise focusing. Tension can be adjusted using the included wrench.
Stage: The mechanical stage is controlled by a right-hand coaxial control. It accepts various inserts including microplates, petri dishes, and slides.
Lighting: Use the power switch to turn on the unit and the variable lighting control to adjust intensity. For phase contrast models (1493INi), ensure the annulus slider matches the objective magnification.
Maintenance
Cleaning: Never use anything other than lens cleaner on optical components. Use an air-bulb or lens brush to remove dust before cleaning with lens tissue.
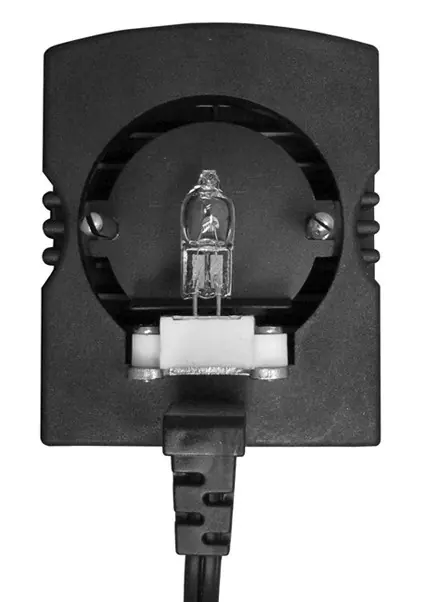
Replacing the Lamp: Unplug the microscope and allow the lamp to cool. Remove the socket assembly from the top of the condenser. Replace the lamp, ensuring pins align with the socket holes. Do not touch the glass bulb with bare hands.
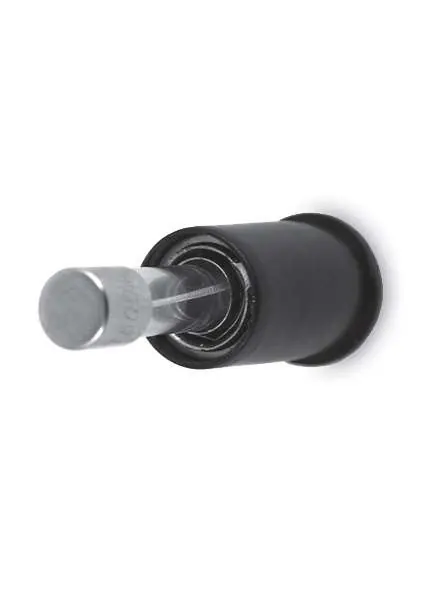
Replacing Fuses: Unplug the microscope. Use a slotted screwdriver to push inward and turn the fuse holder counter-clockwise to remove it. Replace the fuse (1A, 250V) and re-insert the holder by turning clockwise.
Troubleshooting
If you encounter issues, check the following:
- No image in eyepiece: Ensure the microscope is switched on, the light path selection knob is in the correct position, and objectives are fully installed.
- Can't focus: Check if the objective is dirty or if the specimen vessel is too thick (max 1.2mm).
- No light: Check the power cord connection, the fuse, and ensure the bulb is not burnt out.
Practical help
Common problems
No image visible in eyepiece
Check if the power switch is on, the light path selection knob is in the correct position, and objectives are properly installed.
Cannot focus on specimen
Clean the objective lens or check if the specimen vessel exceeds the 1.2mm thickness limit.
No light from collector
Check power cord connection, inspect the fuse, or replace the burnt-out bulb.
Image is too dim
Increase variable lighting control, center the bulb, or clean dirty lenses.
Before use
- Verify all components from the parts list are present.
- Ensure the voltage matches your local power supply (110V or 220V).
- Unplug the microscope from the power source before performing any maintenance.
- Allow the lamp to cool completely before attempting replacement.
- Ensure the head assembly is firmly secured with the head set screw.
Specs in practice
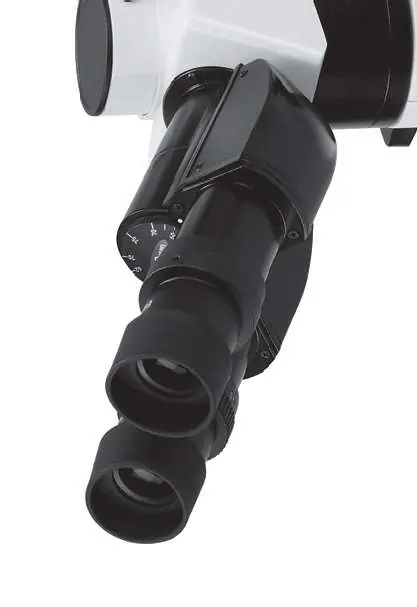
- Viewing Head
- Trinocular Seidentopf head, 30° inclination, 360° rotation.
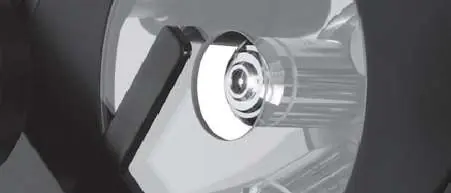
- Illumination
- 30W, 6V Variable Quartz Halogen light source.
- Focusing Graduation
- 2 microns per division, 40mm focusing range.
Images and diagrams
- Assembly diagrams illustrate the installation of the head, eyepieces, objectives, and condenser.
- Maintenance diagrams show the specific locations for fuse and lamp replacement.
Model compatibility
- 1491INi: Equipped with a brightfield condenser.
- 1493INi: Equipped with a phase contrast condenser and annulus slider.

Manual page author
David Miller
Documentation analyst
Organizes user manual content into clear summaries, with attention to model details, product context, and everyday usability.