Garden / Gazebos & Canopies
Veikous 10x10 Hardtop Gazebo Assembly Guide
Quick assembly guide for the Veikous 10x10 Hardtop Gazebo. Includes tool requirements, parts list, step-by-step installation instructions, and safety tips for anchoring.
Table of contents
Manual images
Click an image to enlargeImportant Information
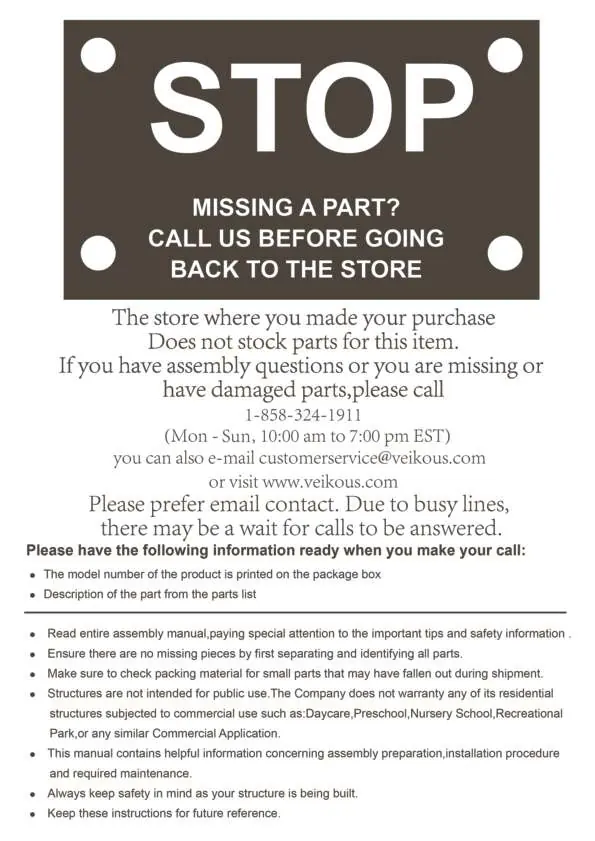
Before beginning assembly, ensure you have all parts listed in the manual. If any parts are missing or damaged, contact customer service at 1-858-324-1911 or email [email protected]. This structure is intended for residential use only and is not suitable for commercial applications such as daycares or schools. At least three people are required for safe assembly.
Tools Required
The following tools are required for assembly but are not included in the package:
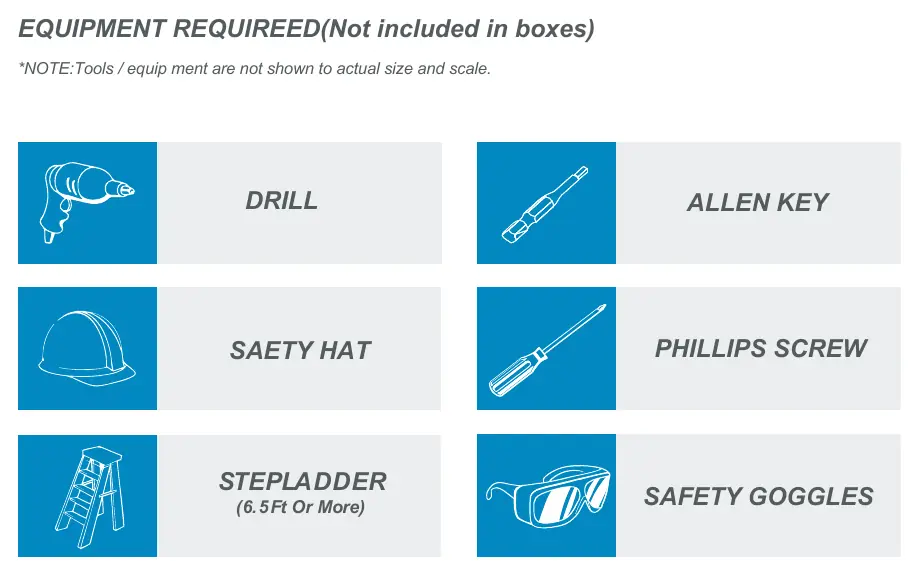
- Drill
- Allen Key
- Phillips screwdriver
- Stepladder (6.5ft or more)
- Safety hat
- Safety goggles
Assembly Preparation
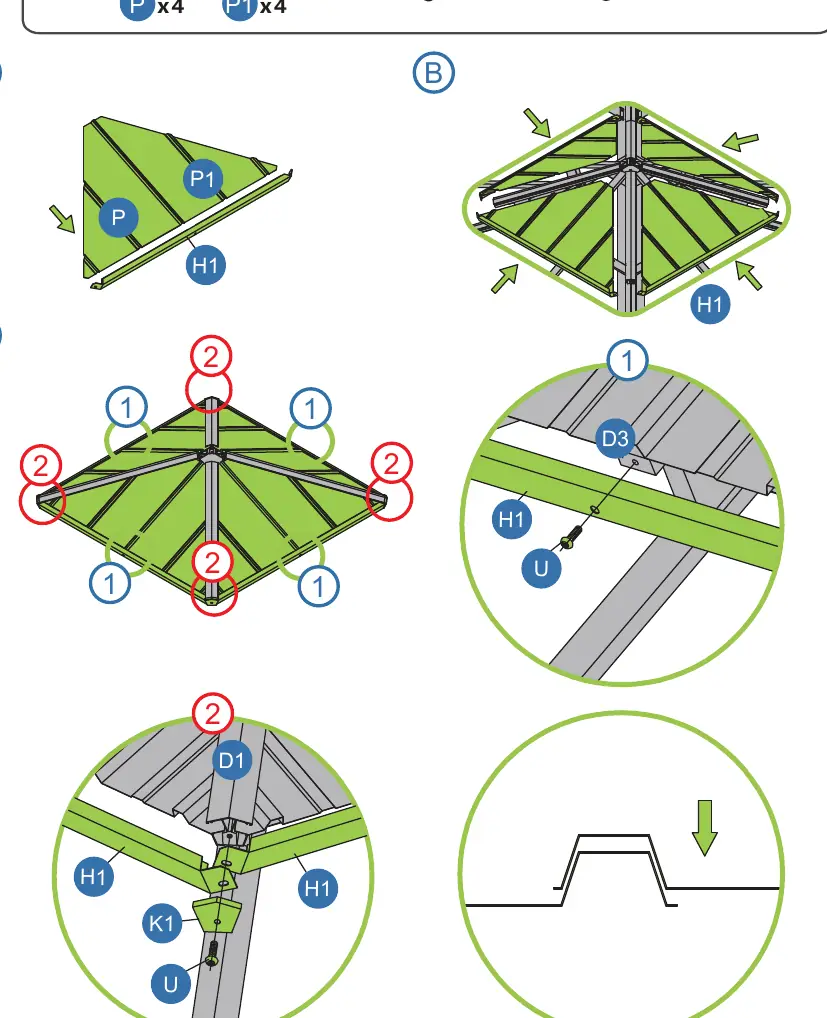
Important: Do not fully tighten screws until the assembly is complete. Ensure all screw holes are properly aligned before installation. When installing metal sheets, remove the protective film and place the uncoated side up towards the sun.
Assembly Steps
The assembly process is divided into 25 steps:
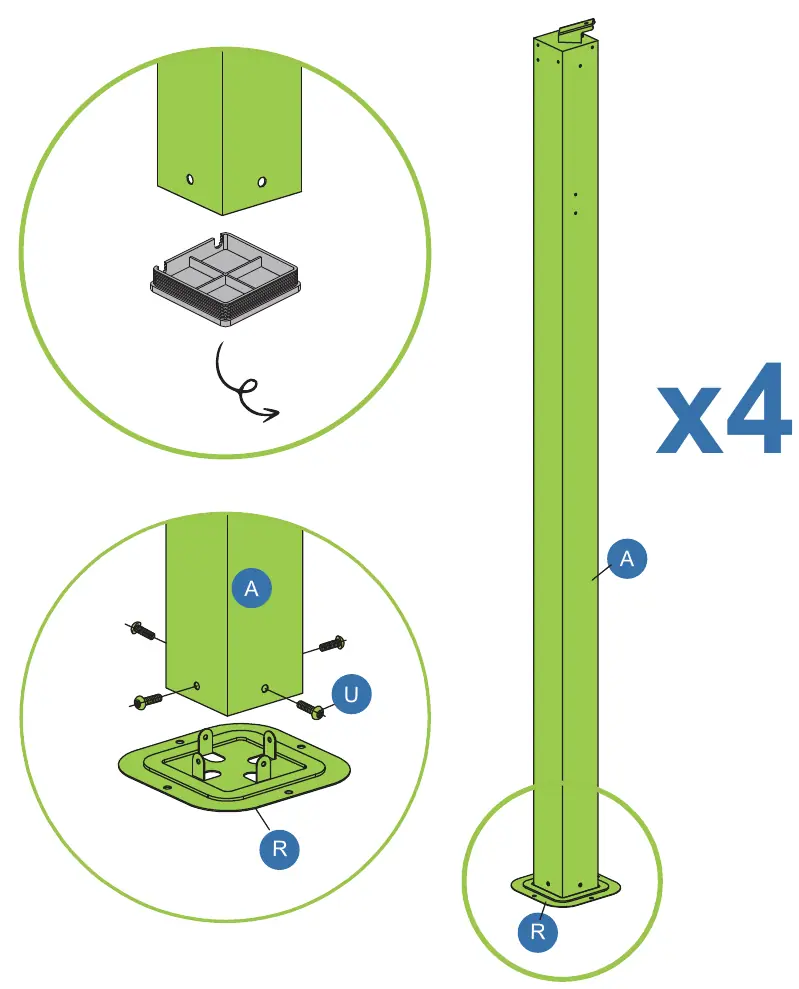
- Steps 1-5: Frame assembly, including connecting posts (A) to base plates (R) and attaching beams (B/B1).
- Steps 6-11: Installing support braces (I/I1) and roof support structures (D/D1/G).
- Steps 12-13: Installing roof rafters (D2/D3).
- Steps 14-17: Installing curtain tracks (J) and roof brackets (M2/M3/K1).
- Steps 18-23: Installing roof panels (P/P1/O series) and top covers (G1).
- Steps 24-25: Installing nets and final anchoring.
Anchoring and Safety
To improve wind resistance, you must anchor the gazebo. Use expansion screws for cement surfaces and ground nails for grassy surfaces. Both are included in the accessories package. Failure to anchor the structure may result in it toppling during strong winds.

Practical help
Common problems
Missing or damaged parts
Do not return to the store. Call 1-858-324-1911 or email [email protected] with your order number and part description.
Structure instability
Ensure all screws are fully tightened after the initial assembly phase. You must anchor the gazebo to the ground using the provided expansion screws or ground nails.
Difficulty aligning parts
Do not fully tighten screws until the entire structure is assembled to allow for adjustments.
Before use
- Verify all parts against the parts list.
- Ensure at least 3 people are available for assembly.
- Prepare required tools: Drill, Allen Key, Phillips screwdriver, Stepladder.
- Wear safety gear (hat, goggles, gloves).
- Remove protective film from metal sheets.
Specs in practice
- Protective Film
- Must be removed from metal sheets; place uncoated side up towards the sun.
Images and diagrams
- Steps 1-25: Detailed sequence for frame and roof assembly.
- Step 14-1: Installation of hooks for curtains/nets.
- Step 25: Anchoring instructions for cement and grassy surfaces.
Model compatibility
- Not intended for commercial use (Daycare, School, etc.).

Manual page author
David Miller
Documentation analyst
Organizes user manual content into clear summaries, with attention to model details, product context, and everyday usability.