Home Appliances / Commercial Kitchen Equipment
User Manual for Vevor Commercial Ice Cream Maker
Comprehensive user guide for the Vevor Commercial Ice Cream Maker. Includes setup instructions, operation panel details, cleaning procedures, maintenance, and troubleshooting steps for optimal performance.
Table of contents
Manual images
Click an image to enlargeQuick Guide from the Manual
This guide provides essential information for operating your Vevor Commercial Ice Cream Maker. Key points include:
- Transportation: Do not tilt the machine more than 45° during handling. Let the machine rest for 4 hours after transportation before use.
- Environment: Ensure a well-ventilated location on a level, solid surface. Maintain at least 80 cm of space behind the machine and 30 cm on the sides.
- Temperature: Ambient temperature should be between 5°C and 35°C. Material temperature should be between 5°C and 40°C.
- Cleaning: Clean the machine daily to ensure food safety and machine longevity.
Safety Precautions
Before using the machine, ensure the following safety measures are met:
- Electrical: Ensure the voltage matches the nameplate (220V -10% to +6%). Entrust electrical connections to a professional to prevent electric shock.
- Environment: Do not use in wet areas, rain, or places with high salt or sulfuric acid content (e.g., hot springs).
- Operation: Refrigeration is not allowed when the cylinder is empty or contains water.
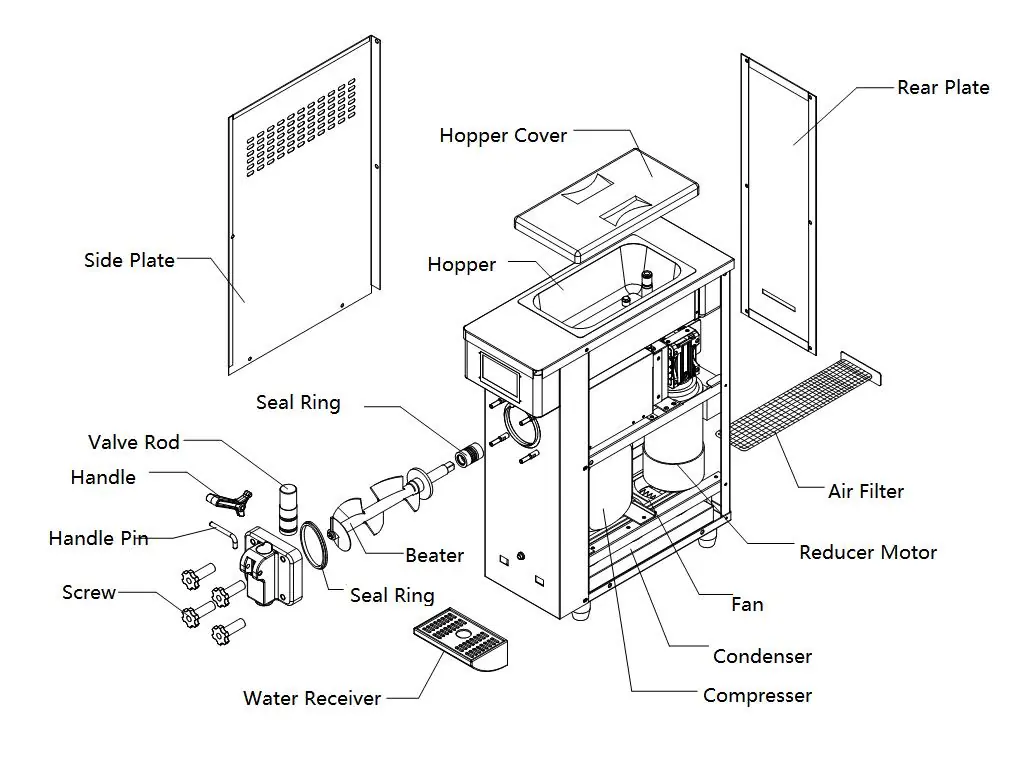
Product Structure
The machine consists of several key components, including the hopper, hopper cover, beater, seal rings, discharge valve, and condenser. Regular maintenance of these parts is essential for proper operation.
Operation Panel and Function
The control panel features an LCD screen and touch controls:

- Cleaning/Defrosting: Used to clean the machine or defrost (on supported models).
- Cooling: Activates the cooling cycle.
- Puffing: Increases the puffing effect (on supported models).
- Hardness Adjustment: Use the arrow buttons to set the desired ice cream hardness.
- Fresh/Pre-cool: Keeps slurry at a low temperature when not in use.
- Timing/Clear: Used for setting restart times and clearing cup counts.
Assembly Method
Follow these steps for assembly:
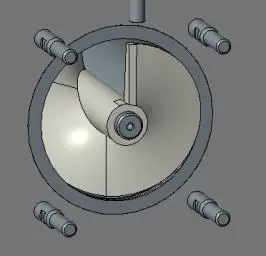

- Assemble the square shaft and bellows of the agitator.
- Install the stirrer, ensuring it aligns with the square shaft.
- Assemble the discharge valve, ensuring the seal ring is installed.
- Install the water tank.
Note: Ensure the power switch is off during assembly.
Ice Cream Manufacturing
- Prepare the ice cream slurry and pour it into the top tanks.
- Turn on the power and run the machine for 3-5 minutes using the clean button.
- Adjust the hardness using the Set button.
- Press the cooling button to start the refrigeration process.
- Use the discharge handle to dispense ice cream.
Cleaning and Maintenance
To ensure hygiene and machine longevity:
- Daily Cleaning: Discharge all slurry, use hot water and disinfectant (70% volume), stir for 5 minutes, and rinse.
- Parts: Disassemble the discharge valve and agitator for thorough cleaning. Do not use hot water or dish-washing detergent on resin parts to avoid deformation.
- Condenser: Clean dust from the condenser every two months to maintain cooling efficiency.
Troubleshooting
If the machine malfunctions, refer to the following:
- Machine does not start: Check power cord, neutral line, control switch, or PCB.
- Ice cream too soft: Reconstitute slurry or adjust hardness setting.
- Ice cream too hard: Reconstitute slurry (too much water) or adjust hardness setting.
- Not cooling: Check for refrigerant leak, blocked condenser, or fan failure.
Manufacturer information
VEVOR
Practical help
Common problems
Machine does not start
Check if the power cord is connected, the neutral line is secure, the control switch is on, or if the PCB needs replacement.
Ice cream is too soft
Reconstitute the slurry ratio or adjust the hardness setting.
Ice cream is too hard
Reduce water in ingredients or adjust the hardness setting.
Not cooling
Check for refrigerant leaks, clean the blocked condenser, or repair/replace the fan.
Before use
- Ensure the machine is on a level, solid surface.
- Maintain 80 cm clearance behind and 30 cm on sides.
- Let the machine rest for 4 hours after transport.
- Verify the local voltage matches the machine nameplate.
- Clean all parts before the first use.
- Ensure the control power switch is off during assembly.
Specs in practice
- Ambient Temperature
- Operating range is 5°C to 35°C.
- Material Temperature
- Slurry temperature should be between 5°C and 40°C.
Images and diagrams
- Product Structure: Identifies the hopper, beater, seal rings, and discharge valve assembly.
- Operation Panel: Shows controls for hardness, cleaning, cooling, and puffing.
Model compatibility
- Requires specific ice cream slurry proportion.
- Not for use in high-salt or high-sulfuric environments.

Manual page author
Michael Turner
Technical manual editor
Reviews PDF manuals for structure, safety notes, and practical product details so readers can find the right information quickly.