Tools / Tool Storage
User Manual for VEVOR Dome Tunnel Greenhouse 15x7x7 ft
Get started with your VEVOR Dome Tunnel Greenhouse 15x7x7 ft. This guide covers assembly steps, component lists, safety precautions, and stability tips for your polytunnel.
Table of contents
Manual images
Click an image to enlargeQuick guide from the manual
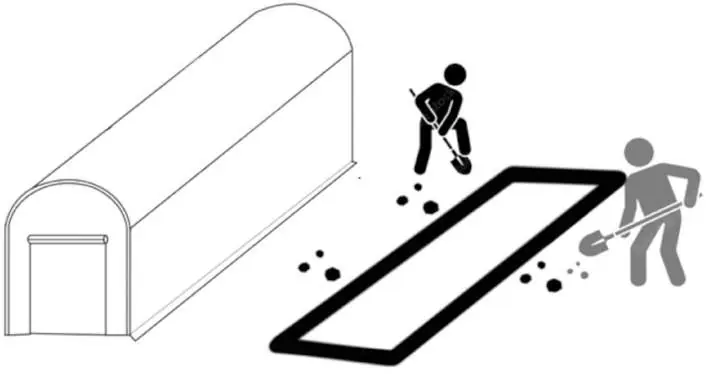
The VEVOR Dome Tunnel Greenhouse is designed for garden use. For a successful setup, it is strongly recommended to have 2-4 people available for construction. The most critical step for long-term stability is digging a 20cm trench around the base of the structure to bury the frame edges. Always check the weather forecast before assembly and avoid using the greenhouse during severe weather conditions such as rainstorms, hail, heavy snow, or high winds.
Safety Rules
- Read carefully: Review this manual thoroughly before starting assembly.
- Fire hazard: Keep the greenhouse away from open flames; the material will ignite and burn upon contact.
- Sharp objects: Avoid contact with sharp points or blades to prevent scratching or tearing the cover.
- Not a toy: This product is not intended for children to play with.
- Document protection: Keep the manual away from water, rain, and hail to prevent damage.
Specifications
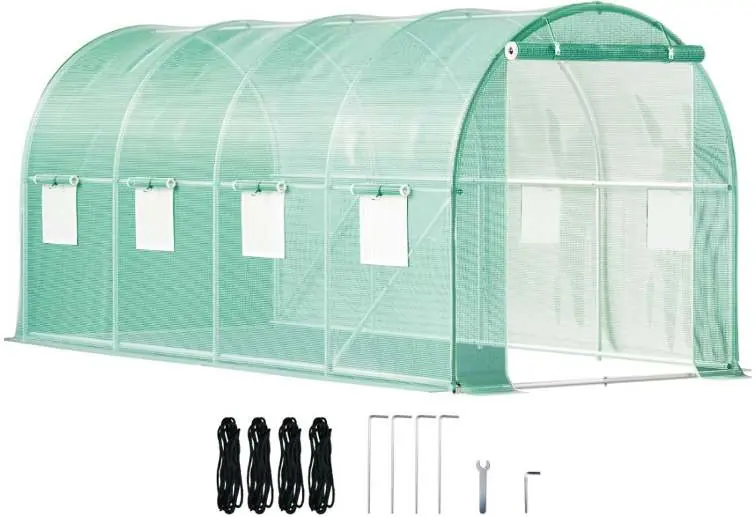
The greenhouse is available in Green and White cover versions. The dimensions for both models are 4.5 x 2 x 2 meters (approximately 15 x 7 x 7 feet).
Components
Before beginning, verify that you have all the necessary parts:
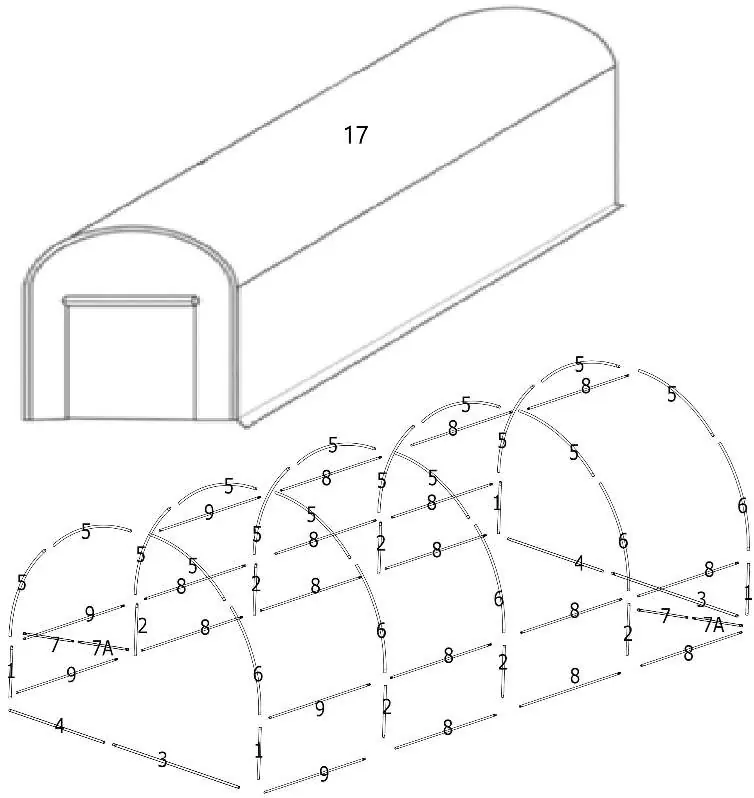
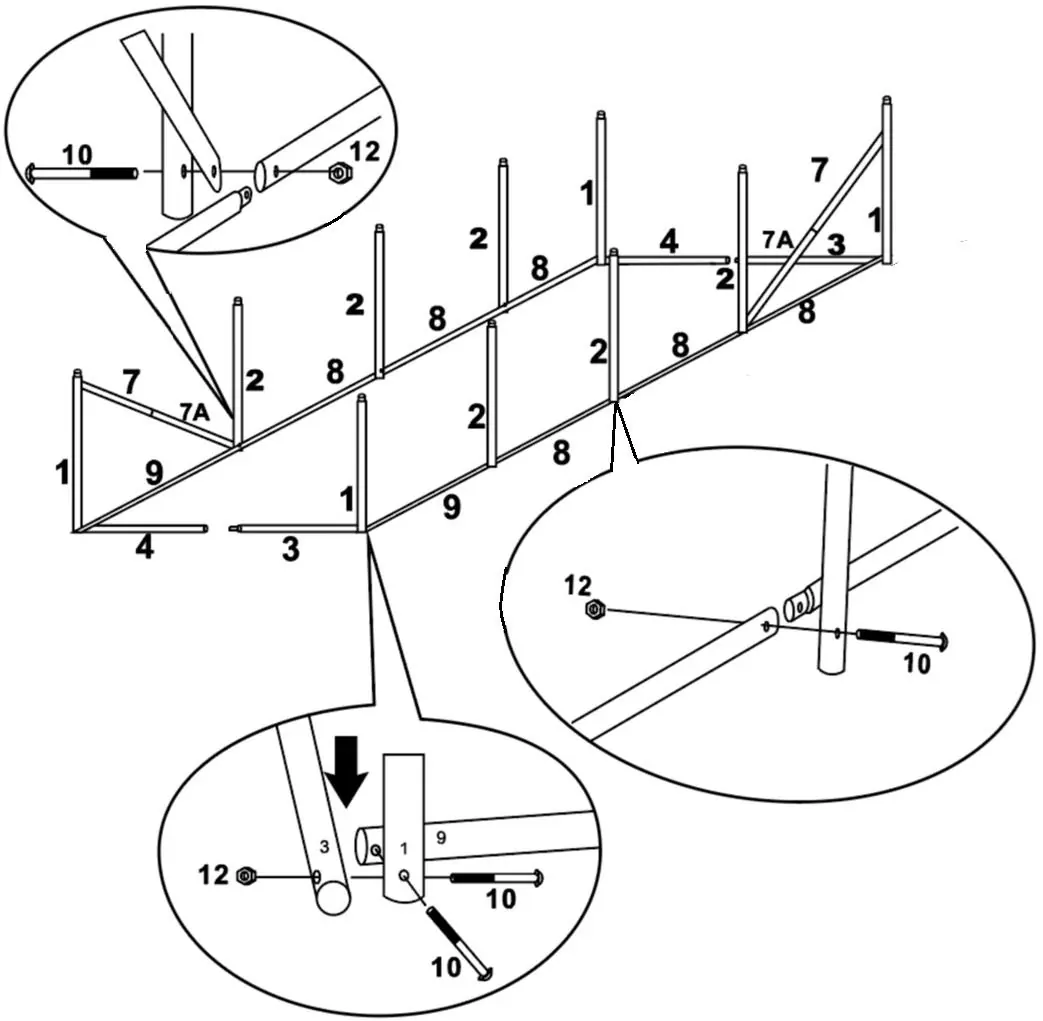
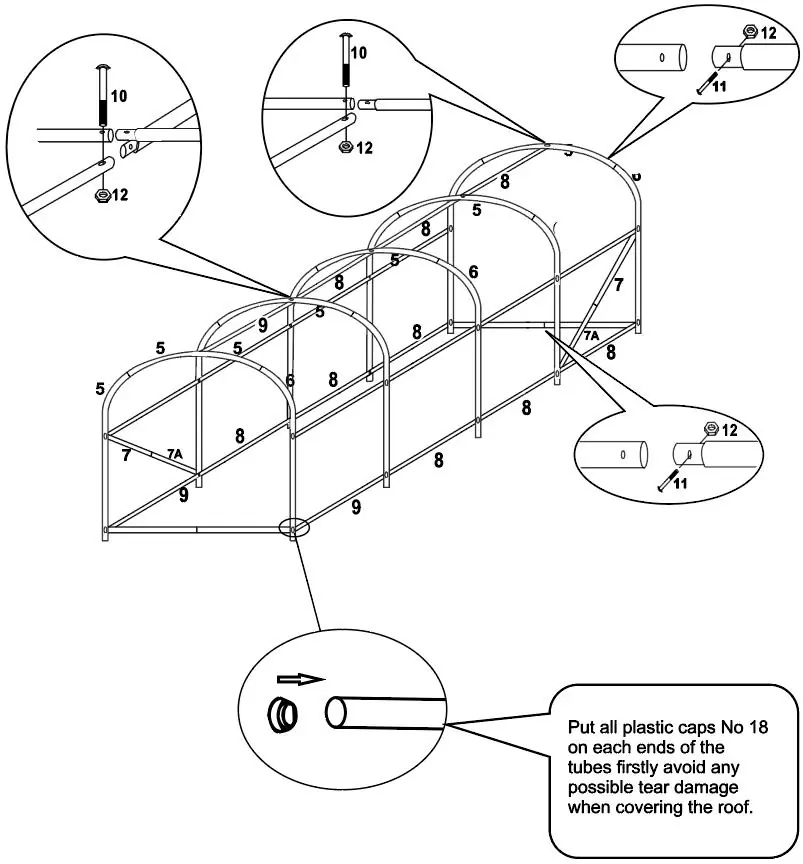
- Straight Rods (various types: 1, 2, 3, 4, 7, 7A, 8, 9)
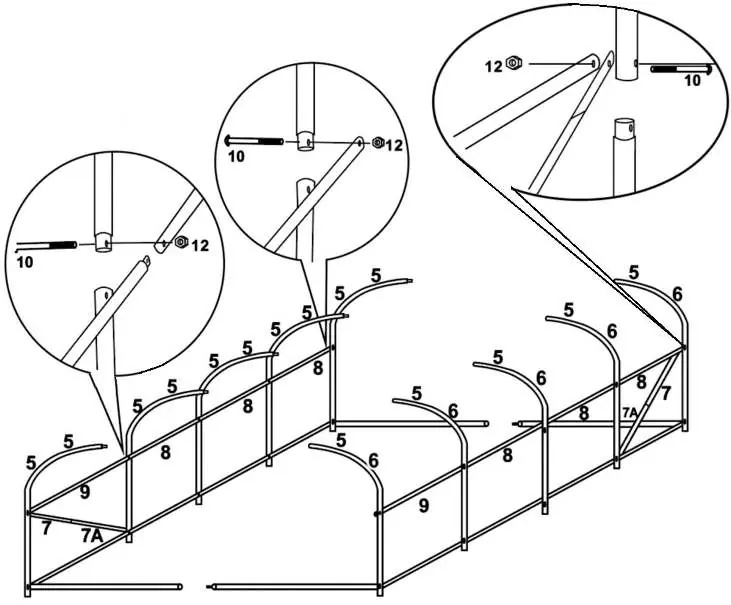
- Arced Rods (5, 6)
- Bolts (10, 11) and Nuts (12)
- Tools: Screwdrivers (13, 14)
- Accessories: Tent pegs (15), String (16), Tarpaulin (17), Plastic plugs (18)
Assembly Instructions
The assembly process involves building the frame in sections and then securing the cover. It is recommended to assemble the frame loosely first, and only tighten all bolts once the structure is fully positioned.
Step 1: Frame Preparation
Assemble the floor tubes (No. 3 + No. 4) and the horizontal frame (No. 9 + No. 8 + No. 8 + No. 8). Assemble the curved roof sections by connecting Arced Rods (No. 5 + No. 5 and No. 5 + No. 6) using the shorter bolts.
Step 2-4: Frame Construction
Connect the floor and horizontal frames with the vertical rods. Continue building the structure by attaching the curved roof sections to the base frame. Ensure all bolts are inserted and nuts are attached, but keep them loose until the entire frame is aligned.
Step 5: Stability and Anchoring
For maximum stability, dig a 20cm wide trench around the base of the polytunnel. Place the frame inside the trench and fill it with soil to anchor the structure firmly.
Step 6: Covering
Before covering the roof, place the plastic caps (No. 18) on all tube ends to prevent the cover from tearing. Carefully pull the tarpaulin over the frame, ensuring it is positioned correctly. Use the provided ropes and stakes at the four corners to reinforce the stability of the greenhouse.
Maintenance and Stability
Regularly inspect the frame and cover for any signs of wear. Ensure the cover is taut and properly secured. In the event of bad weather, such as heavy wind or snow, ensure the greenhouse is properly anchored or consider removing the cover if necessary to prevent structural damage.
Manufacturer information
VEVOR
Practical help
Common problems
Instability in wind
Dig a 20cm trench around the base of the polytunnel and bury the frame edges in the soil.
Tear damage to the cover
Put plastic caps (No. 18) on all tube ends before covering the roof to prevent sharp edges from cutting the material.
Frame deformation
Do not use the greenhouse in bad weather conditions, such as rainstorms, hail, heavy snow, or heavy wind.
Before use
- Ensure 2-4 people are available for construction.
- Check all parts against the Product List (rods, bolts, nuts, tools).
- Select a flat, level area for assembly.
- Have the included screwdrivers ready.
- Verify you have the correct model (Green or White).
Specs in practice
- Product Size
- 4.5 x 2 x 2 meters (approx. 15 x 7 x 7 feet).
Images and diagrams
- Step 1-4: Frame assembly sequence using rods and bolts.
- Step 5: Trenching for stability.
- Step 6: Anchoring with ropes and stakes.
Model compatibility
- Available in Green and White cover versions.

Manual page author
David Miller
Documentation analyst
Organizes user manual content into clear summaries, with attention to model details, product context, and everyday usability.