Automotive / Motorcycle Accessories
Installation manual for Wunderlich 15310-X00 Handlebar Risers
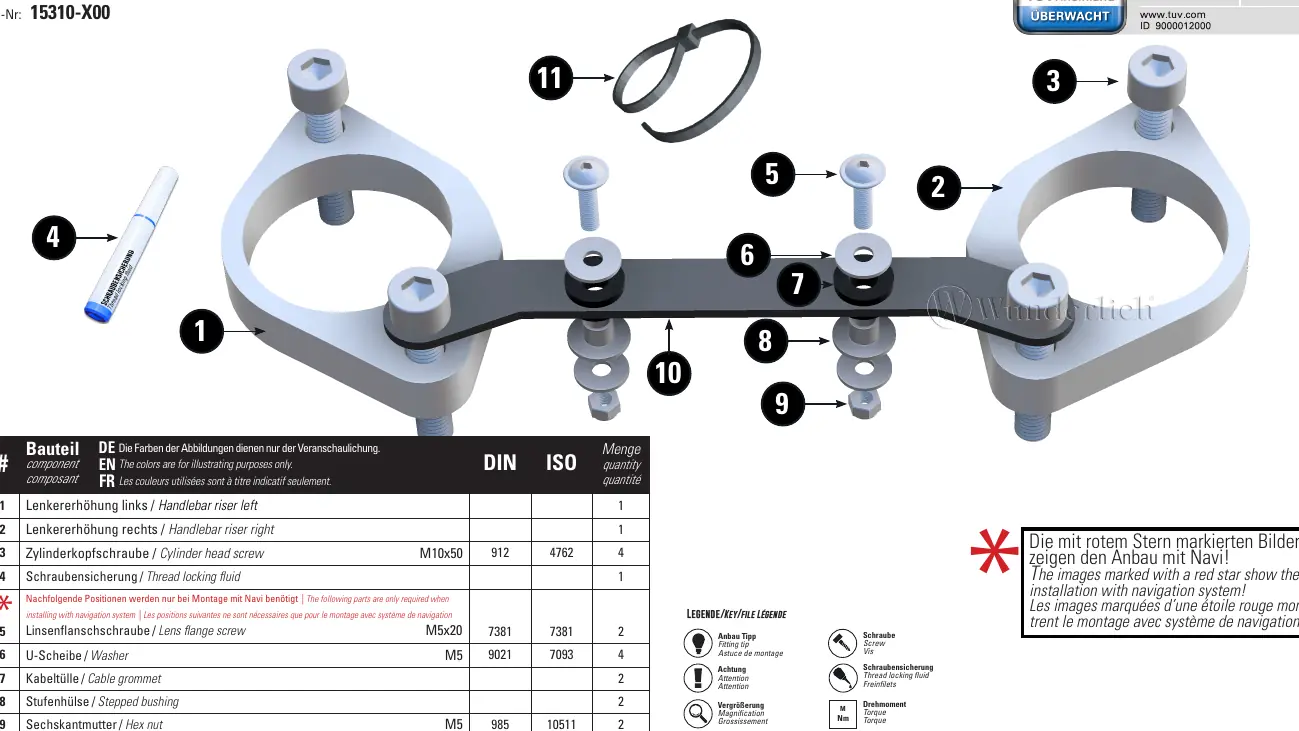
Step-by-step installation guide for the Wunderlich 15310-X00 Handlebar Risers. Includes torque specifications, cable routing instructions, and navigation system mounting details.
Table of contents
Manual images
Click an image to enlargeQuick guide from the manual
This document provides instructions for installing the Wunderlich Handlebar Risers (15310-X00). Please note that steps marked with a red star in the manual are only required if you are installing the navigation system. Ensure you have the necessary tools and thread locking fluid before beginning the installation.
Installation steps
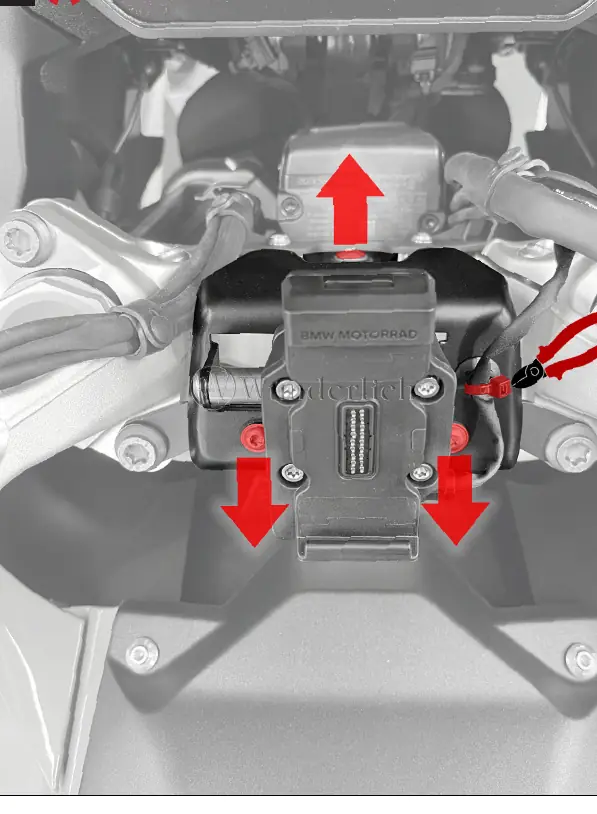
- Preparation: Loosen the control unit screws slightly and slide the unit to the right to gain access.
- Disconnection: Locate the connector, release the lock, and disconnect the plug.
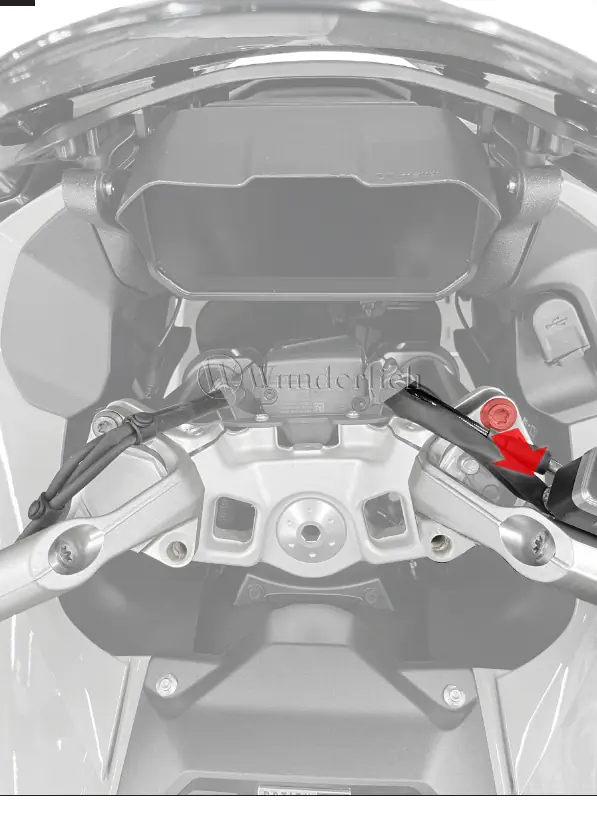
- Riser installation: Unthread the connector from the original handlebar clamp. Fit the new handlebar riser and thread the connector back through the clamp.
- Cable routing: Reinsert the connector and route the cable exactly as it was in the original position. Reconnect the plug.
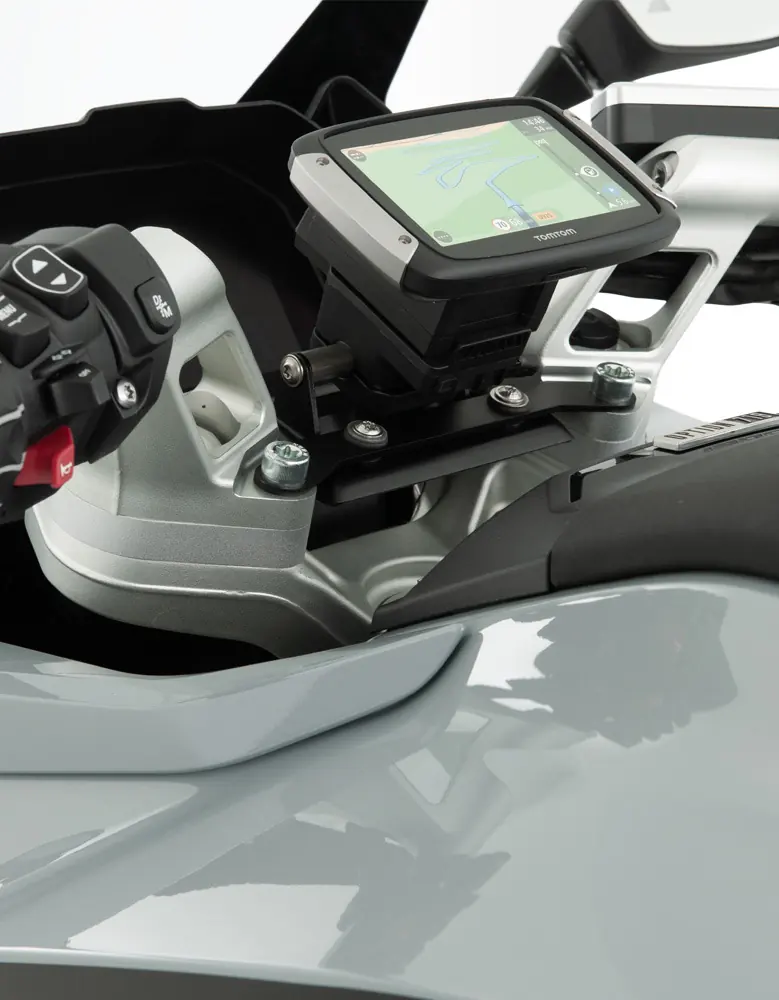
- Navigation system (if applicable): Preassemble the navigation plate on the navigation bracket using the provided M5x20 screws.
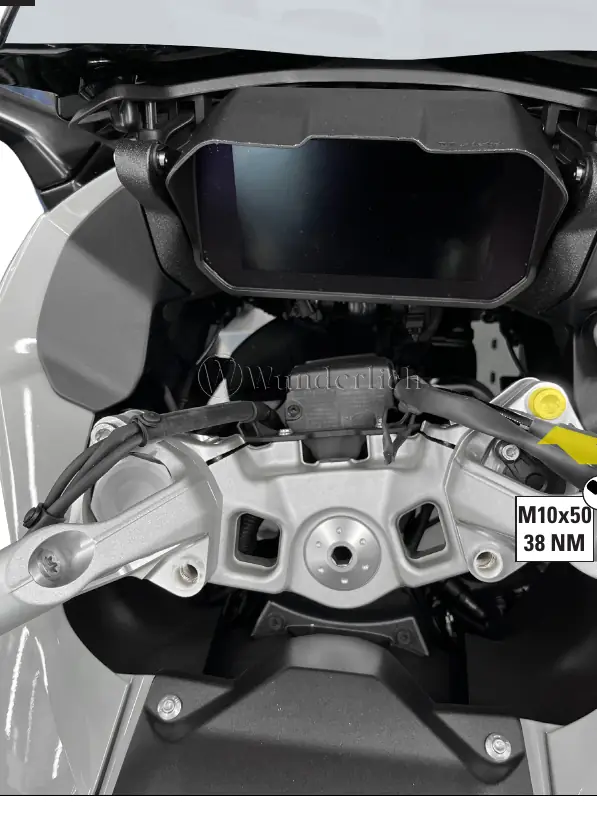
- Final assembly: Secure the navigation preparation and ensure all cables are properly fixed. Align the control unit with the original markings and tighten all screws to the specified torque.
Torque specifications
- M10x50 screws: 38 Nm
- M5x20 screws: 3 Nm
- Original screws: 8 Nm
- Original navigation screw: 3 Nm
- Original control unit screw: 2 Nm
Practical help
Common problems
Navigation system installation
Only follow steps marked with a red star if you are installing the navigation system.
Cable routing issues
Ensure the cable is routed exactly as in the original position before reconnecting the plug.
Before use
- Verify all parts from the parts list are present
- Ensure you have thread locking fluid
- Check availability of a torque wrench
- Ensure the motorcycle is stable and secure
Images and diagrams
- Red star indicates steps for navigation system installation
- Red arrows indicate movement, disconnection, or routing paths
Model compatibility
- Designed for specific motorcycle models; verify compatibility with the Wunderlich catalog
- Navigation system mounting requires additional parts included in the kit

Manual page author
Emily Carter
User documentation editor
Prepares concise manual descriptions and highlights the most useful setup, operation, and maintenance information for readers.