Electronics / Monitors
AcuRite 02029W Thermometer Instruction Manual
Quick guide for the AcuRite 02029W thermometer, covering sensor and display setup, battery installation, backlight settings, and troubleshooting wireless connectivity.
Table of contents
Manual images
Jump to the sectionQuick guide from the manual
This document provides setup and operation instructions for the AcuRite 02029W thermometer. Key steps include installing batteries in both the outdoor sensor and display unit, connecting the power adapter, and ensuring proper placement for accurate temperature readings. The system automatically synchronizes after power-up.
Device Description
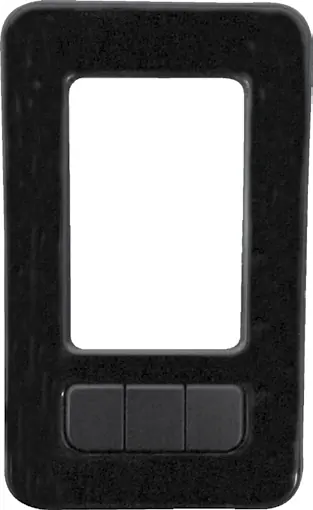
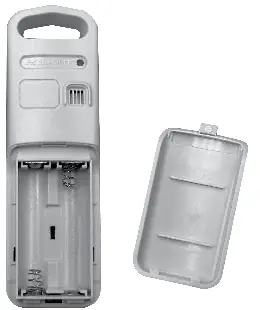
The system consists of a display unit and a wireless outdoor sensor. The display features a color screen with indoor/outdoor temperature, clock, and backlight controls. The outdoor sensor includes an integrated hanger for easy placement.
Setup
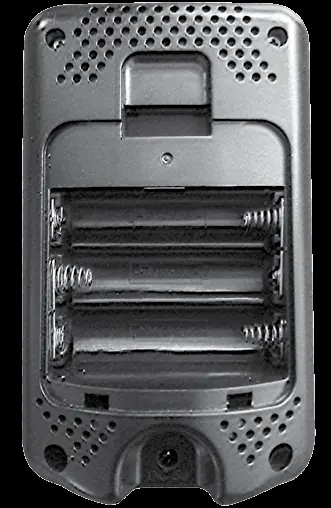
Outdoor Sensor: Slide off the battery compartment cover and insert 2 x AA batteries, following the polarity diagram. Use lithium batteries if temperatures drop below -4°F (-20°C).
Display Unit: Insert 3 x AA batteries (optional, for backup) into the compartment. Plug the included power adapter into the unit as the primary power source for full functionality.
Operation
Time and Units: Press the gear button to enter SET MODE. Use the arrow buttons to adjust the clock hour, minute, and temperature units (°F or °C). The system exits setup automatically after 10 seconds of inactivity.
Backlight Settings: When using the power adapter, press the BACKLIGHT button to cycle through brightness levels (100%, 60%, 30%) and enable AUTO DIM mode, which adjusts brightness based on the time of day.
High/Low Records: Press the arrow buttons to view high and low temperature records. Press and hold the respective arrow button while viewing the record to reset it.
Placement Guidelines
- Keep units within 165 ft (50 m) of each other.
- Place units at least 3 ft (0.9 m) away from electronic devices (TVs, microwaves) to avoid interference.
- Avoid placing units in direct sunlight or near heat sources/vents.
- Mount the outdoor sensor in a shaded, well-ventilated area protected from direct weather.
Care and Maintenance
Clean both units with a soft, damp cloth. Do not use caustic cleaners or abrasives. Keep ventilation ports on the display unit free of dust.
Manufacturer information
AcuRite
Practical help
Common problems
No outdoor sensor reception (no bars)
Relocate units within 165 ft (50 m), ensure they are 3 ft away from electronics, and verify battery type. Synchronization may take up to 20 minutes.
Outdoor temperature is flashing or showing dashes
Indicates wireless interference. Remove batteries from both units, reinstall them, and place units near each other for 20 minutes to re-establish connection.
Inaccurate temperature readings
Ensure both units are placed out of direct sunlight and away from heat sources or vents.
Before use
- Remove protective film from the LCD screen.
- Install 2 AA batteries in the outdoor sensor (lithium recommended for cold).
- Install 3 AA batteries in the display unit (optional backup).
- Connect the power adapter to the display unit.
- Place the sensor in a shaded, protected outdoor location.
- Allow up to 20 minutes for initial synchronization.
Specs in practice
- Outdoor Temperature Range
- -40°F to 158°F (-40°C to 70°C)
- Wireless Range
- 165 ft (50 m) depending on construction materials.
- Data Reporting
- Updates every 30 seconds.
Images and diagrams
- The display unit features a Freeze Alert indicator, indoor/outdoor temperature trends, and an AUTO DIM mode icon.
- The outdoor sensor includes an integrated hanger and a wireless signal indicator that flashes during data transmission.
Model compatibility
- Use high-quality alkaline or lithium batteries; heavy-duty or rechargeable batteries are not recommended.
- Lithium batteries are required for the outdoor sensor in temperatures below -4°F (-20°C).

Manual page author
Michael Turner
Technical manual editor
Reviews PDF manuals for structure, safety notes, and practical product details so readers can find the right information quickly.