Electronics / Monitors
AcuRite 06022RM Weather Sensor Display User Guide
Quick start guide for the AcuRite 06022RM display unit, covering setup, calibration, backlight settings, rainfall tracking, and troubleshooting.
Table of contents
Manual images
Jump to the sectionQuick guide from the manual
This document provides instructions for the AcuRite 06022RM display unit. Note that this display requires a compatible AcuRite 5-in-1 Weather Sensor (sold separately) to function. Ensure the product is registered at www.AcuRite.com to receive warranty service.
Display Unit Setup
To synchronize the display with your sensor:
- Set the A-B-C switch inside the battery compartment to the same letter as your 5-in-1 sensor.
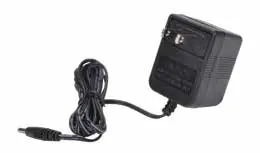
- Plug the power adapter into an electrical outlet.
- Install 6 AA alkaline batteries (optional) as a backup power source to preserve records during power outages.
Set the Time, Date & Units
Press the SET button to enter setup mode. Use the up and down arrows to adjust values and press SET to confirm and move to the next preference. The order is: Clock Hour, Minute, Calendar Month, Date, Year, Temperature Units, Wind Speed Units, Rainfall Units, Pressure Units, Language, and Weather Ticker Speed. The unit will exit setup mode automatically after 20 seconds of inactivity.
Display Backlight Settings
When using the power adapter, the display remains at 100% brightness. Press the BACKLIGHT button to cycle through 60%, 30%, and AUTO DIM modes. In AUTO DIM mode, brightness adjusts automatically based on the time of day and year.
Rainfall Tracking
Press the RAINFALL button to cycle through historical data, including previous rainfall events, monthly totals, yearly totals, and all-time records. The icon on the display indicates when historical data is being viewed.
Calibration
To calibrate temperature, humidity, or barometric pressure, press and hold the up arrow, SET, and down arrow buttons simultaneously for at least 5 seconds. Use the arrow buttons to adjust values and press SET to save. Calibrations are erased if the display is reset or power is lost.
Troubleshooting
If you experience inaccurate readings, ensure the sensor is mounted at least 5 feet off the ground and away from heat sources or obstructions. For display issues, press and hold the CLEAR ALL/RESET button for 10 seconds to restore factory defaults.
Official resources from the manual
Manufacturer information
AcuRite
Practical help
Common problems
Inaccurate temperature or humidity readings
Ensure the display and sensor are away from heat sources, vents, and moisture. Verify the sensor is mounted at least 5 ft off the ground.
No rainfall data
Ensure the rain gauge stabilizer (plastic tab) was removed from the bottom of the sensor and clear any debris from the collector funnel.
Inaccurate wind readings
Ensure the sensor is mounted at least 5 ft high with no obstructions. If wind cups hesitate, lubricate them with graphite powder or spray lubricant.
Display screen not working
Check battery installation or perform a factory reset by holding the CLEAR ALL/RESET button for 10 seconds.
Before use
- Ensure you have a compatible AcuRite 5-in-1 Weather Sensor.
- Set the A-B-C switch in the battery compartment to match the sensor.
- Plug in the power adapter for full functionality.
- Install 6 AA batteries for backup power.
- Register the product online at www.AcuRite.com.
Specs in practice
- Wireless Range
- Up to 330 ft (100 m) depending on home construction materials.
- Operating Frequency
- 433 MHz.
- Power Requirements
- Display: 4.5V, 250mA AC adapter (primary) + 6 AA batteries (backup).
Images and diagrams
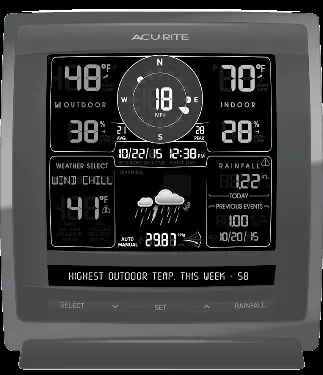
- The display unit features a central wind speed indicator, indoor/outdoor temperature and humidity readings, and a weather ticker at the bottom.
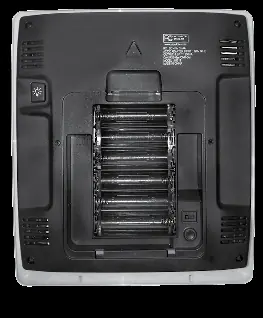
- The back of the display contains the A-B-C switch, power adapter plug, and the CLEAR ALL/RESET button.
Model compatibility
- Requires an AcuRite 5-in-1 Weather Sensor (sold separately) to be operational.

Manual page author
Michael Turner
Technical manual editor
Reviews PDF manuals for structure, safety notes, and practical product details so readers can find the right information quickly.