Electronics / Monitors
AcuRite 02030RM Weather Station Instruction Manual
Quick guide for the AcuRite 02030RM Weather Station, covering sensor setup, display configuration, calibration, and troubleshooting.
Table of contents
Manual images
Jump to the sectionQuick guide from the manual
This document provides essential instructions for setting up and maintaining your AcuRite 02030RM Weather Station. Key steps include matching the A-B-C switch on both the sensor and display unit, installing batteries, and allowing the system to synchronize. The device features a self-calibrating weather forecaster that requires a 14-day learning period to provide accurate local predictions.
Sensor Setup
The outdoor sensor requires 2 AA batteries. For temperatures below -4°F (-20°C), use lithium batteries. Ensure the A-B-C switch inside the battery compartment matches the setting on the display unit to enable synchronization.


Display Unit Setup
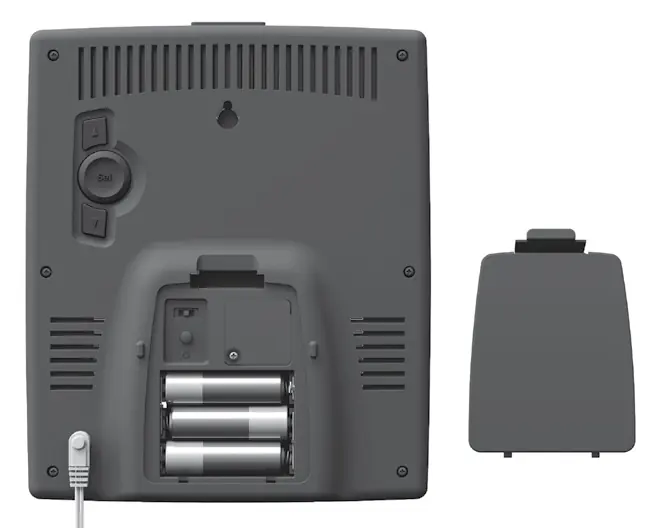
The display unit is powered primarily by the included 5V power adapter. 3 AA batteries can be installed as a backup power source to preserve records during power outages. Ensure the A-B-C switch on the back of the unit matches the sensor's setting.
Settings and Calibration
Press the SET button to enter setup mode to configure time, date, units, and time zone. The device also allows for manual calibration of temperature, humidity, and barometric pressure. To calibrate, hold the appropriate buttons as described in the manual to adjust readings to match local conditions.
Placement Guidelines
For maximum accuracy, place the display unit in a dry area. The outdoor sensor should be placed outside, ideally 4 to 8 feet above the ground in a shaded area with good airflow. Keep both units within 330 feet (100 meters) of each other and away from large metallic objects or electronic interference sources like TVs and microwaves.
Maintenance
Clean the display and sensor with a soft, damp cloth. Avoid caustic cleaners or abrasives. The Intelli-Time clock uses a CR2032 coin-cell battery, which should be replaced if the time is not retained after a power loss.
Manufacturer information
AcuRite
Practical help
Common problems
No outdoor sensor reception (no bars)
Relocate units within 330 ft (100 m), ensure they are 3 ft away from electronics, and verify A-B-C switch settings match.
Outdoor temperature flashing or showing dashes
Remove batteries from both units, verify A-B-C switch match, reinstall batteries, and let them sit near each other for 20 minutes.
Inaccurate forecast
The unit requires a 14-day learning period to calibrate pressure. Allow it to run continuously for up to 33 days for full accuracy.
Before use
- Remove protective film from the LCD screen.
- Set A-B-C switches on both sensor and display to the same letter.
- Install 2 AA batteries in the sensor.
- Connect the power adapter to the display unit.
- Install optional 3 AA backup batteries in the display unit.
- Register the product online at AcuRite.com for warranty service.
Specs in practice
- Wireless Range
- 330 ft (100 m) maximum distance between sensor and display, depending on obstacles.
- Operating Frequency
- 433 MHz signal used for wireless communication.
- Data Reporting
- Outdoor data updates every 16 seconds; indoor data updates every 60 seconds.
Images and diagrams
- The A-B-C switch is located inside the battery compartments of both the sensor and the display unit.
- The display unit back features a reset button, setup buttons (Set, Up, Down), and a plug-in for the power adapter.
- The Intelli-Time battery compartment is located on the back of the display unit, requiring a CR2032 battery.
Model compatibility
- Use lithium batteries in the outdoor sensor for temperatures below -4°F (-20°C).
- Do not use rechargeable or heavy-duty batteries.

Manual page author
David Miller
Documentation analyst
Organizes user manual content into clear summaries, with attention to model details, product context, and everyday usability.