Home / Security
Integration Guide for Aeotec Siren 6 with FIBARO Home Center 2/Lite
A comprehensive guide on integrating the Aeotec Siren 6 with FIBARO Home Center 2 or Lite. Includes steps for importing the virtual device, configuring network settings, setting up Base64 authentication, and creating automated scenes.
Quick answers from the manual
Quick answer
- To integrate the Aeotec Siren 6 with FIBARO Home Center 2/Lite, import the Virtual Device file, configure the IP to 127.0.0.1 and TCP Port to 11111 in the Advanced tab, and update the API commands with your Base64 encoded credentials. p. 1, 2, 3
Key actions
- Import Virtual Device p. 1
- Configure Network Settings p. 2
Technical specifications
| Parameter | Value | Meaning | Pages |
|---|---|---|---|
| IP Address | 127.0.0.1 | Localhost address for virtual device communication. | p. 2 |
| TCP Port | 11111 | Communication port for the virtual device. | p. 2 |
Show 1 more answers Show less
Where to find it in the PDF
- Preparation p. 1
- Settings p. 2
- Authentication p. 3
- Using in Scenes p. 5, 6
Table of contents
Manual images
Click an image to enlargeQuick guide from the manual
This document provides the necessary steps to integrate the Aeotec Siren 6 with a FIBARO Home Center 2 or Lite controller. It covers the installation of the required Virtual Device, network configuration, authentication setup, and how to utilize the siren within block scenes.
Preparation
Before starting, ensure you have downloaded the Virtual Device file for the Siren 6. Follow these steps to import it:
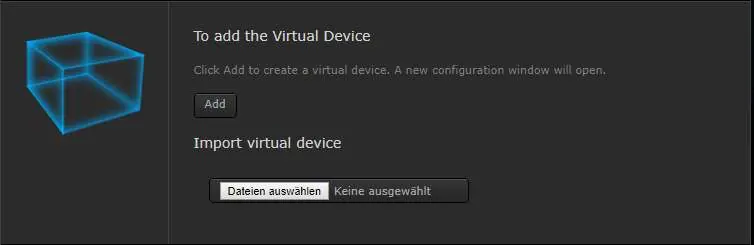
- Log in to your HomeCenter 2/Lite interface.
- Ensure the Siren 6 is paired/included as described in its main manual.
- Navigate to the Devices page.
- Click Add or Remove device on the left side.
- Select the downloaded Virtual Device file and confirm to import.
- Return to the Devices page to locate the newly added Siren 6.
- Click the small wrench icon to open the Siren 6 settings.
- Record the Device ID listed under "ID:".
Settings and Configuration
Once the device is imported, you must configure the network settings for the virtual module:
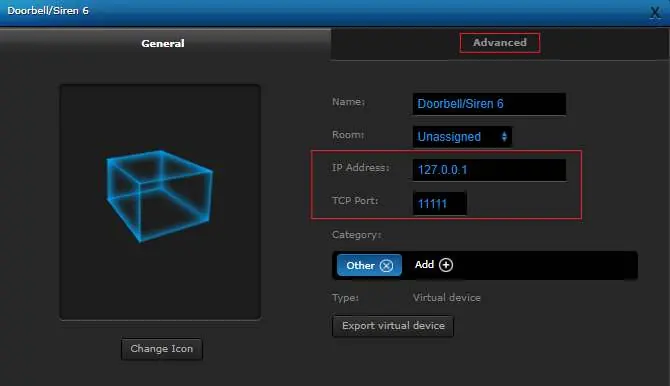
- Open the configuration of the Virtual Module.
- Switch to the Advanced tab.
- Set the IP-Address to 127.0.0.1.
- Set the TCP-Port to 11111.
- Scroll down to the settings section and enter the Device ID you recorded earlier in the DEVICEID field.
Authentication Setup
To ensure the virtual device can communicate with the controller, you must provide authentication credentials in Base64 format:
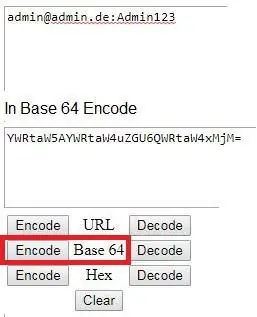
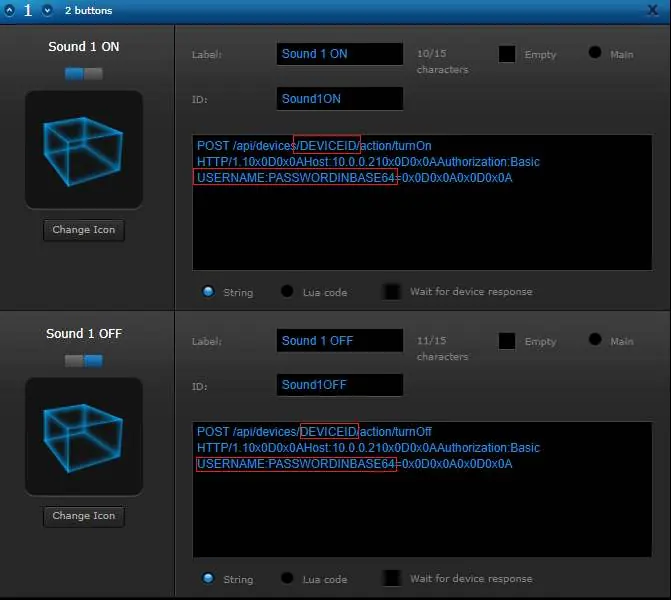
- Go to a Base64 encoding website.
- Enter your Home Center username and password in the format: username:password (separated by a colon).
- Click Encode Base64.
- Copy the resulting string.
- Replace the placeholder in the API command fields for all buttons with this encoded string.
- Press Save on the right side to apply changes.
Using in Block Scenes
To use the siren in your automation scenes:
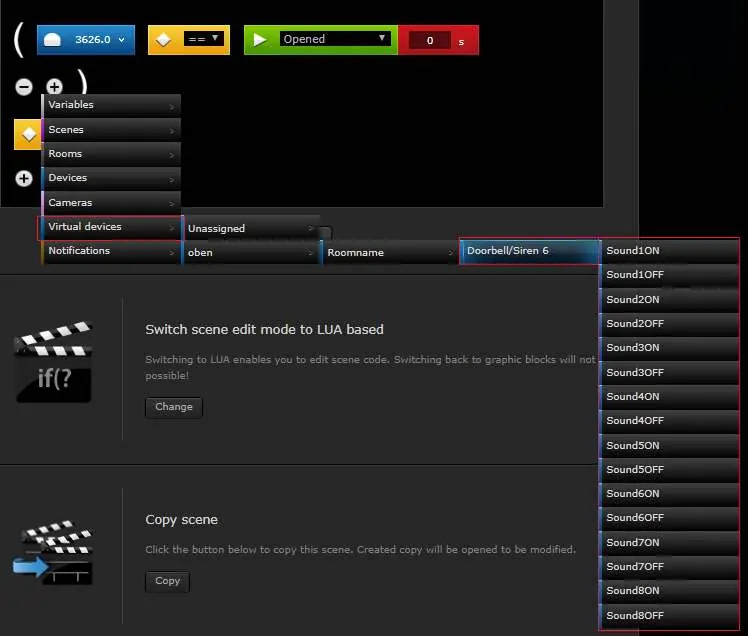
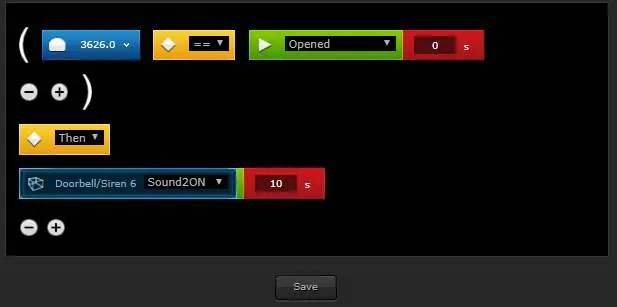
- Create a new Block Scene.
- Select your desired trigger.
- Select Virtual module as the device to be triggered.
- Choose the associated button (e.g., Sound 1 ON) for the action.
- Save the scene.
Practical help
Common problems
Device not found in Devices list
Ensure the Virtual Device file was correctly imported and the import process was confirmed.
Authentication failure
Verify that the Base64 string was generated using the correct 'username:password' format and that no extra characters were included.
Before use
- Pair/Include the Siren 6 with the Home Center first.
- Download the Virtual Device file.
- Have your Home Center username and password ready for Base64 encoding.
- Record the Device ID of the Siren 6.
Show more Show less
Images and diagrams
- The Virtual Device configuration panel shows where to input the IP Address and TCP Port.
- The Base64 encoding tool interface shows how to convert credentials for API authentication.
Model compatibility
- Compatible with FIBARO Home Center 2 and Home Center Lite.

Manual page author
David Miller
Documentation analyst