Home Appliances / Cookers & Ranges
Assembly Instructions for AGA 1098BEG-1 Accent Chair
Quick assembly guide for the AGA 1098BEG-1, 1098DGY-1, and 1098BUE-1 accent chairs. Includes parts list, step-by-step assembly instructions, and fabric care tips.
Table of contents
Manual images
Click an image to enlargeQuick Assembly Guide
This document provides assembly instructions for the AGA accent chair models 1098BEG-1, 1098DGY-1, and 1098BUE-1. Ensure all parts are present before beginning assembly to ensure a smooth setup process.
Parts List
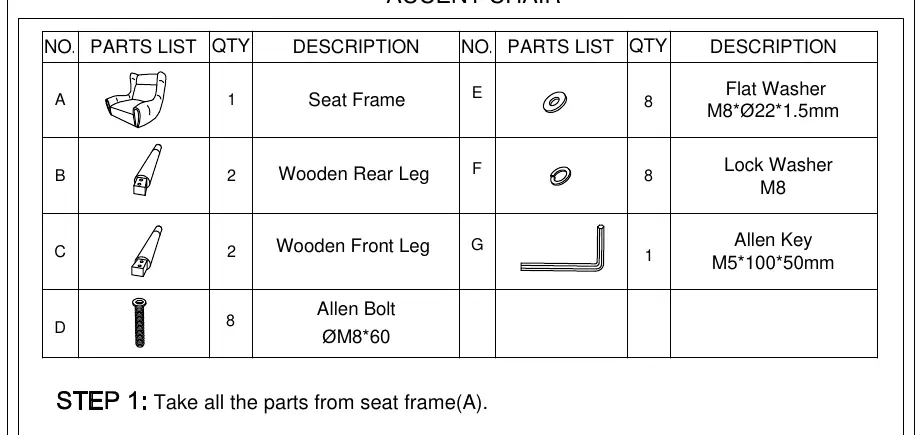
- A: Seat Frame (1)
- B: Wooden Rear Leg (2)
- C: Wooden Front Leg (2)
- D: Allen Bolt ØM8*60 (8)
- E: Flat Washer M8*Ø22*1.5mm (8)
- F: Lock Washer M8 (8)
- G: Allen Key M5*100*50mm (1)
Assembly Instructions
Step 1: Preparation
Remove all parts from the seat frame (A) packaging.
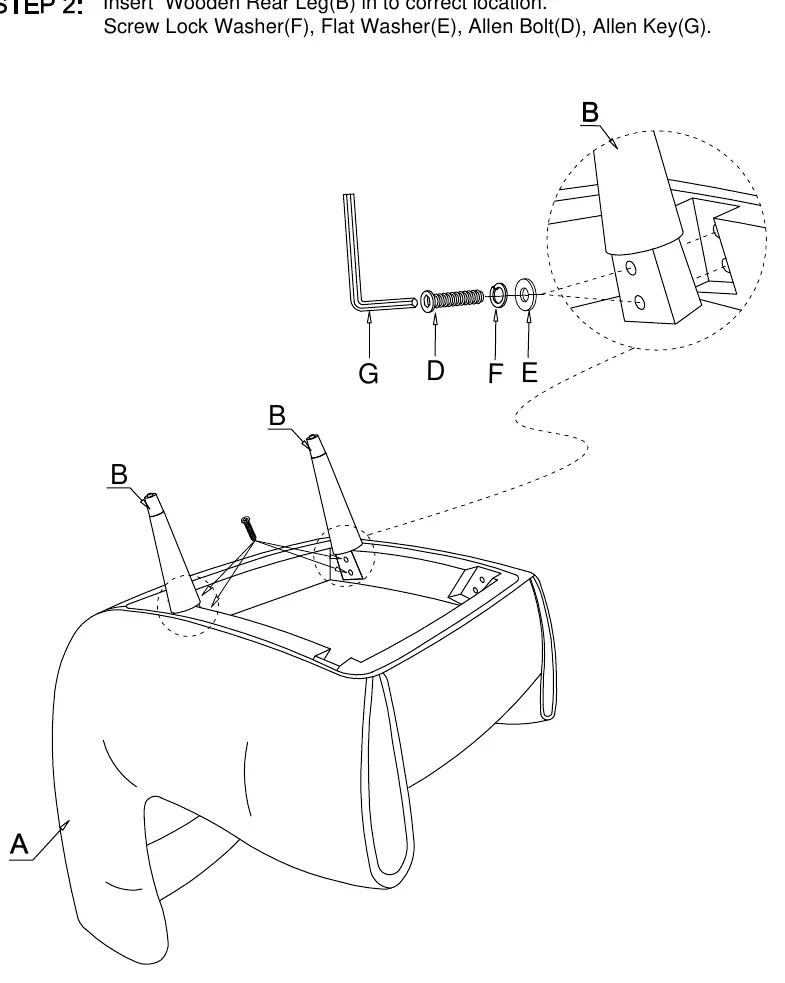
Step 2: Attach Rear Legs
Insert the wooden rear legs (B) into the correct location on the seat frame. Secure each leg using the lock washer (F), flat washer (E), and Allen bolt (D). Tighten the bolts using the provided Allen key (G).
Step 3: Attach Front Legs
Insert the wooden front legs (C) into the correct location. Secure each leg using the lock washer (F), flat washer (E), and Allen bolt (D). Tighten the bolts using the provided Allen key (G).
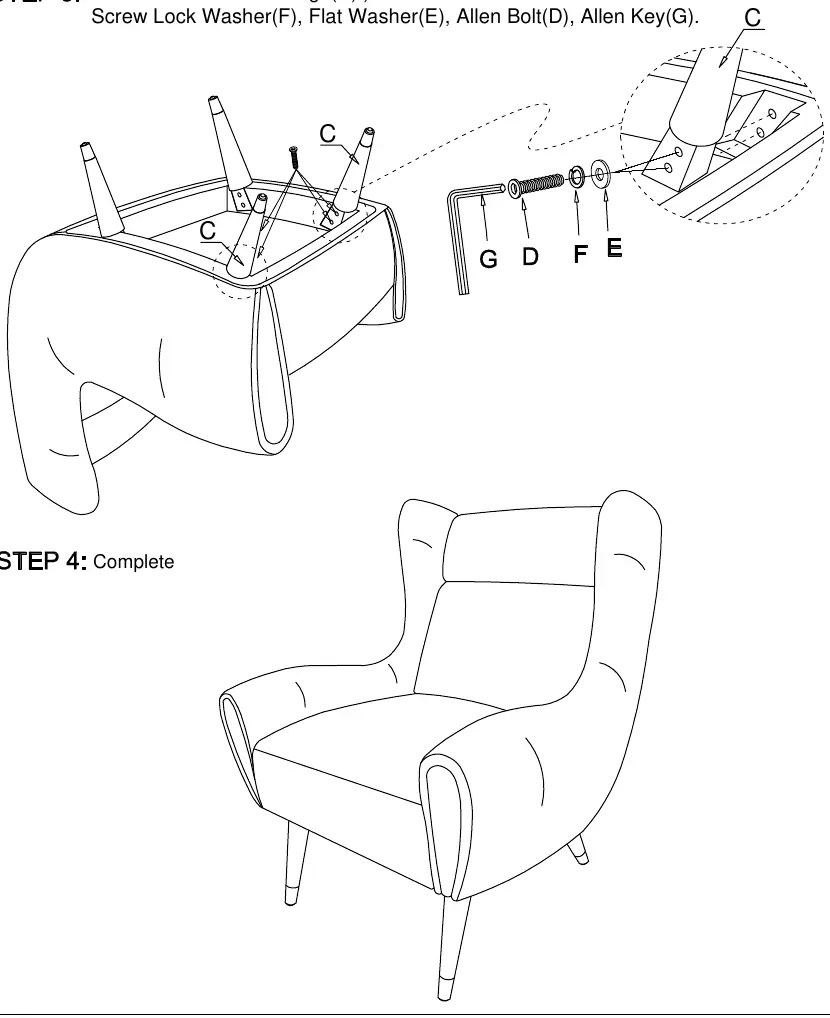
Step 4: Completion
Ensure all bolts are tightened securely. The chair is now fully assembled and ready for use.

Care Instructions for Fabric Furniture
- Avoid exposing furniture directly to sunlight or heating/air conditioning outlets to prevent fabric fading or damage.
- Wipe gently with a damp soft cloth to remove dust, dirt, and grime.
Practical help
Before use
- Verify all parts (A-G) are present according to the parts list
- Ensure you have the provided Allen Key (G) for assembly
- Clear a workspace to avoid scratching the fabric during assembly
Specs in practice
- Allen Bolt ØM8*60
- 8mm diameter, 60mm length bolt used for leg attachment
- Flat Washer M8
- Protective washer used between the bolt and the leg to prevent damage
Images and diagrams
- The assembly sequence for each leg is: Bolt -> Lock Washer -> Flat Washer -> Leg -> Frame
Model compatibility
- Models 1098BEG-1, 1098DGY-1, and 1098BUE-1 share the same assembly process.

Manual page author
Emily Carter
User documentation editor
Prepares concise manual descriptions and highlights the most useful setup, operation, and maintenance information for readers.