Computers / Laptops
ASUS M1703QA Customer Self Repair Guide
A comprehensive guide for the ASUS M1703QA laptop, covering safe disassembly, RAM module installation, and M.2 SSD installation.
Table of contents
Manual images
Click an image to enlargeQuick guide from the manual
This guide provides instructions for customers to perform self-repairs on the ASUS M1703QA laptop. Before starting, ensure you have the necessary tools: a screwdriver, a non-conductive pry tool, tweezers, and anti-static gloves. Always disconnect all peripherals, power cables, and the battery pack before beginning any disassembly to prevent electric shock or short circuits.
Before disassembly
To ensure a successful repair, follow these preparation steps:
- Prepare a smartphone or camera to take photos of the internal layout to remember the location of parts and cables.
- Wear anti-static gloves to protect sensitive electronic components from electrostatic discharge (ESD).
- Place the laptop on a stable, flat surface.
- Handle all components by their edges to avoid touching integrated circuits.
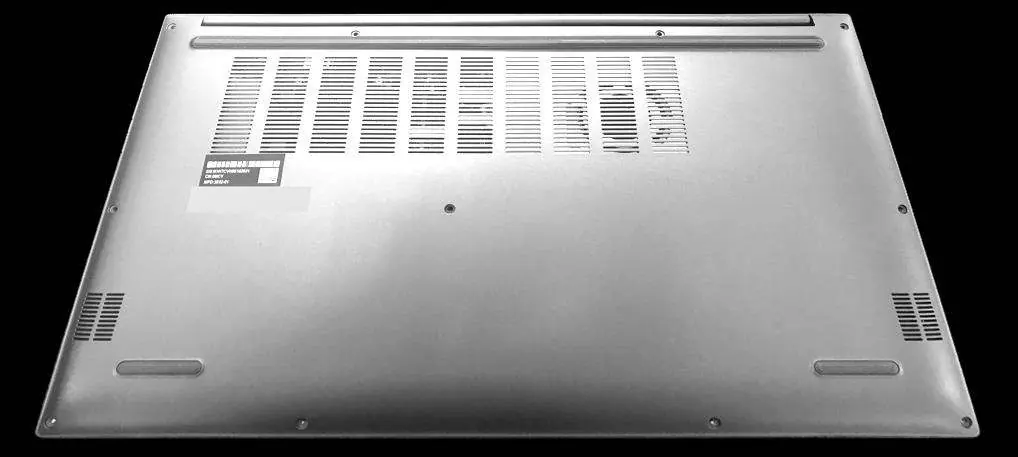
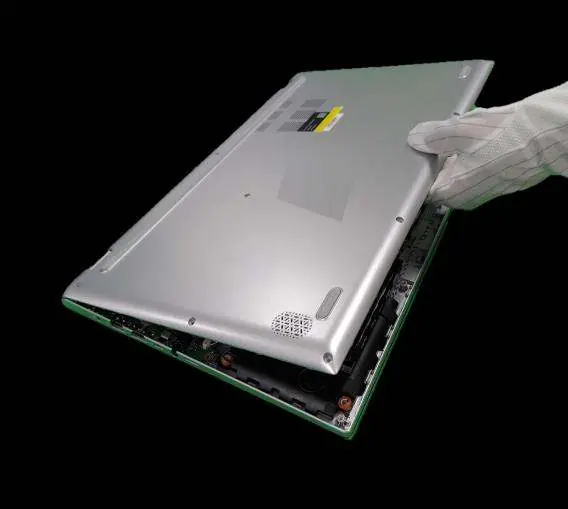
Removing the base cover
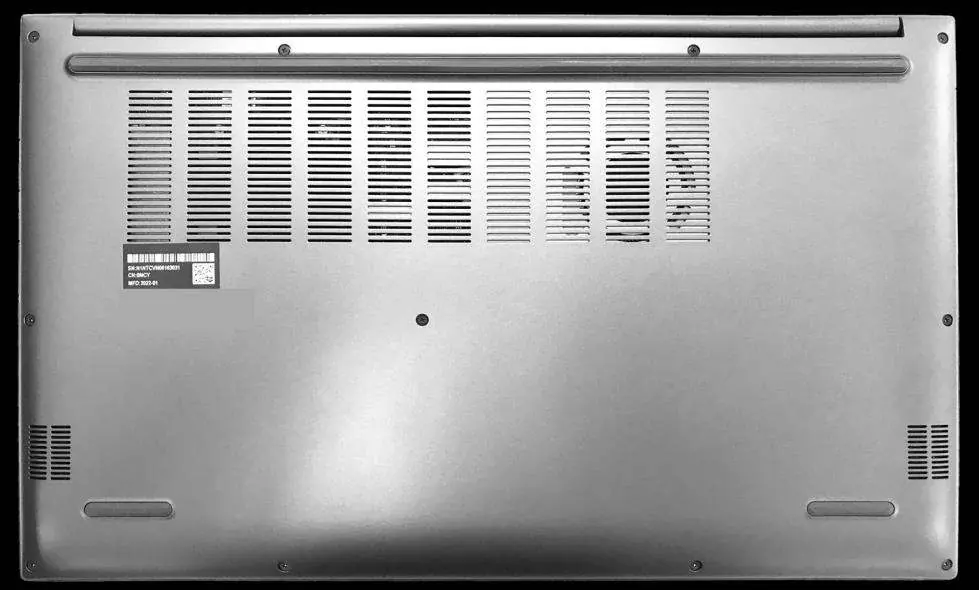
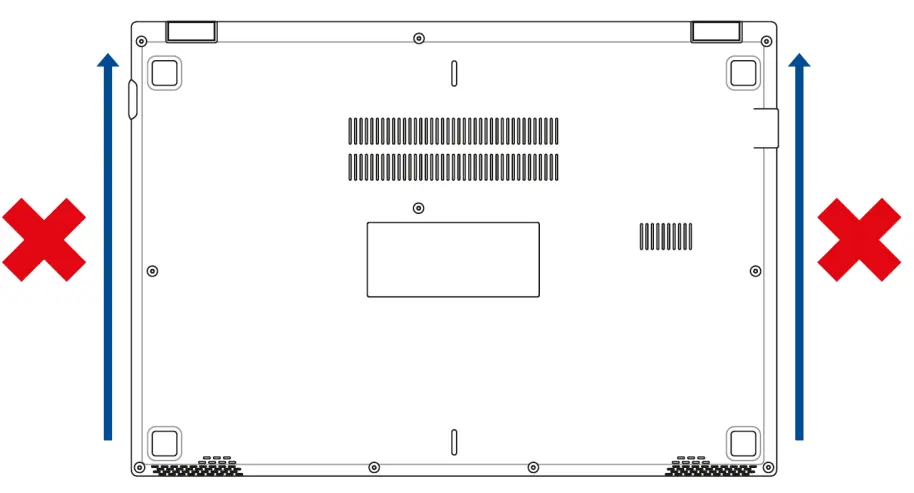
- Remove all screws securing the base cover to the bottom of the laptop.
- Use a non-conductive pry tool to gently lift the base cover. Start at the indicated area and work carefully.
- Important: Do not slide the pry tool along the side of the laptop to avoid damaging the casing.
- Lift the cover slowly and ensure no cables are snagged before removing it completely.
- Once the cover is off, immediately disconnect the battery cable to cut power to the system.
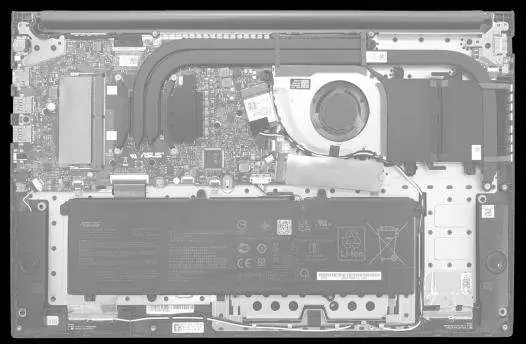
Installing a RAM module
- Follow the base cover removal steps above.
- Disconnect the battery cable.
- Unlock the existing RAM module and remove it. If there is an absorber (thermal/protective material) on the old RAM, tear it off carefully to reuse it on the new module.
- Remove the specification label from the old RAM and paste it onto the new module if required.
- Align the new RAM module with the memory slot at a 30-degree angle.
- Push the module down until it clicks securely into place.
- Reconnect the battery cable and reattach the base cover.
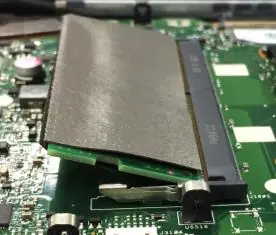
Installing an M.2 card (SSD)
- Follow the base cover removal and battery disconnection steps.
- Remove the screw securing the existing M.2 SSD and pull the card out.
- Remove the absorbers from the old SSD and reuse them on the new SSD.
- Align the new M.2 SSD with the slot at an angle of less than 15 degrees.
- Insert the card and secure it with the screw.
- Reconnect the battery cable and reattach the base cover.
Reassembly
To reassemble the laptop, install the base cover at a slight tilt (15-30 degrees) starting from the upper side. Press the upper side to fix it, then lower the cover and press the left, right, and lower sides until it snaps into place. Finally, secure the base cover with the screws.
Manufacturer information
ASUSTeK Computer Inc.
Practical help
Common problems
Difficulty removing the base cover
Ensure all screws are removed. Use a non-conductive pry tool carefully; do not slide it along the side of the laptop to prevent damage.
Laptop does not power on after repair
Verify that the battery cable is fully reconnected and the base cover is properly secured.
Before use
- Prepare a camera to document part locations
- Wear anti-static gloves
- Disconnect all peripherals and power cables
- Remove the battery pack
- Use a non-conductive pry tool
Specs in practice
- M.2 card (SSD)
- Solid State Drive for storage expansion.
Images and diagrams
- Base cover screw locations
- Battery connector disconnection
- RAM installation angle (30 degrees)
- M.2 SSD installation angle (<15 degrees)
Model compatibility
- Only purchase RAM and M.2 SSD modules from authorized retailers to ensure compatibility.
- The appearance of the bottom view may vary per model.

Manual page author
Emily Carter
User documentation editor
Prepares concise manual descriptions and highlights the most useful setup, operation, and maintenance information for readers.