Home Appliances / Commercial Kitchen Equipment
User Manual for Avantco 177SL612A and 177SL713A Meat Slicer
Comprehensive user guide for the Avantco 177SL612A and 177SL713A meat slicers. Includes installation, operation modes, cleaning, sharpening, and maintenance instructions.
Quick answers from the manual
Quick answer
- The Avantco 177SL612A/713A is a medium-duty meat slicer. It features manual and auto feed modes, integrated sharpening, and requires regular cleaning and lubrication. p. 1, 2
Key actions
- Cleaning and Sanitizing p. 4, 5, 6, 7
- Sharpening the Blade p. 12
First start
- Place the unit on a stable surface, clean with a damp cloth, and ensure the power supply is correct (AC). p. 2, 3
Problems and fixes
Blade dullness
Use the integrated sharpening stones.
p. 12Maintenance and reset
- Lubricate side shafts weekly via port [B] with two pushes of the dispenser. p. 3
Technical specifications
| Parameter | Value | Meaning | Pages |
|---|---|---|---|
| Blade Rotation Speed | 530 rpm | Speed of the blade rotation | p. 13 |
| Cut Thickness | 0 - 0.6" | Range of slice thickness | p. 13 |
Where to find it in the PDF
- Installation and Operation p. 2
- Cleaning and Sanitizing p. 4, 5, 6, 7
- Sharpening p. 12
- Parts Diagram p. 14, 15
Table of contents
Manual images
Click an image to enlargeQuick guide from the manual
This manual provides instructions for the Avantco 177SL612A and 177SL713A meat slicers. These units are designed for medium-duty, indoor use only. Key operations include manual and automatic feeding, regular blade sharpening, and thorough daily cleaning to maintain hygiene standards.
Installation and Operation
Installation: Place the unit on a stable, dry surface at a comfortable working height, away from high-traffic areas. Do not plug the unit in until installation is complete.
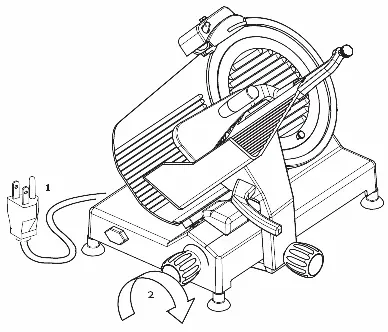
Operation Modes: The slicer features two feed modes controlled by lever H (see Diagram 1):
- Manual Mode (Position A): Disengages auto feed. Use the handle on the food pusher to manually move the carriage back and forth.
- Auto Feed Mode (Position B): Engages auto feed. Switch on the blade motor first, then the auto feed motor.
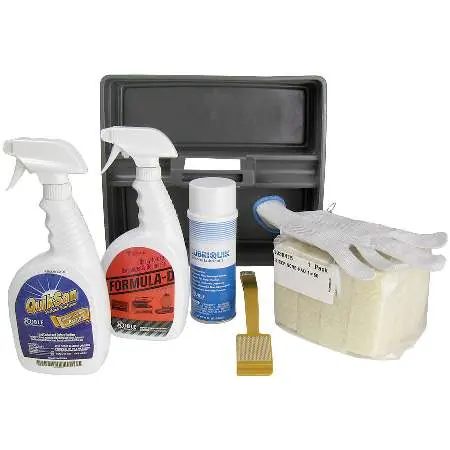
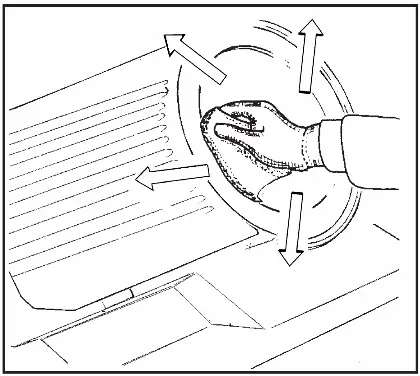
Cleaning and Sanitizing
The machine must be cleaned and sanitized at least once a day. Always unplug the unit before cleaning.
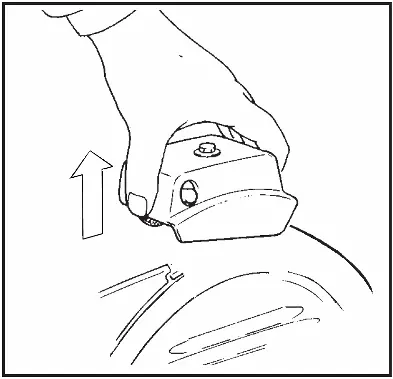
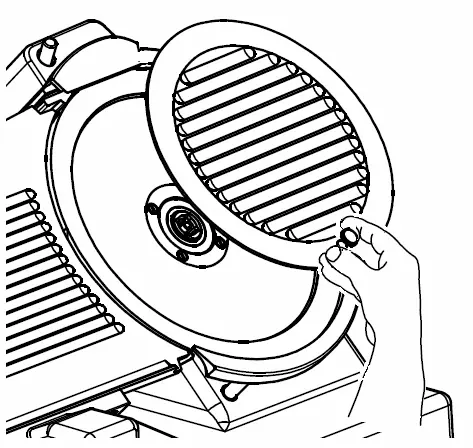
- Disassembly: Remove the meat pusher, product table, center plate, slice deflector, and sharpener.
- Cleaning: Use hot water and a biodegradable detergent (7-8 pH). Use a soft, spongy cloth and a semi-rigid nylon brush.
- Sanitizing: Use a USDA-approved sanitizer. Rinse with hot water and allow to air dry.
- Warning: Never use water or steam jets to clean the slicer. Always wear protective gloves when handling the blade.
Sharpening Instructions
Sharpen the knife when slice quality decreases. Do not sharpen a dirty knife.
- Switch off and unplug the slicer.
- Set the thickness control knob to 0.
- Loosen the sharpener locking knob, rotate the sharpener so stones sit on each side of the knife, and retighten.
- Plug in and switch on the power.
- Press the sharpening stone button for 5-10 seconds.
- Press the deburring stone button for 2-3 seconds.
- Switch off, return the sharpener to the stored position, and clean the slicer before use.
Maintenance
Gear Box Oil Gauge: Check the glass window [A]. If levels drop, add oil using the provided dispenser into port [B]. A new machine requires 20 minutes of operation before the oil gauge begins showing oil. Lubricate side shafts weekly via port [B] with two pushes of the dispenser.
Safety
- Operate on AC current only.
- Wear close-fitting clothes and protective gloves during maintenance.
- Replace the blade if it has reduced in size by 5mm.
- Only trained personnel should operate the machine.
Manufacturer information
Avantco Equipment
Practical help
Common problems
Slicer not cutting properly
Sharpen the blade using the integrated sharpening stones.
Oil gauge not showing oil
Run the machine for 20 minutes; if still empty, add oil via port [B].
Food not feeding automatically
Ensure control lever H is set to position B.
Before use
- Ensure the unit is on a stable, dry surface.
- Clean the unit with a damp cloth and neutral detergent.
- Check that the power supply matches the machine requirements (AC only).
- Ensure the meat support platform is in the start position.
- Verify the thickness knob is set to the desired slice thickness.
Specs in practice
- Blade Rotation Speed
- 530 rpm
- Cut Thickness
- 0 - 0.6 inches
Images and diagrams
- Diagram 1: Shows the control lever (H) for switching between Manual (A) and Auto (B) modes.
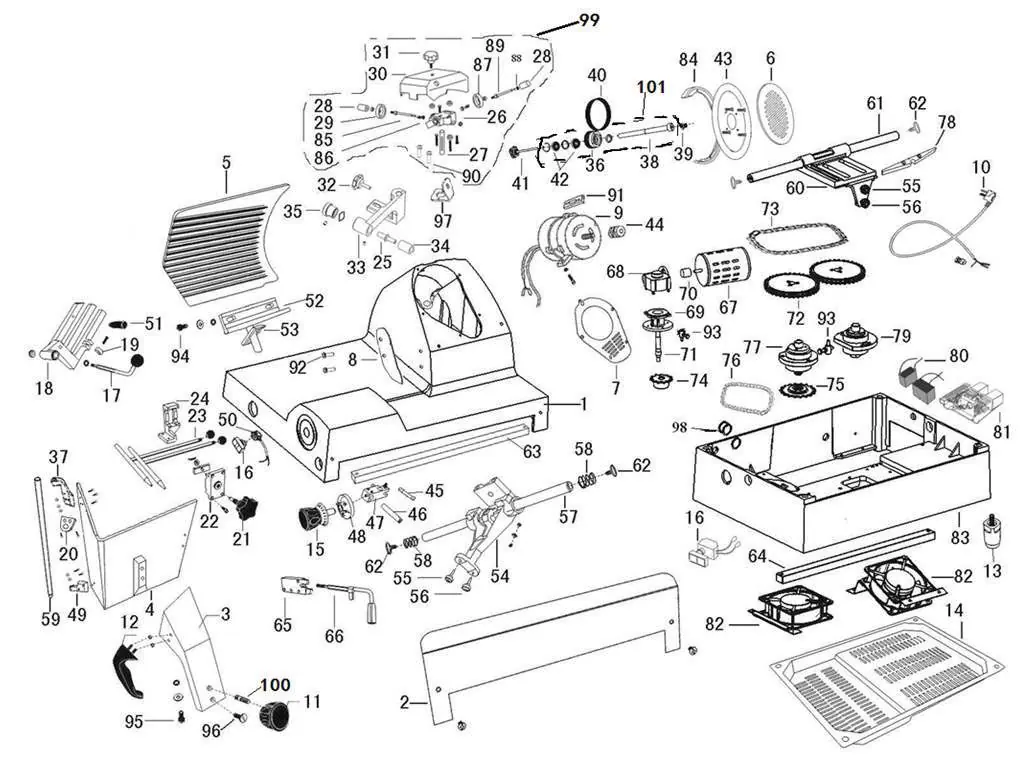
- Exploded parts diagrams: Used for identifying replacement parts like the blade, belt, and motor.
Model compatibility
- Indoor use only.
- Operate on AC current only (do not use DC).

Manual page author
Emily Carter
User documentation editor
Prepares concise manual descriptions and highlights the most useful setup, operation, and maintenance information for readers.