Home Appliances / Commercial Kitchen Equipment
User Manual for Avantco Refrigerated Prep Tables
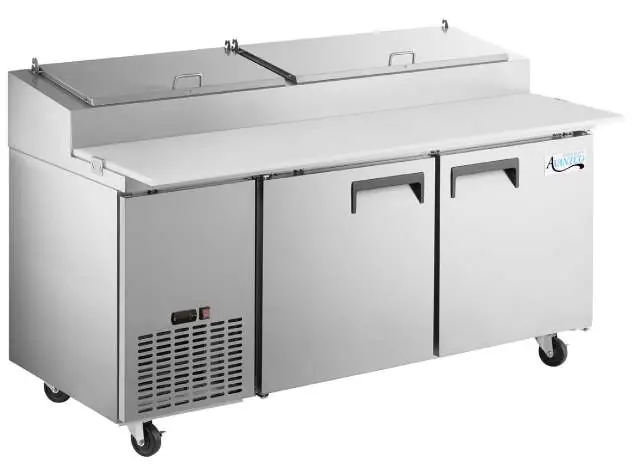
Comprehensive user guide for Avantco Refrigerated Prep Tables. Includes installation instructions, temperature control settings, cleaning procedures, food pan layouts, and troubleshooting tips for Sandwich and Pizza Prep models.
Quick answers from the manual
Quick answer
- Avantco Refrigerated Prep Tables are designed for indoor use in temperature-controlled environments. Key maintenance includes cleaning the condenser coil monthly and ensuring proper airflow by maintaining 4 inches of clearance at the back of the unit. p. 3, 14
Key actions
- Clean the condenser coil at least once per month to prevent compressor damage. p. 14
- Adjust the temperature using the digital controller by holding the SET button. p. 4
First start
- If the unit was transported on its side, let it stand upright for at least 24 hours before plugging it in. p. 3
Problems and fixes
Compressor not running
Check fuse/breaker, power connection, thermostat setting, or wait for defrost cycle to finish.
p. 15Maintenance and reset
- Manual defrost can be initiated by pressing the defrost button (Snowflake and down arrow) for 3 seconds. p. 5
Technical specifications
| Parameter | Value | Meaning | Pages |
|---|---|---|---|
| Temperature Range | 33°F - 40°F | Operating cycle range | p. 4 |
Where to find it in the PDF
- Installation and Safety p. 2, 3, 6
- Operation and Controls p. 4, 5
- Food Pan Layouts p. 7, 8, 9, 10
- Cleaning and Troubleshooting p. 14, 15
Table of contents
Manual images
Click an image to enlargeQuick Guide
This manual provides essential instructions for the setup, operation, and maintenance of Avantco Refrigerated Prep Tables. Before using the unit, ensure it is placed on a level surface and has been standing upright for at least 24 hours if it was transported on its side. Always use a dedicated, grounded electrical outlet and ensure proper ventilation with at least 4 inches of clearance at the back of the unit.
Safety Information
Warning: This unit uses flammable refrigerant. Repairs must only be performed by trained service personnel. Do not puncture the refrigerant tubing. Do not use extension cords, and do not plug or unplug the unit with wet hands.
Installation
The unit is intended for indoor use in a temperature-controlled environment (below 75°F and 60% relative humidity). Malfunctions due to improper environmental conditions are not covered under warranty. Ensure the unit is installed away from heat and moisture-generating equipment. Maintain 3 inches of clearance around all louvered or vented panels for proper airflow.

Temperature Controls
The refrigerator is factory-set to cycle between 33°F and 40°F. To adjust the temperature:
- Hold the SET button for 1 second until the display flashes the current minimum temperature.
- Use the arrow buttons to adjust the desired minimum temperature.
- Press SET again to save the settings.
Note: The cabinet temperature will fluctuate up to 7°F above the set minimum as the compressor cycles.
Operation
The unit features an automatic defrost cycle. To run a manual defrost cycle (on digital control models only), press the defrost button (Snowflake and down arrow) for approximately 3 seconds. When loading product, ensure shelves are level and leave 2-4 inches of space between the back wall and the product to maintain airflow.
Cleaning and Maintenance
Regular maintenance is required for efficient operation:
- Interior: Wipe down with warm water and mild soap. Do not use steel wool or abrasive cleaners.
- Door Gaskets: Clean weekly by soaking in warm soapy water.
- Condenser Coil: Clean at least once per month. Disconnect power, remove the front/base cover, and use a soft brush or vacuum to remove dust and lint from the finned coil. Straighten bent fins with a fin comb if necessary.
Troubleshooting
If the unit is not performing correctly, check the following:
- Compressor not running: Check for a blown fuse, tripped circuit breaker, or unplugged power cord. Ensure the thermostat is not set too high and the unit is not in a defrost cycle.
- Cabinet too warm: Check for blocked airflow, excessive warm product, or a dirty condenser coil. Ensure the door is fully closed and the gasket is sealing properly.
- Condensation: Ensure the gasket is sealing properly and the ambient relative humidity is below 60%.
Manufacturer information
Avantco Equipment
Practical help
Common problems
Compressor not running
Check for a blown fuse or tripped circuit breaker, ensure the unit is plugged in, and verify the thermostat setting. Wait if the unit is in a defrost cycle.
Cabinet temperature is too warm
Ensure airflow is not blocked, clean the condenser coil, check that the door is fully closed, and verify the thermostat setting.
Condensation on cabinet or floor
Check that the door gasket is sealing properly and ensure the ambient relative humidity is below 60%.
Before use
- Ensure the unit is on a strong, level surface.
- If transported on its side, let the unit stand upright for at least 24 hours before plugging in.
- Ensure the unit is plugged into a dedicated, grounded electrical outlet.
- Verify that the unit is in a well-ventilated area with at least 4 inches of clearance at the back.
- Ensure all accessories like shelves and clips are installed.
- Verify the unit is not in direct sunlight or near heat-generating equipment.
Specs in practice
- Operating Temperature
- Factory-set to cycle between 33°F and 40°F.
- Ambient Environment
- Must be used in environments below 75°F and 60% relative humidity.
Images and diagrams
- The manual includes detailed food pan layout diagrams for all Sandwich and Pizza Prep models, specifying the number and size of pans (1/6, 1/9, 1/3) that fit each unit.
Model compatibility
- For indoor use only.
- Not designed for chilling warm products; meant for keeping cold products cold.
- Manual defrost is only available on models with digital controls.

Manual page author
Michael Turner
Technical manual editor
Reviews PDF manuals for structure, safety notes, and practical product details so readers can find the right information quickly.