Industrial / Commercial Refrigeration
User Manual for Avantco Round Refrigerated Bakery Case
Quick guide for the Avantco Round Refrigerated Bakery Case. Includes installation guidelines, digital temperature controller operation, maintenance procedures, and safety warnings.
Quick answers from the manual
Quick answer
- The Avantco Round Refrigerated Bakery Case is factory-set to optimal temperatures. Installation requires a level surface, 6 inches of clearance, and a dedicated grounded outlet. If the unit was transported on its side, wait 24 hours before plugging it in. p. 1, 4, 6
Key actions
- Adjusting Temperature p. 5
- Cleaning Condenser Coil p. 7
First start
- Wait 24 hours if transported on its side before plugging in. p. 4
Problems and fixes
Display shows 'Disorder'
Perform a factory reset by pressing the Down arrow for 2 seconds, then the Up arrow for 6 seconds.
p. 5Maintenance and reset
- Factory Reset Procedure p. 5
Where to find it in the PDF
- Safety Warnings p. 2
- Structure and Components p. 3
- Installation p. 4
- Digital Controller Operation p. 5
- Electrical and Defrost p. 6
- Maintenance p. 7
Table of contents
Manual images
Click an image to enlargeQuick guide from the manual
This manual provides essential instructions for the setup, operation, and maintenance of your Avantco Round Refrigerated Bakery Case. Key requirements include allowing the unit to stand upright for 24 hours if it was transported on its side, ensuring a 6-inch clearance for ventilation, and never blocking the air exhaust. Always consult an authorized service technician for repairs.
Installation
Proper installation is critical for the unit's performance and longevity:
- Surface: Install on a strong, leveled surface to prevent noise and malfunctions.
- Clearance: Maintain at least 6 inches of space on the sides and back for proper airflow.
- Environment: Use indoors only. Avoid direct sunlight, high humidity, dusty areas, and proximity to heat-generating equipment.
- Electrical: Use a dedicated, grounded outlet with appropriate over-current protection. Do not use extension cords.
Operation and Temperature Control
The unit is factory-set to optimal temperatures. The digital controller allows for adjustments:
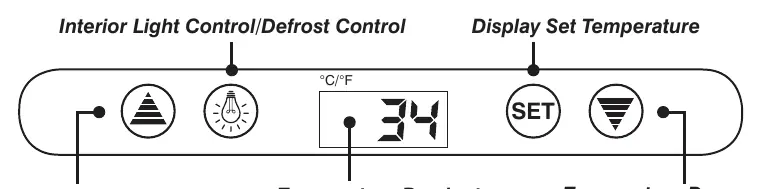
- Check Temperature: Press the SET button.
- Adjust Temperature: Press the SET button, then use the Up or Down arrow buttons to modify the value. Press SET again to save.
- Illumination: Press the light button to toggle interior lights.
- Manual Defrost: Press and hold the defrost button for 6 seconds.
- Reset: If the display shows "Disorder", press the Down arrow for 2 seconds until the buzzer rings, then press the Up arrow for 6 seconds until it rings again. The display will flash to confirm factory reset.
Maintenance and Cleaning
Regular maintenance ensures efficient operation:
- Condenser Coil: Clean at least once per month to remove dust and lint. Use a commercial condenser coil cleaner.
- Interior: Clean with a solution of warm water and mild soap. Avoid abrasive cleaners, steel wool, or bleach.
- Fan Blades/Motor: Clean with a soft cloth. If washing, cover the motor to prevent moisture damage.
- Loading: Do not block air vents. Ensure shelves are level and secured before loading.
Manufacturer information
Avantco Equipment
Practical help
Common problems
Unit is noisy
Ensure the unit is placed on a strong, leveled surface.
Unit malfunctioning or poor performance
Check for dust on the condenser coil, ensure 6-inch clearance, and verify the unit is not in a high-humidity or high-temperature area.
Display shows 'Disorder'
Perform a factory reset: Press the Down arrow for 2 seconds (buzzer rings), then the Up arrow for 6 seconds (buzzer rings again).
Before use
- If transported on its side, let the unit stand upright for at least 24 hours before plugging in.
- Ensure all shelves and shelf clips are installed.
- Allow the unit to reach the desired temperature before loading products.
- Verify the outlet is grounded and dedicated to the unit.
- Ensure the area is well-ventilated and away from heat sources.
Specs in practice
- 6-inch clearance
- Required space on sides and back to ensure proper airflow and prevent compressor malfunction.
- 10-minute wait
- Wait at least 10 minutes after unplugging before plugging the unit back in to prevent compressor damage.
Images and diagrams
- The digital controller features a display for temperature, buttons for increasing/decreasing temperature, a light control button, and a defrost button.
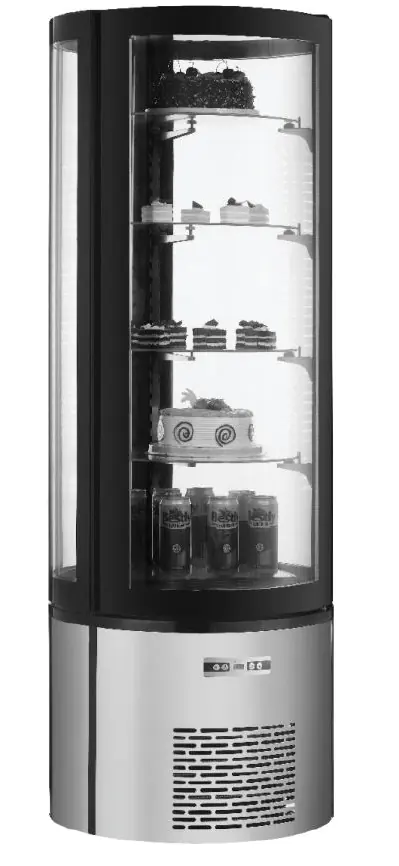
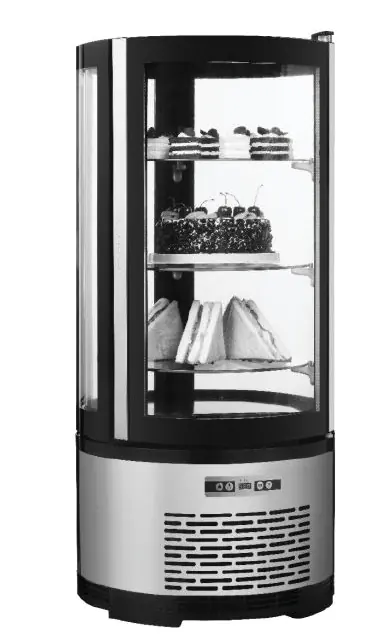
- The unit structure includes a glass door, merchandising shelves, and a hot air exhaust vent that must remain unblocked.
Model compatibility
- Indoor use only.
- Do not use extension cords.
- Not for outdoor use.

Manual page author
Emily Carter
User documentation editor
Prepares concise manual descriptions and highlights the most useful setup, operation, and maintenance information for readers.