Automotive / Car Audio
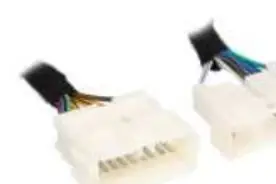
Installation Instructions for Axxess AXABH-NI1 Amplifier Bypass Harness
Quick guide for installing the Axxess AXABH-NI1 amplifier bypass harness. Includes amplifier locations for various Nissan vehicles and wiring connection charts.
Quick answers from the manual
Quick answer
- The AXABH-NI1 is an amplifier bypass harness for Nissan vehicles. Installation involves disconnecting the battery, locating the factory amplifier, and wiring the harness according to the specific vehicle's color-coded chart provided in the manual. p. 1
Key actions
- Disconnect negative battery terminal p. 1
- Locate factory amplifier p. 2
- Connect wires based on vehicle-specific chart p. 3, 4, 5, 6
Problems and fixes
Uncertain about speaker presence
Use a tone generator or multimeter to test wires/impedance.
p. 1Where to find it in the PDF
- Installation Instructions and Safety p. 1
- Amplifier Locations p. 2
- Wiring Connections p. 3, 4, 5, 6
Table of contents
Manual images
Click an image to enlargeQuick guide from the manual
This document provides installation instructions for the Axxess AXABH-NI1 amplifier bypass harness. Before beginning the installation, ensure the vehicle's ignition is off and the negative battery terminal is disconnected. Verify all connections are secure before cycling the ignition to test the product.
Tools required
- Crimping tool and connectors or solder gun, solder, and heat shrink
- Tape
- Wire cutter
- Zip ties
- Multimeter tester
Amplifier locations
The factory amplifier location varies by vehicle model and year:
- 370z (2010-Up): In trunk towards the front of the vehicle
- Altima (2007-2018): Under rear shelf between the rear speakers
- Armada (2008-2015): Under steering column
- Armada (2017-Up): Under steering column
- Maxima (2009-2014): Under rear shelf
- Murano (2009-2014): Center of luggage floor
- Pathfinder (2012-Up): Center of luggage floor
- Quest (2011-2017): Right rear under luggage area
- Rogue (2008-Up): Below passenger seat
- Sentra (2013-2019): Rear deck between speakers
Wiring connections
Wiring connections vary per vehicle. Refer to the specific connection charts provided in the manual for your vehicle model and year. If you are uncertain whether the vehicle contains a specific speaker, test the wires with a tone generator, check if the factory wires are populated on the vehicle side, or test the wires for impedance using a multimeter.
Technical support
If you encounter difficulties, contact Axxess Tech Support at 386-257-1187 or via email at [email protected]. Support hours are Monday - Friday 9:00 AM - 7:00 PM, Saturday 10:00 AM - 7:00 PM, and Sunday 10:00 AM - 4:00 PM (Eastern Standard Time).
Practical help
Common problems
Uncertain if the vehicle contains a specific speaker
Test the wires with a tone generator, check if factory wires are populated on the vehicle side, or test the wires for impedance with a multimeter.
Before use
- Disconnect the negative battery terminal with the key out of the ignition.
- Gather required tools: crimping tool/connectors or solder gun/solder/heat shrink, tape, wire cutter, zip ties, and a multimeter.
- Locate the factory amplifier based on the vehicle model.
- Ensure all installation connections are secure before cycling the ignition to test the product.
Images and diagrams
- The manual contains detailed wiring color code charts for specific Nissan models and years to facilitate the bypass installation.
Model compatibility
- Compatible with various Nissan vehicles from 2008-Up, including 370z, Altima, Armada, Maxima, Murano, Pathfinder, Quest, Rogue, and Sentra.

Manual page author
Emily Carter
User documentation editor
Prepares concise manual descriptions and highlights the most useful setup, operation, and maintenance information for readers.