Automotive / Car Audio
Installation Guide for Scosche ITCCR05B In-Dash Stereo Kit
Complete installation and setup guide for the Scosche ITCCR05B in-dash stereo kit for 2018-up Jeep Wrangler. Includes wiring diagrams, disassembly steps, and touchscreen interface configuration.
Quick answers from the manual
Quick answer
- The ITCCR05B is an in-dash stereo installation kit for 2018+ Jeep Wranglers that replaces factory climate controls with a touchscreen interface. p. 1, 5
Key actions
- Disconnect negative battery terminal before starting. p. 1
- Remove factory dash panel and radio screen. p. 2
Problems and fixes
Display affected by high heat
Wait for the unit to cool down.
p. 1Where to find it in the PDF
- Installation and Disassembly p. 1, 2, 5
- Touchscreen Interface p. 6, 7, 8, 9
Table of contents
Manual images
Click an image to enlargeImportant Information
The Scosche ITCCR05B is an in-dash stereo installation kit designed specifically for 2018-Up Jeep Wrangler vehicles. It is compatible with shallow radios only. Before beginning installation, disconnect the vehicle's negative battery terminal to prevent electrical damage. Do not use a test light on airbag wiring.
Included Parts
- Radio Face Panel with Hazard Warning Flasher
- Integrated Touchscreen Control Panel
- Stereo mounting brackets (left & right)
- Dash pocket for single DIN mount
- Power harness
Disassembly
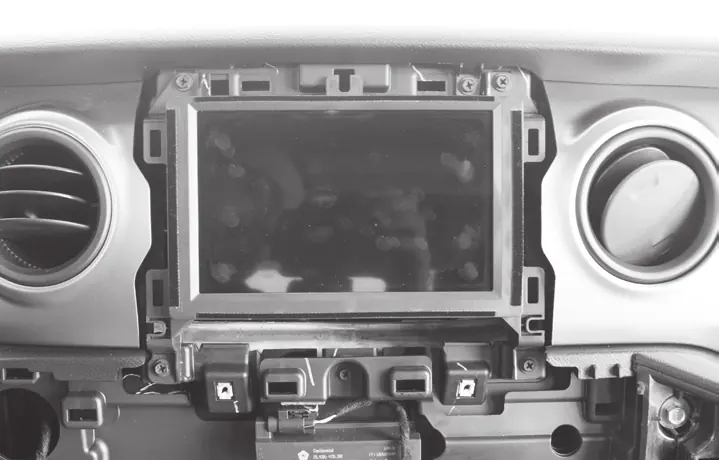
- Remove the engine start/climate control panel using a panel removal tool. Disconnect all connections and set the panel aside.
- Use a panel removal tool to remove the radio screen's panel. The panel is held by four clips.
- Unscrew the four 8mm screws securing the radio screen into place. Retain these screws for reinstallation.
- Remove the rectangular module to route wiring connections to the ITC unit.
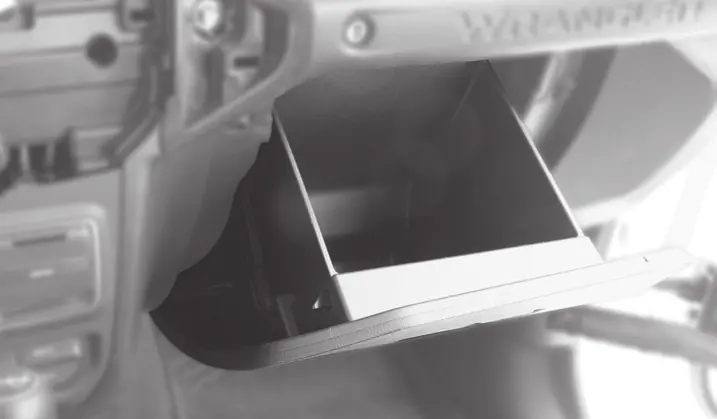
- Unhook the glovebox by opening it, unhooking the left-side clip, and releasing the tab at the inside top-center of the storage container.
Wiring
Refer to the wiring color codes provided in the manual for proper connections:
- White: Left Front Positive (LF+)
- White/Black: Left Front Negative (LF-)
- Green: Left Rear Positive (LR+)
- Green/Black: Left Rear Negative (LR-)
- Black: Chassis Ground
- Yellow: +12V Constant Power
- Red: +12V Accessory
- Gray: Right Front Positive (RF+)
- Gray/Black: Right Front Negative (RF-)
- Violet: Right Rear Positive (RR+)
- Violet/Black: Right Rear Negative (RR-)
- Orange: Illumination
Assembly
- Mount both the left and right radio brackets to your aftermarket radio.
- Connect all wiring to the ITC unit and the vehicle.
- Reinstall everything in reverse order of the disassembly process using the retained hardware.
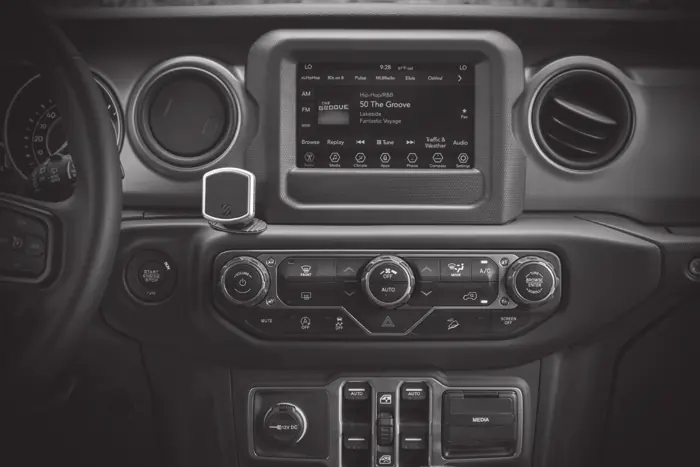
Touchscreen Interface
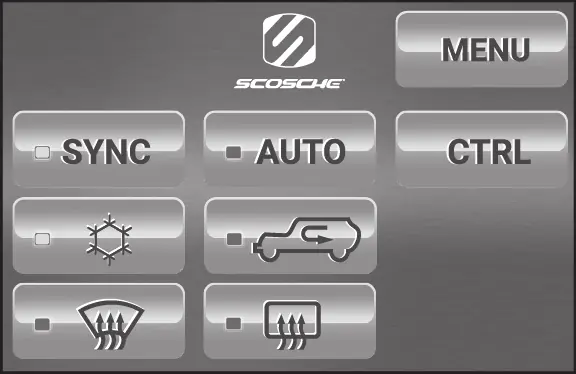
The Scosche Touch Screen Interface replaces factory climate, convenience, and personalization controls. Use the touchscreen to adjust temperature, fan speed, and airflow direction. The interface includes specific buttons for A/C, Defrost, Recirculation, and Menu access.

Settings and Configuration
Press the MENU button on the touchscreen to access the Configuration Menu. From here, you can adjust:
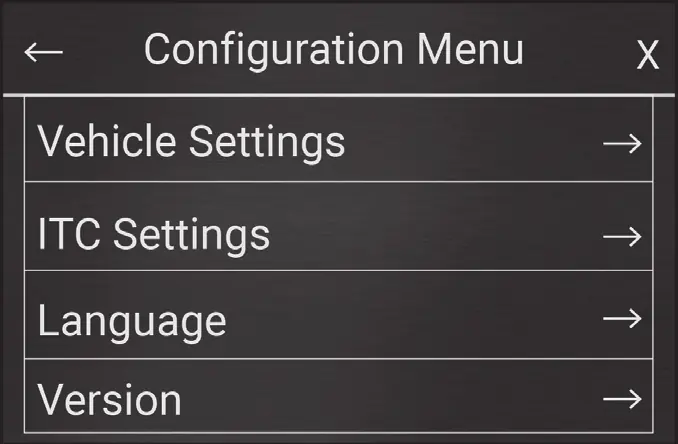
- Vehicle Settings: Time/Date, Units, Safety Driving Assistance, Engine Off Delay, Lights, Doors & Locks, Aux Switches.
- ITC Settings: Picture Settings (Brightness), Volume (ITC Beep), Park Brake Source, Radio Type selection.
- Language: Select between English, Français, and Español.
- Version: View current MCU and Resource software versions.
Manufacturer information
Scosche Industries, Inc.
Practical help
Common problems
Display affected by high temperatures
Normal operation will resume once the unit cools.
Radio does not fit
This kit is designed for shallow radios ONLY.
Windows fogging
Ensure A/C is on; recirculation is not available in Defog/Defrost modes.
Before use
- Disconnect vehicle's negative battery terminal
- Verify radio is a shallow model
- Have a panel removal tool ready
- Read all instructions accompanying your car stereo
Specs in practice
- 12V Accessory
- Red wire connection
Images and diagrams
- Wiring diagram shows connections for aftermarket radio, camera retention, and factory HVAC.
- Menu navigation uses arrows and X to close windows.
Model compatibility
- Designed for 2018-Up Jeep Wrangler vehicles.
- Designed for shallow radios only.

Manual page author
David Miller
Documentation analyst
Organizes user manual content into clear summaries, with attention to model details, product context, and everyday usability.