Furniture / Chairs & Seating
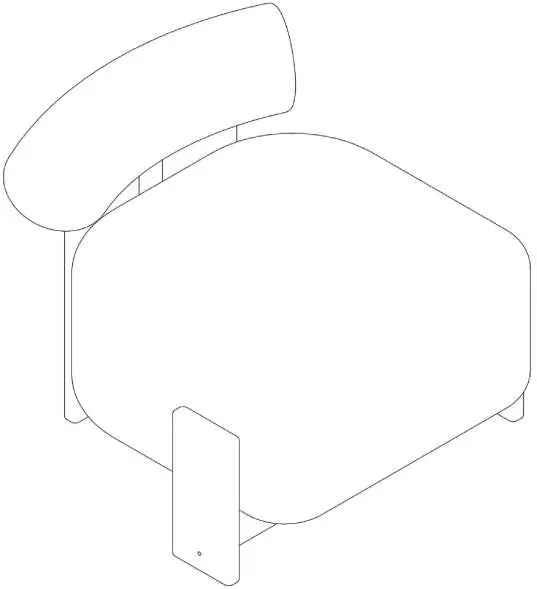
Assembly Instructions for Belleze 014-HG-31958 Sherpa Boucle Chair
Quick assembly guide for the Belleze 014-HG-31958 Sherpa Boucle Chair. Includes parts list, hardware requirements, step-by-step assembly instructions, and care tips.
Table of contents
Manual images
Click an image to enlargeQuick guide from the manual
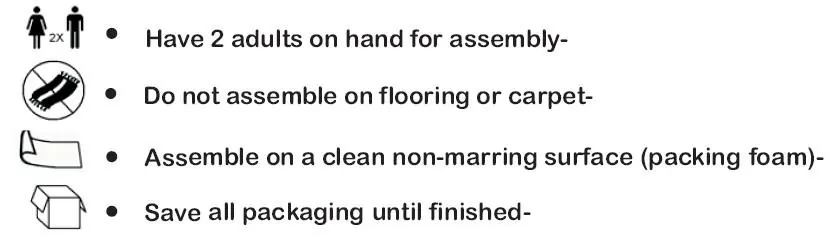
This chair requires assembly by two adults. Before starting, ensure you have a clean, non-marring surface (such as packing foam) to protect the furniture. Do not assemble on carpet or rough flooring. Important: Do not fully tighten any bolts during the initial assembly steps. Tighten them gradually in a sequential manner only after all parts are connected to ensure the chair is even and stable.
Care and Maintenance
- For residential use only; not intended for commercial use.
- Use furniture pads to protect floors from scratches.
- Do not place hot items directly on the surface.
- Avoid harsh cleansers or polish; clean with a mild soap solution and a damp cloth.
- Keep away from direct sunlight and heating/cooling vents.
- Do not write on the surface without a protective barrier.
- For indoor use only.
- Children should not climb or jump on the furniture.
- Dust using a clean, non-colored, lint-free cloth.
Parts and Hardware
Before beginning, verify all parts are present:
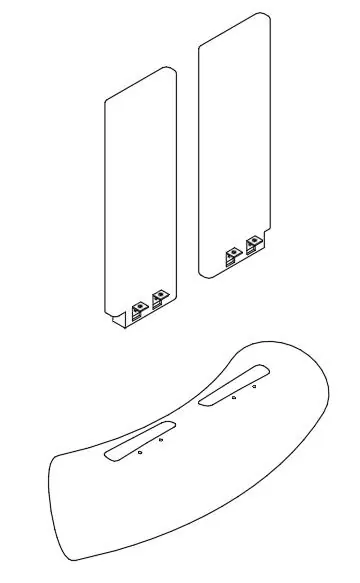
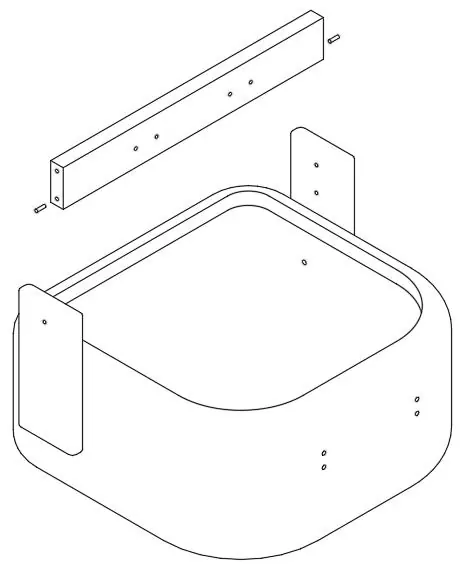
- Parts: Back (A), Seat (B), Left hind leg (C), Right hind leg (D), Front Leg (E) x2, Base support (F) x2, Front support (G).
- Hardware: Angle iron (1) x5, Plate iron (2) x5, Bolts (M6*20MM) (3) x17, Bolts (M6*30MM) (4) x5, Spring Washer (M6) (5) x21, Washer (M6) (6) x23, Allen Wrench (M6) (7), Bolts (M8*45MM) (8) x9, Spring Washer (M8) (9) x9, Washer (M8) (10) x7, Allen Wrench (M8) (11), Wood plugs (12) x3.
Assembly Instructions
Follow these steps to assemble your chair:

- Step 1: Unpack all parts on a clean surface.
- Step 2: Fix the Angle iron (1) to the Left hind leg (C) using Bolt (3), Spring washer (5), and Washer (6) with Allen wrench (7). Repeat for the Right hind leg (D). Do not fully tighten.
- Step 3: Slot the Hind legs (C+D) into the slots on the Back (A). Attach using bolts (4), Spring washer (5), and Washer (6) with Allen wrench (7). Do not fully tighten.
- Step 4: Unzip the seat bottom.
- Step 5: Attach the Front legs (E) to the Seat (B) using Bolts (8), Spring washers (9), and Washers (10) with Allen wrench (11). Do not fully tighten.
- Step 6: Insert wood plugs (12) into the Front support (G) and Front legs (E). Attach Front legs (E) to Front support (G) using Bolts (8), Spring washer (9), and Washers (6) with Allen wrench (11).
- Step 7: Attach the Seat (B) to the Hind legs (C+D) using Bolts (8), Spring washers (9), and Washers (10) with Allen wrench (11). Do not fully tighten.
- Step 8: Attach Plate irons (2) to the Base supports (F) using Bolts (3), Spring washers (5), and Washers (6) with Allen wrench (7). Do not fully tighten.
- Step 9: Attach Plate irons (2) to the Front support (G) using Bolts (3), Spring washers (5), and Washers (6) with Allen wrench (7). Do not fully tighten.
- Step 10: Attach Plate irons (2) to the Hind legs (C+D) using Bolts (3), Spring washers (5), and Washers (6) with Allen wrench (7). Do not fully tighten.
- Step 11: Tighten all bolts sequentially and evenly. Zip the seat bottom up and turn the chair right side up. Ensure it is placed on a flat, level surface.
Manufacturer information
Belleze Furniture
Practical help
Common problems
Chair wobbles after assembly
Ensure the chair is on a flat, level surface. If it still wobbles, loosen all bolts slightly, ensure the chair is level, and then re-tighten all bolts in a sequential, even manner.
Difficulty aligning parts during assembly
Do not fully tighten bolts during the initial steps. Keeping them loose allows for minor adjustments to align the holes.
Before use
- Have 2 adults available for assembly.
- Prepare a clean, non-marring surface (e.g., packing foam).
- Verify all parts (A-G) are present.
- Verify all hardware (1-12) is present.
- Ensure you have the required Allen wrenches (M6 and M8).
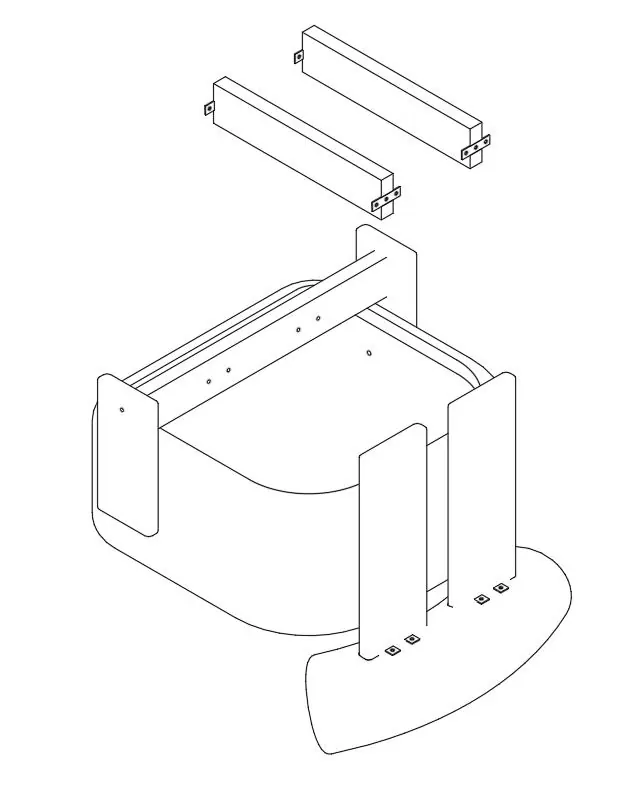
Images and diagrams
- Assembly steps show the sequential order of attaching legs and supports to the seat and back.
Model compatibility
- For residential use only; not for commercial use.
- Must be used on a flat, level surface.

Manual page author
David Miller
Documentation analyst
Organizes user manual content into clear summaries, with attention to model details, product context, and everyday usability.