Furniture / Storage Cabinets
Installation Guide for Belleze Brent Corner Cabinet 014-HG-43507
Quick installation and user guide for the Belleze Brent Corner Cabinet (014-HG-43507). Includes assembly steps, LED light setup, remote control instructions, and maintenance tips.
Table of contents
Manual images
Click an image to enlargeQuick Guide
The Belleze Brent Corner Cabinet requires two people for assembly and takes approximately 45 minutes to complete. For safety, the unit must be permanently fixed to a wall stud using the provided anti-tipping device. Ensure all parts are present before beginning assembly and perform the work on a soft surface like a carpet or rug to prevent damage.
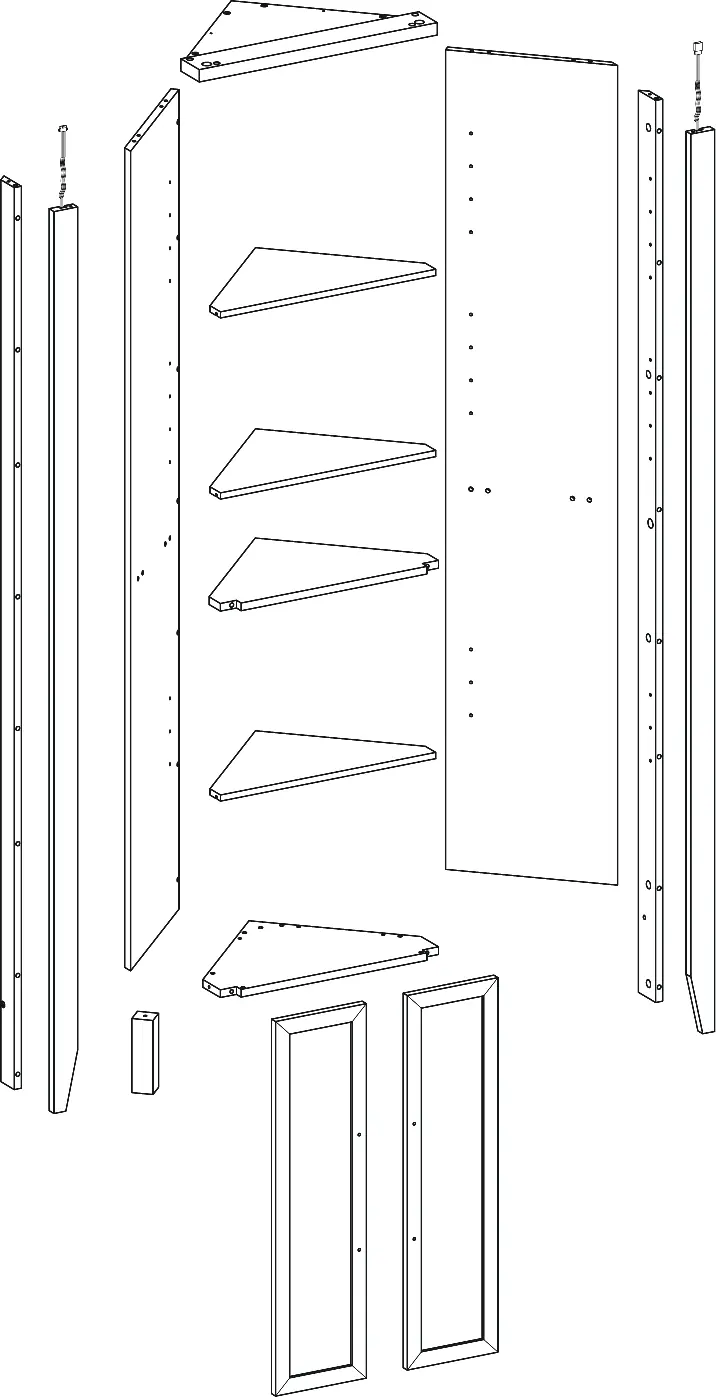
Package Contents
The package includes various panels (Top, Center, Bottom, Storage, Side, and Door panels) and hardware components such as cam bolts, wood dowels, screws, magnetic catches, pivot hinge plates, and an LED remote control kit. Verify all items against the parts list before starting.
Assembly Instructions
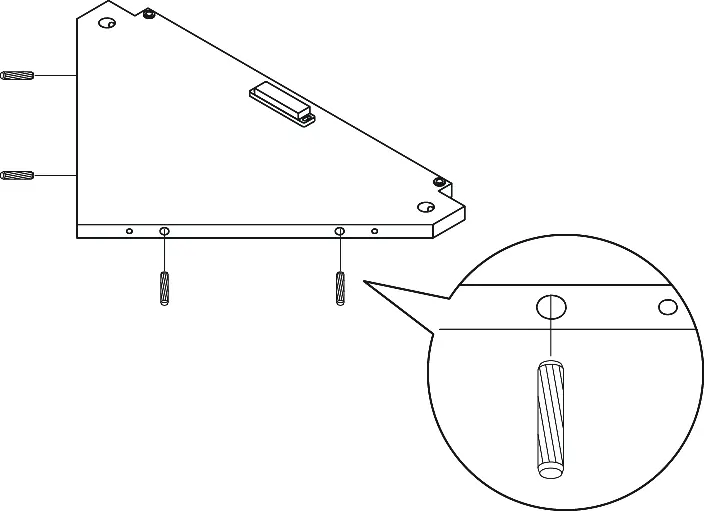
Assembly involves connecting the panels using cam bolts and wood dowels. Key steps include:
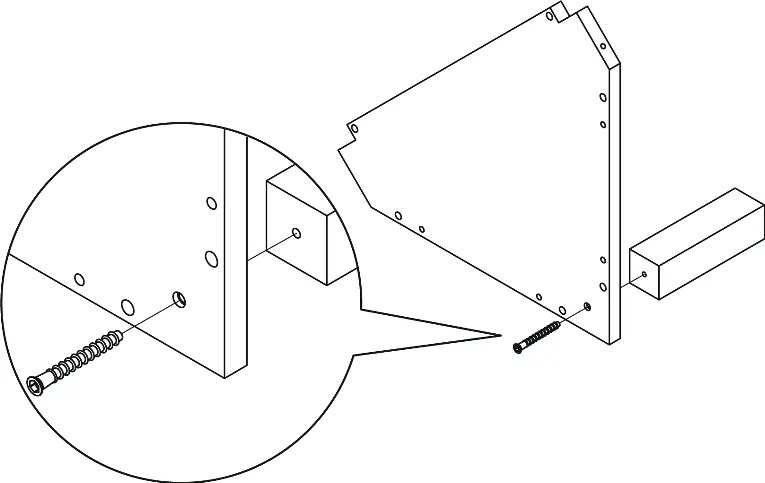
- Base Assembly: Attach the back leg to the bottom panel.
- Main Structure: Assemble the center, left, and right panels.
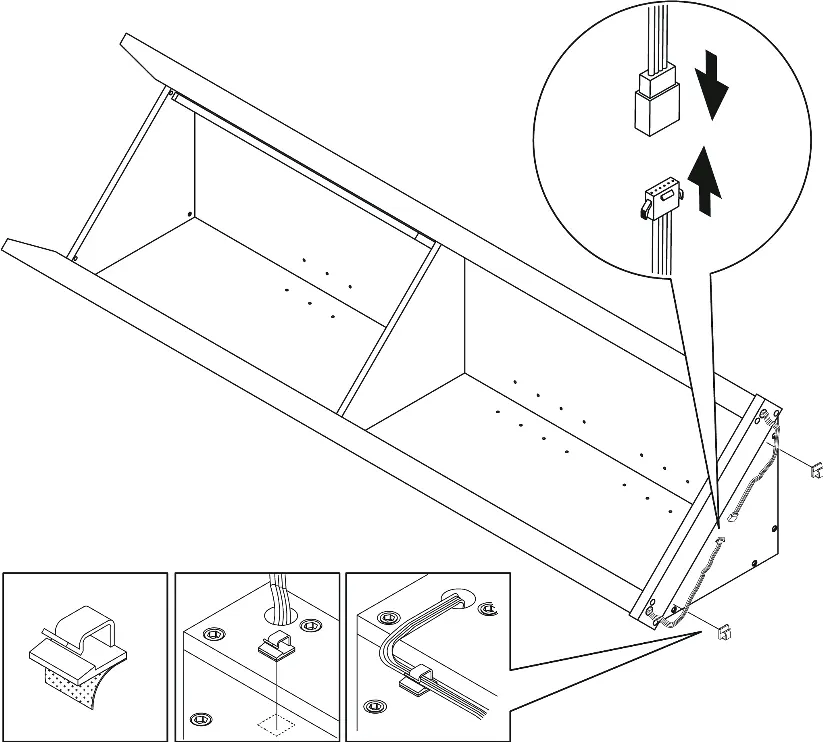
- Legs and Wiring: Attach the front and side legs. Note that the USB port for the LED lights must be routed through the hole in the right side leg.
- Top Panel: Secure the top panel, ensuring the LED line interface passes through the designated hole.
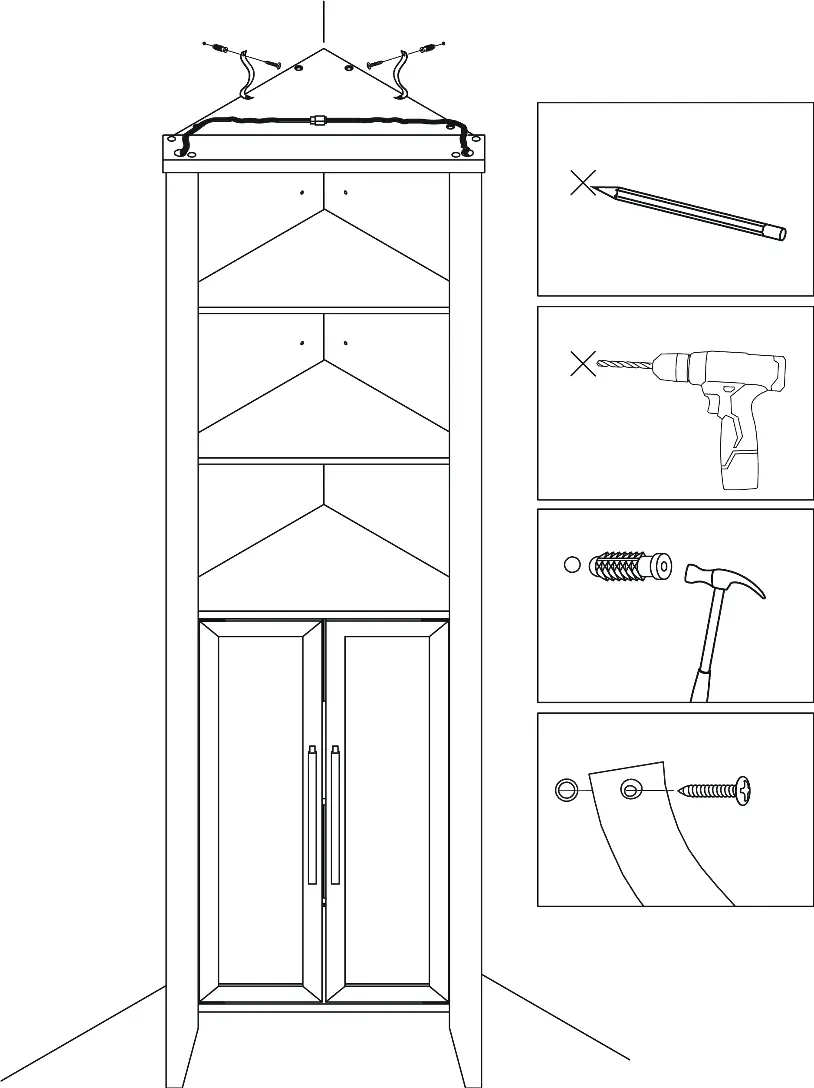
- LED Connection: Connect the power cord between the left and right legs and use the provided cable clips to secure the cord.
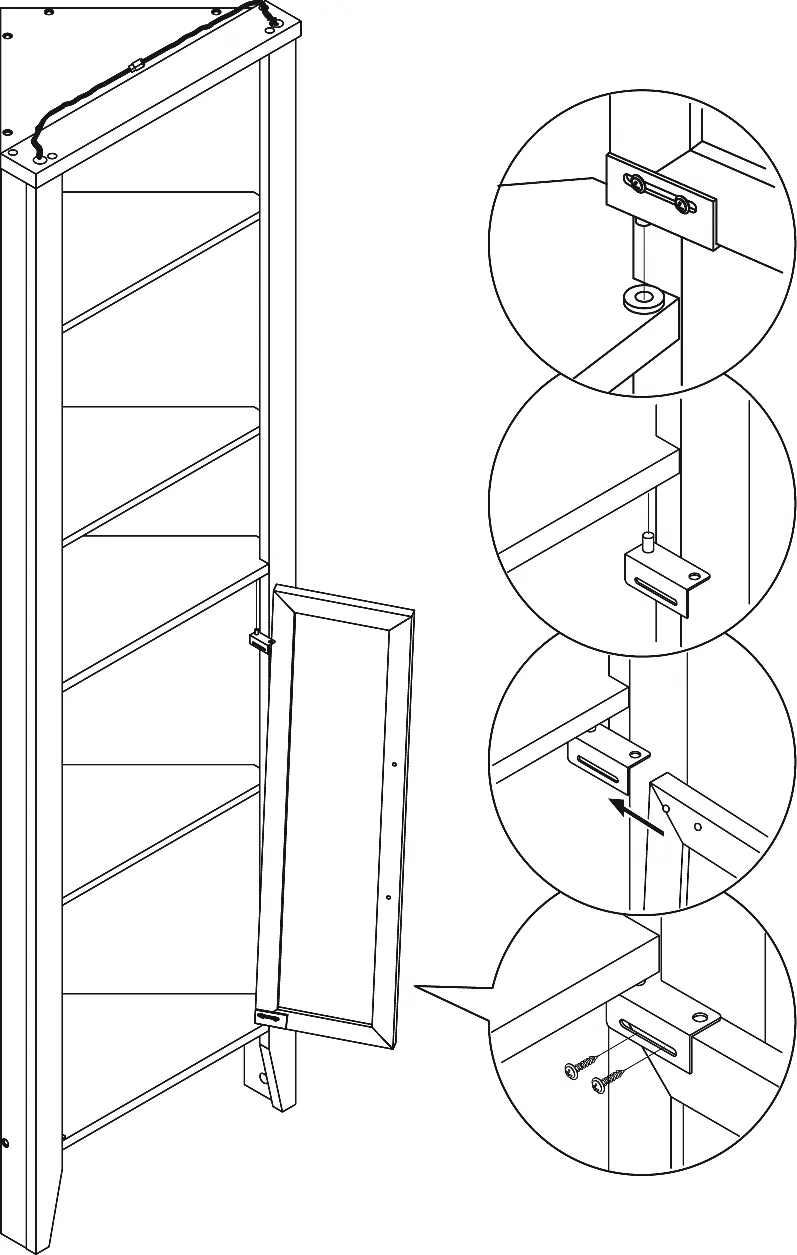
- Shelves and Doors: Insert shelf pegs and install the storage panels. Attach the magnetic catch plates and pivot hinge plates to the doors, then mount the doors to the cabinet.
- Wall Mounting: Attach the anti-tipping straps to the top of the cabinet and secure them to the wall using the provided anchors and screws.
Remote Control Operation
The included remote control manages the LED lighting system:
- ON/OFF: Use the dedicated buttons to power the lights.
- Static Color: Press the color shortcut buttons to select a specific color.
- Brightness/Speed: Use the Increase and Decrease buttons to adjust brightness in static mode or effect speed in dynamic mode.
- Flash/Strobe: Use Flash 7/16 and Strobe 7/16 buttons to enable color cycling or breathing modes.
Safety and Maintenance
To ensure longevity and safety:
- Maintenance: Tighten all bolts and screws within the first 2 weeks of assembly. Check the tightness of all bolts every 2 months and tighten if necessary.
- Cleaning: Clean the MDF surface with a lightly dampened cloth. A small amount of mild soap may be used if necessary. Dry the surface immediately after cleaning.
- Restrictions: Do not use bleach or alcohol to clean the surface. Do not apply wood treatment to MDF parts.
- Weight Limits: Do not exceed the maximum load of 15 lb per shelf or section.
Manufacturer information
Belleze Furniture
Practical help
Common problems
Missing parts
Do not use the product until missing parts are restored. Contact support for replacements.
Furniture tipping
The furniture must be permanently fixed to a wall stud with the included anti-tipping device to prevent serious injury.
LED light not working
Ensure the power cord is correctly connected to the power brick and the power outlet.
Before use
- Ensure 2 people are available for assembly.
- Clear a space on a carpet or rug to prevent scratches.
- Verify all parts are present using the package contents list.
- Have a screwdriver, hammer, and drill ready.
- Read the full instruction manual before starting.
Specs in practice
- Maximum Load
- 15 lb per shelf or section.
- Assembly Time
- Approximately 45 minutes.
Images and diagrams
- Assembly steps show the sequence of connecting panels using cam bolts and wood dowels.
- Wiring diagrams illustrate how to route the LED power cord through the cabinet legs.
Model compatibility
- Requires wall mounting for safety.
- Designed for indoor use.

Manual page author
David Miller
Documentation analyst
Organizes user manual content into clear summaries, with attention to model details, product context, and everyday usability.