Electronics / Televisions
Assembly Guide for Belleze 014-HG-43504 Corona Curio Cabinet
Step-by-step assembly instructions for the Belleze 014-HG-43504 Corona Curio Cabinet. Includes safety warnings, parts list, and maintenance tips.
Table of contents
Manual images
Jump to the sectionQuick guide from the manual
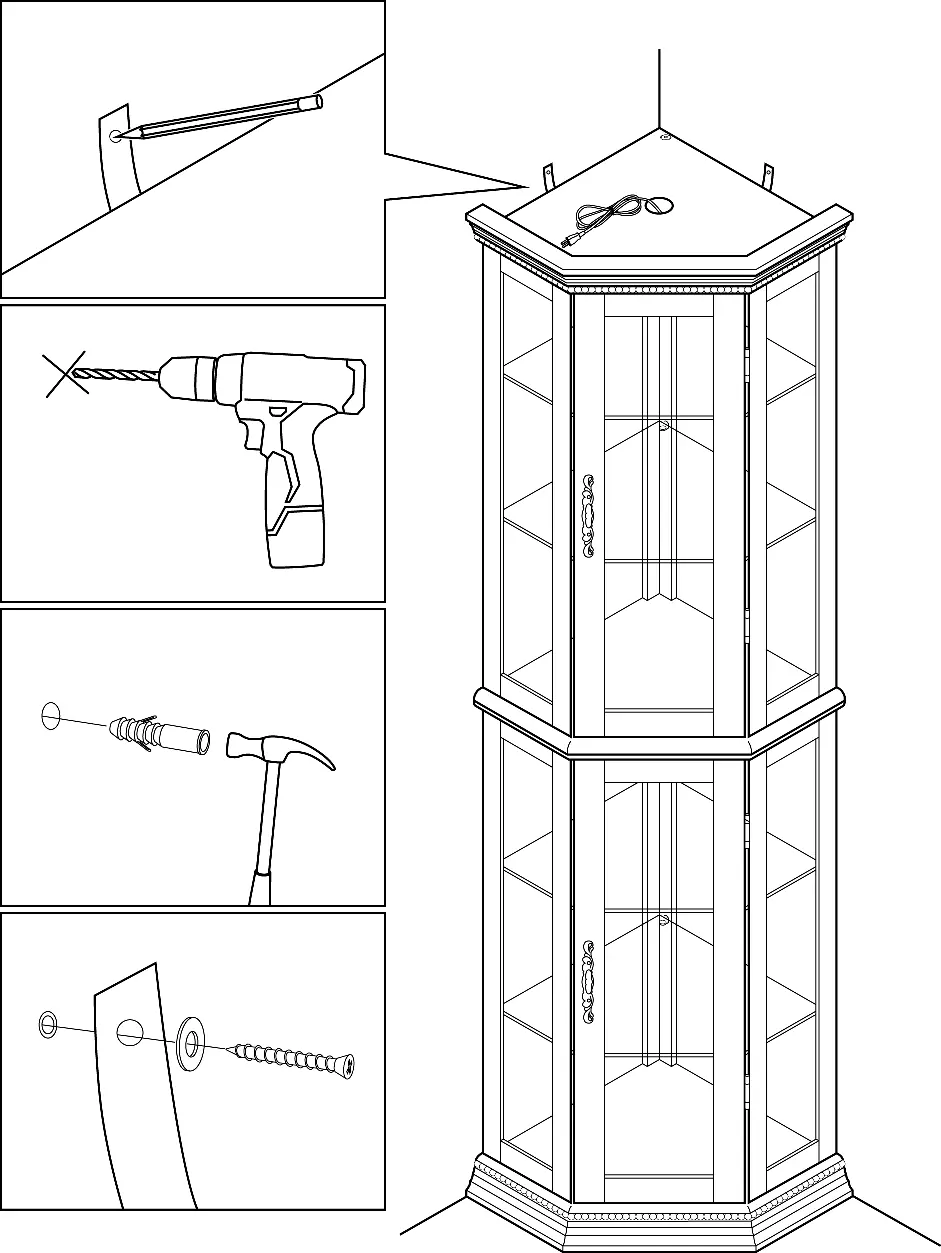
The Belleze Corona Curio Cabinet requires 2 people for assembly. The estimated assembly time is 100 minutes. Please ensure you have a clear, flat, and soft surface (such as a carpet or empty carton) to assemble the furniture to prevent scratches or damage. Always keep pets and children away from the assembly area due to small parts and packaging materials.
Package contents
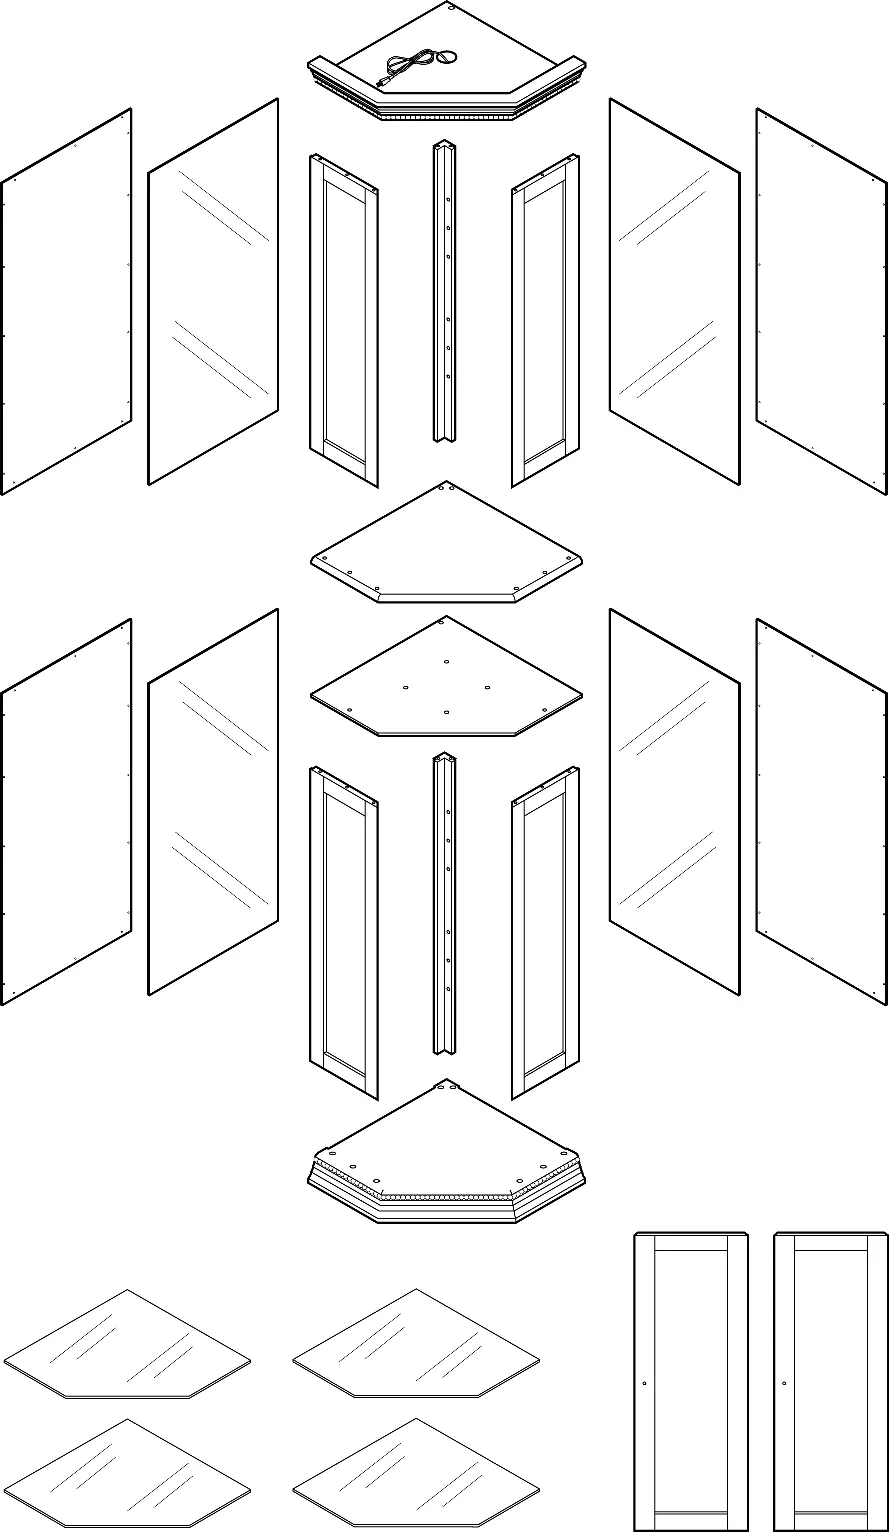
Before beginning, lay out all components and hardware separately to ensure nothing is missing or damaged. The package includes:
- Upper and bottom shelf panels
- Left, right, and back panels
- Support bars and cabinet doors
- Mirror back panels and glass storage shelf panels
- Various hardware including screws, bolts, hinges, magnetic catches, and shelf pegs
Assembly instructions
The assembly process involves 19 steps. Key procedures include:
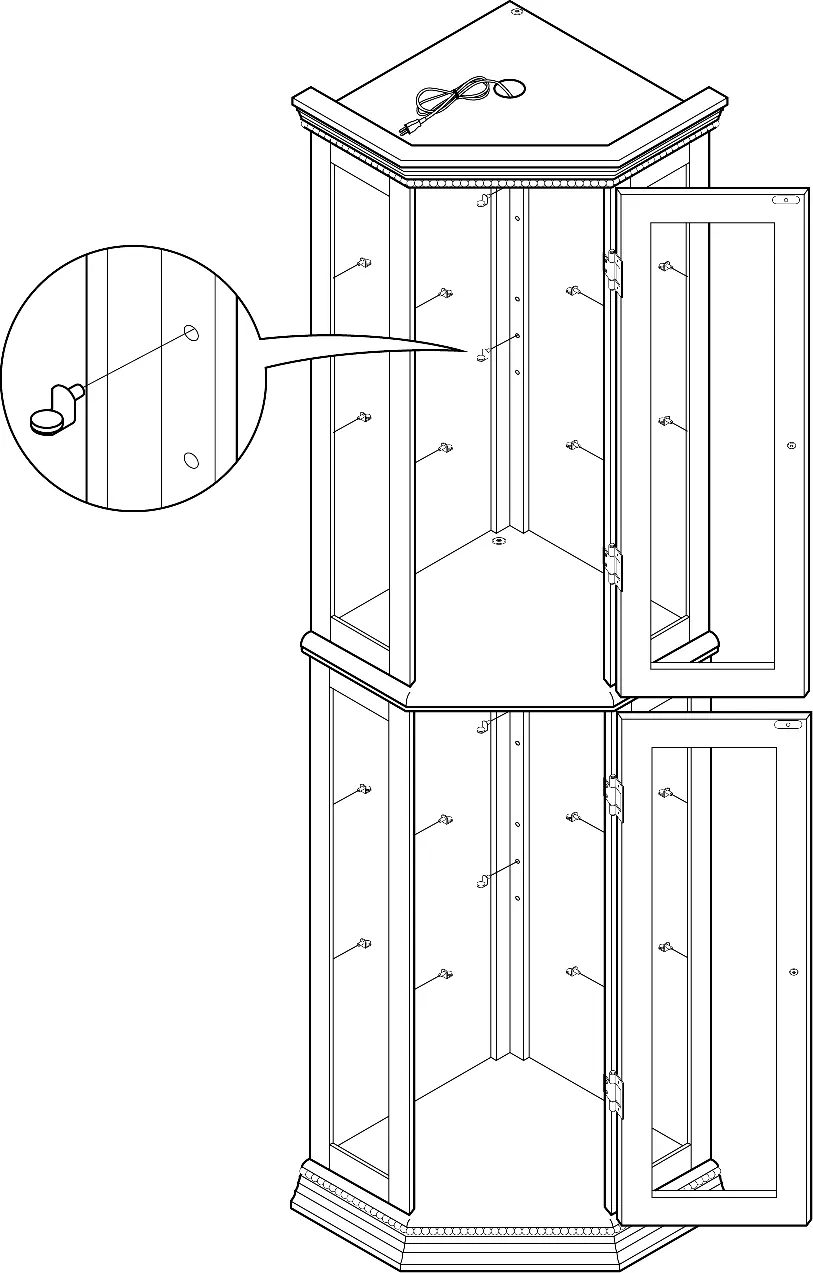
- Door preparation: Attach handles and magnetic catch plates to the cabinet doors.
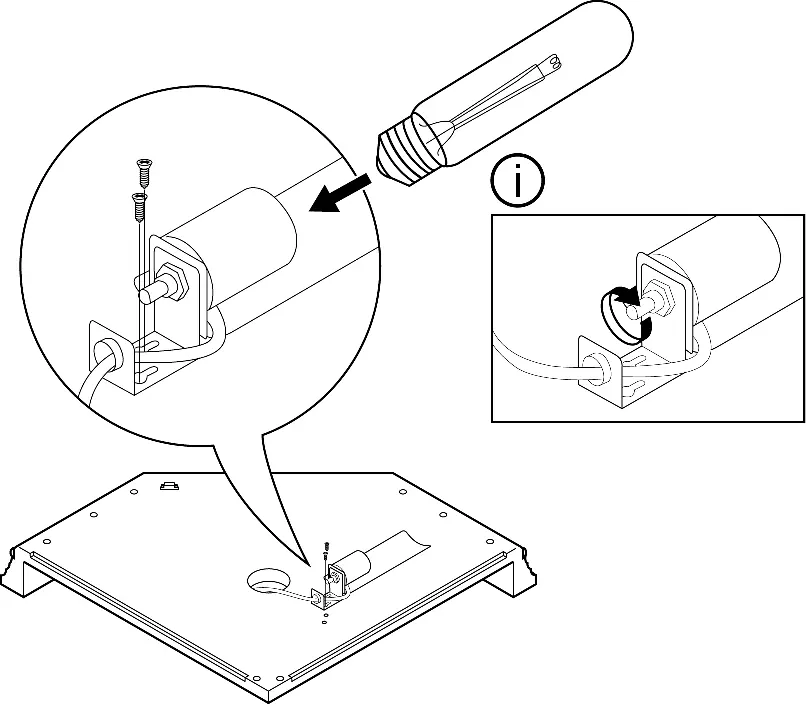
- Light installation: Install the cabinet light socket to the underside of the upper shelf top panel. The recommended bulb is a 120V 25W Type T bulb.
- Frame assembly: Attach side panels and support bars to the shelf bottom panels using the provided bolts and wooden dowels.
- Back panel installation: Attach mirror back panels and back panels to the rear of the shelf assemblies. Remove the protective film from the mirror panels.
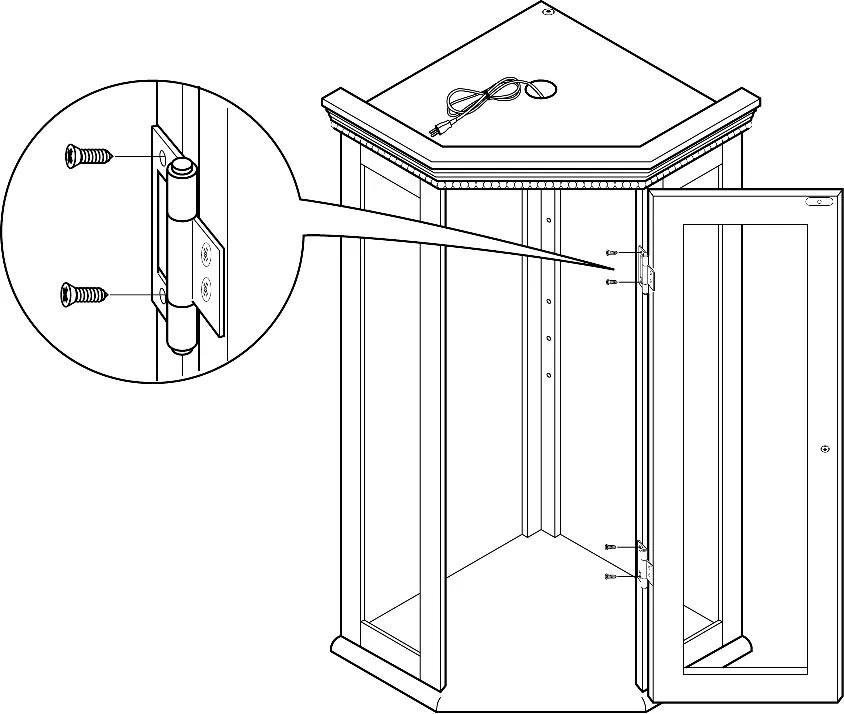
- Door attachment: Install hinges on the cabinet doors and attach the doors to the shelf assemblies.
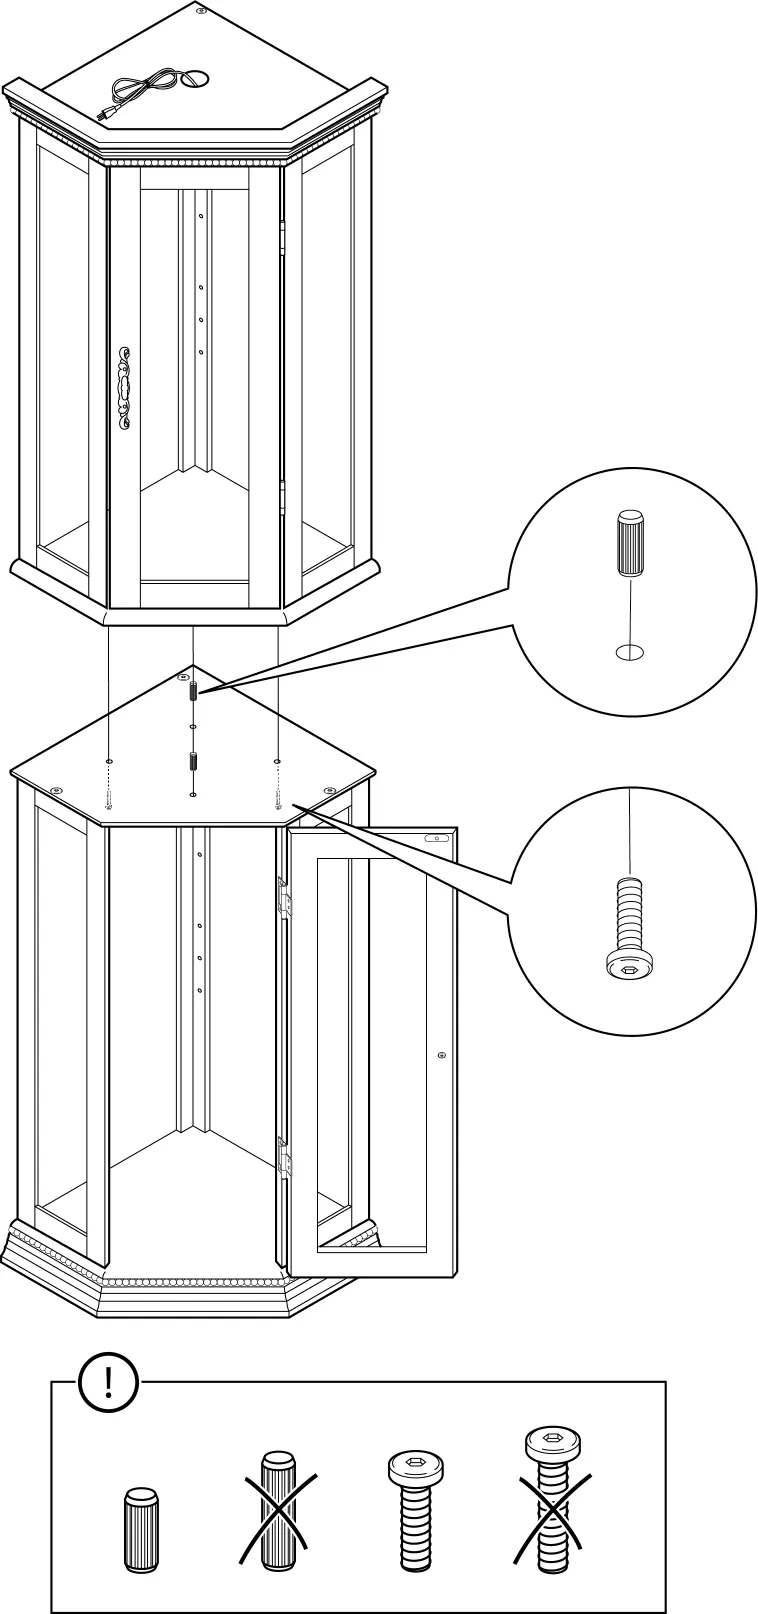
- Stacking: Assemble the upper shelf unit on top of the bottom shelf unit using the correct hardware.
- Shelving: Insert shelf pegs into the cabinet and place the glass storage shelf panels inside.
Safety and warnings
Important: The furniture must be permanently fixed to the wall stud using the included anti-tipping device to prevent serious or fatal crushing injuries. Different wall materials require different types of wall anchors or screws; ensure you use the correct type for your specific wall. Do not climb on, step on, or place overweighted objects on the product. The maximum load is 25 lb per shelf.
Care and maintenance
To ensure the longevity of your furniture:
- Tighten all bolts and screws again within the first 2 weeks of assembly.
- Check the tightness of all bolts every 2 months and tighten if necessary.
- Clean the surface with a lightly dampened cloth or soft brush.
- Keep metal plated hinges dry to prevent rusting.
- Dry the surface immediately after cleaning.
- Do not use bleach or alcohol to clean the surface.
Manufacturer information
Belleze Furniture
Practical help
Common problems
Missing parts or hardware
Do not use the product until you have restored the missing parts. Contact Belleze support at 1-800-682-6376 or [email protected].
Furniture tipping over
The furniture must be permanently fixed to the wall stud using the included anti-tipping device.
Surface damage during assembly
Assemble the furniture on an empty carton, carpet, or rug to prevent scratches.
Before use
- Verify all components and hardware are present using the package contents list.
- Ensure 2 people are available for the assembly process.
- Prepare a flat, soft surface for assembly.
- Have a screwdriver and drill ready (not included).
- Ensure the product is fully assembled before use.
Specs in practice
- Maximum Load
- 25 lb per shelf.
- Assembly Time
- Estimated 100 minutes.
Images and diagrams
- Steps 1-19 provide a sequential visual guide for assembling the cabinet structure, doors, and lighting.
- Step 19 illustrates the mandatory wall-mounting procedure to prevent tipping.
Model compatibility
- Wall anchors/screws for the anti-tipping device depend on your specific wall material; use appropriate hardware for your wall type.

Manual page author
Michael Turner
Technical manual editor
Reviews PDF manuals for structure, safety notes, and practical product details so readers can find the right information quickly.