Furniture / Home Furnishing
Installation Guide for Belleze Zoey Accent Table 014-HG-41303
Step-by-step assembly and usage guide for the Belleze Zoey Accent Table (014-HG-41303). Includes safety warnings, weight limits, remote control instructions, and maintenance tips.
Table of contents
Manual images
Jump to the sectionQuick guide from the manual
The Belleze Zoey Accent Table (014-HG-41303) is a set of two nightstands featuring integrated LED lighting. Assembly requires two people and approximately 120 minutes. For safety, the furniture must be permanently fixed to a wall stud using the included anti-tipping device. Ensure you have a clear, carpeted area for assembly to prevent scratches.
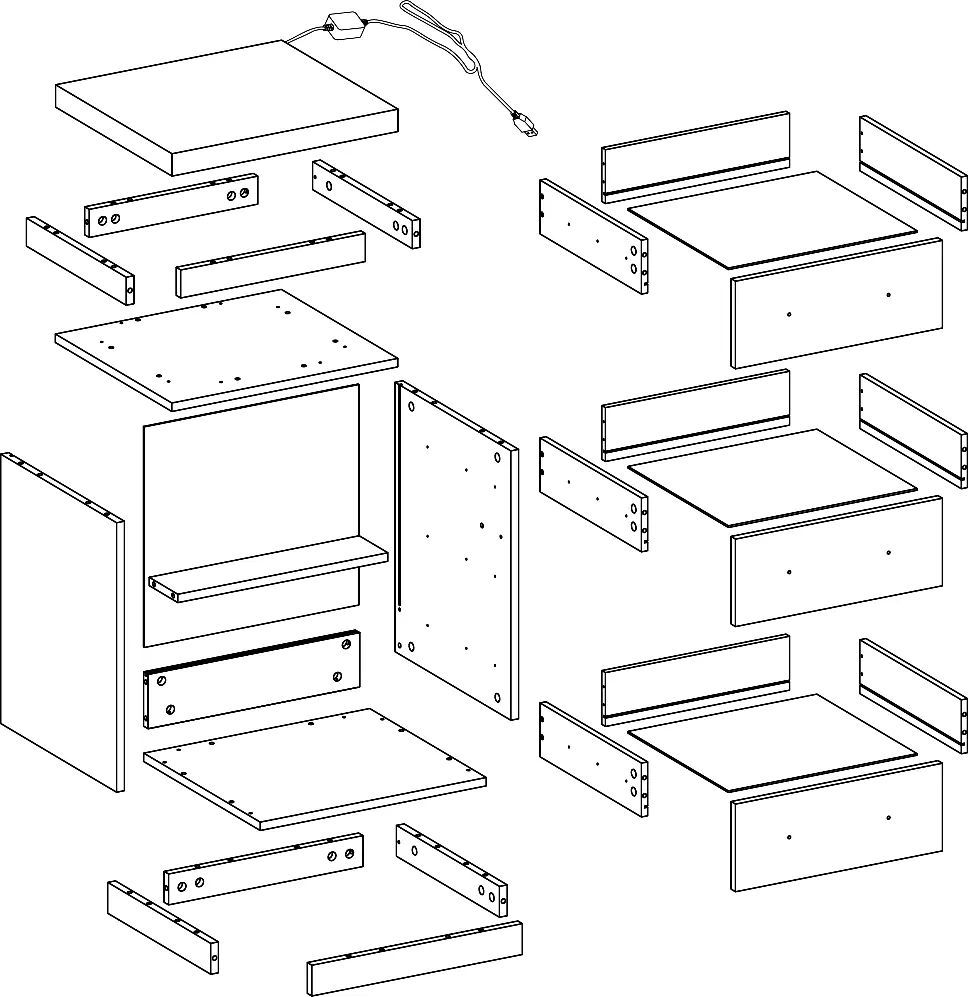
Package contents
The package includes various panels (1-21) and hardware (A-P, AA, BB). Before beginning, lay out all components on a flat surface and verify that no parts are missing or damaged. Do not discard packaging until assembly is complete.
Assembly instructions
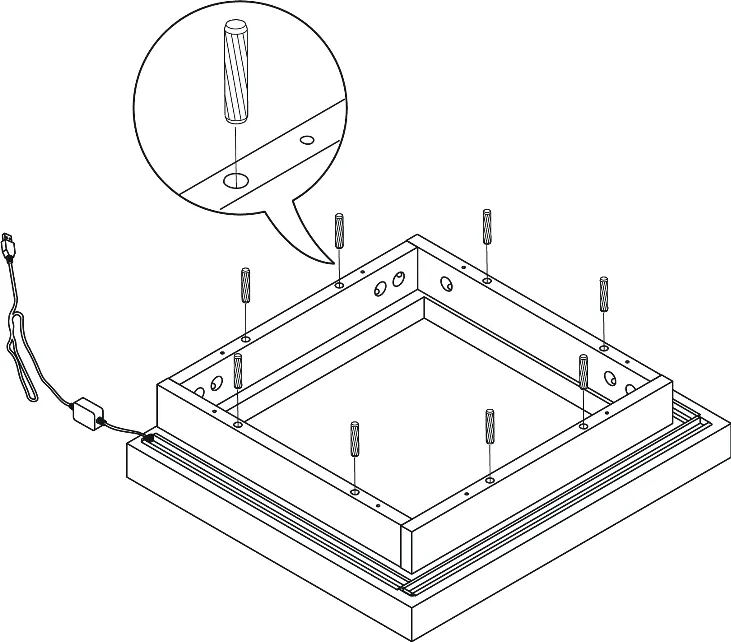
Assembly involves multiple steps, including attaching cam bolts, inserting wood dowels, and securing panels with cam locks. Key procedures include:
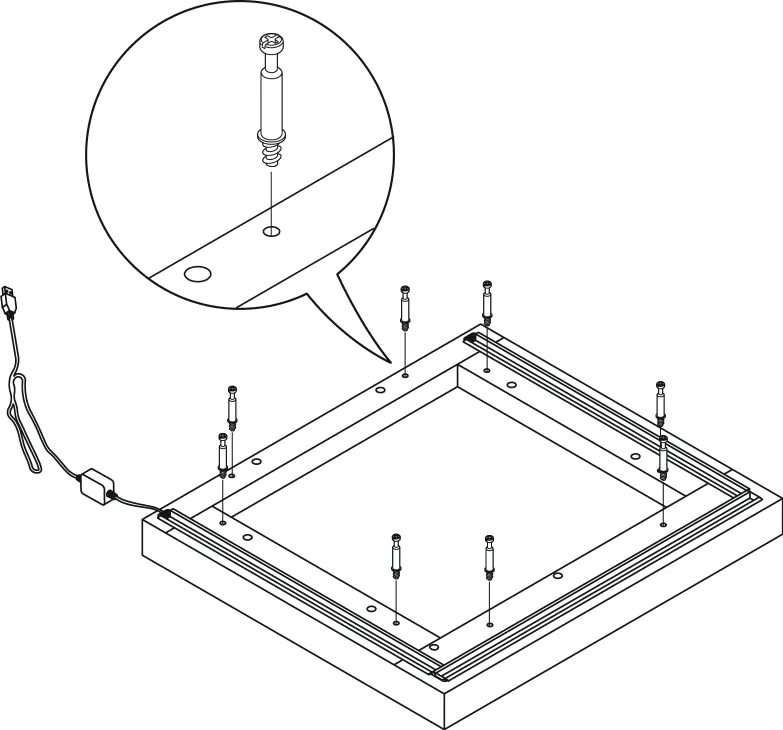
- Top Panel Assembly: Attach cam bolts to the underside of the top panel.
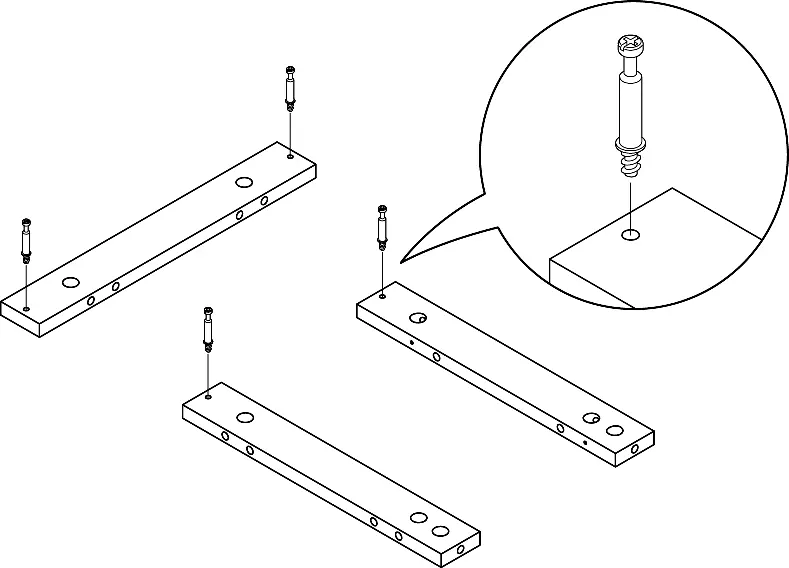
- Support Assembly: Assemble the upper support panels and attach them to the top panel.
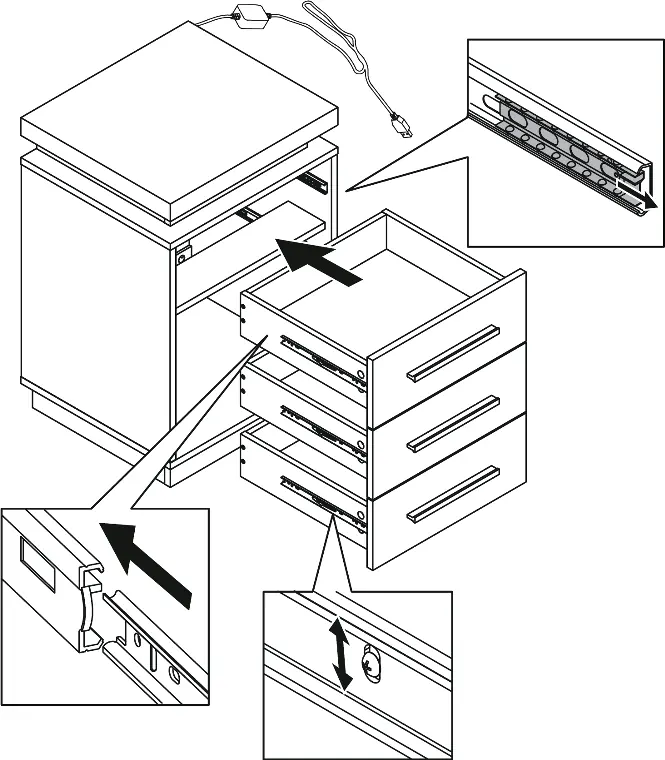
- Drawer Assembly: Detach the drawer slider (L2) from the slide bracket (L1) before attaching the bracket to the side panels.
- Base Assembly: Assemble the base panels and attach the bottom panel on top.
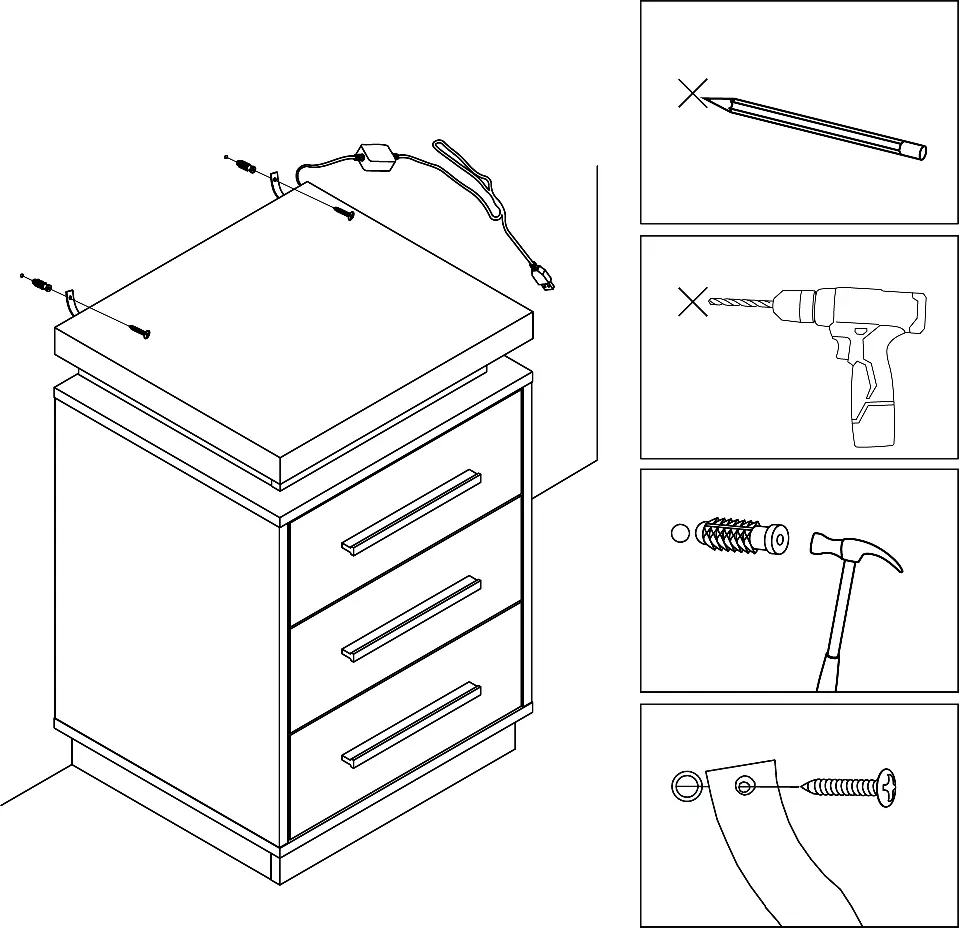
- Final Assembly: Secure the back panels and attach the anti-tipping strap to the back of the table.
Always hand-tighten hardware and avoid over-tightening to prevent damage to the MDF material.
Remote control operation
The LED lights are controlled via the included remote. One table is equipped with a main control receiver and the other with a sub control receiver; only one remote is needed to operate both tables in sync. Use the remote to turn the lights on/off, select static colors, or enable dynamic modes like Flash 7, Strobe 7, Flash 16, and Strobe 16.
Safety and warnings
Serious or fatal crushing injuries may occur if the furniture tips over. The unit must be permanently fixed to the wall. Only place items on top of the product if they meet the recommended weight limits: 70 lb for the top surface and 20 lb per drawer. Keep small components, plastic bags, and packaging film away from children and pets to avoid choking or suffocation hazards.
Furniture care and maintenance
To ensure longevity, tighten all bolts and screws within the first 2 weeks of assembly and check the tightness of all bolts every 2 months. Clean the MDF surface with a lightly dampened cloth and mild soap if necessary. Do not use bleach or alcohol, and do not apply wood treatment to MDF parts. Dry the surface immediately after cleaning to prevent water damage.
Customer support
If you encounter difficulties or are missing parts, contact Belleze support at 1-800-682-6376 or email [email protected]. You can also register your product on the official website for a limited lifetime warranty.
Manufacturer information
Belleze Furniture
Practical help
Common problems
Missing parts or hardware
Contact Belleze support at 1-800-682-6376 or [email protected] for replacements.
Furniture tipping over
The furniture must be permanently fixed to a wall stud using the included anti-tipping device.
LED lights not syncing
One table has a main receiver and the other a sub receiver. Only one remote is needed to operate both in sync.
Drawer not sliding correctly
Ensure the drawer slider (L2) is properly attached and the slider plate is in the forward position. You can adjust the height by loosening the screws on the drawer slide.
Before use
- Ensure 2 people are available for assembly.
- Clear a flat, carpeted area to prevent scratches.
- Verify all parts and hardware against the package contents list.
- Have a hammer, screwdriver, and drill ready.
- Do not over-tighten hardware to avoid damaging the MDF.
Specs in practice
- Top Panel Load
- 70 lb maximum weight capacity.
- Assembly Time
- Approximately 120 minutes.
Images and diagrams
- Cam bolts and locks: Ensure hardware is installed perpendicular to the opening.
- Drawer sliders: Detach the slider (L2) from the bracket (L1) before attaching to the panels.
Model compatibility
- Wall mounting: Different wall materials require different anchors; consult a hardware store if unsure.

Manual page author
Emily Carter
User documentation editor
Prepares concise manual descriptions and highlights the most useful setup, operation, and maintenance information for readers.