Home Appliances / Cookers & Ranges
User Manual for Belling 100/110cm Electric Ceramic Cooker
Comprehensive user guide for the Belling 100/110cm Electric Ceramic Cooker. Includes safety warnings, operating instructions for the oven, grill, and AirFry function, clock programming, cleaning tips, and maintenance procedures.
Table of contents
Manual images
Click an image to enlargeQuick Guide
This guide provides essential information for operating your Belling 100/110cm Electric Ceramic Cooker. Before first use, ensure all packaging is removed and wash the oven shelves, baking tray, and grill pan in hot soapy water. Run the ovens and grill for a short period to burn off manufacturing residues; a harmless smell may occur during this process.
Safety Information
Important: This appliance must be earthed. Keep children under 8 years old away unless supervised. Do not use steam cleaners on this appliance. If the hob surface is cracked, switch off the appliance immediately to avoid electric shock. Never place food or dishes directly on the base of the oven; always use the shelves. Do not store flammable items on the cooking surfaces.
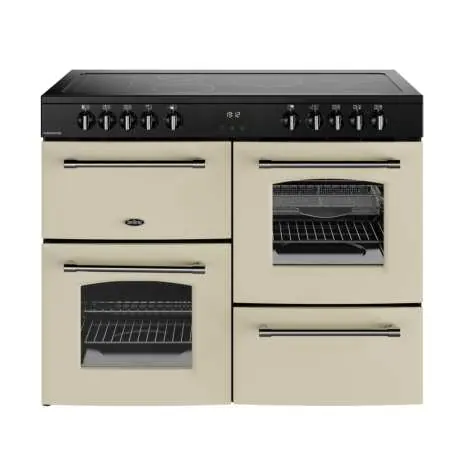
Getting to Know Your Product
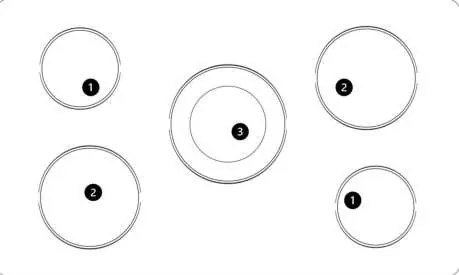
The control panel features dials for cook zones, the grill, and the main oven temperature. The hob consists of five electric zones (small, medium, and large). The appliance layout may vary by model.
Using the Grill
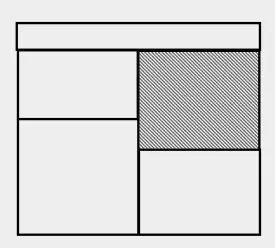
The grill door must be fully open when the grill is in use. For best results, preheat the dual grill for 3 minutes or the single grill for 5 minutes. Use shelf position 2 for optimal grilling. Never cover the grill pan or trivet with aluminium foil, as this creates a fire hazard.
Using the Main Oven
To start cooking, select a heating function and a temperature. The cooling fan may cycle on and off during use and continue to run for up to 1 hour after cooking; this is normal and ensures the appliance cools down safely. Do not switch the cooker off at the wall until the fan has stopped completely.
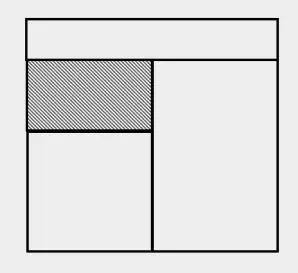
AirFry Function: Select the AirFry setting and set the temperature to 220°C. Place the metal AirFry tray on the 3rd shelf position from the bottom. Use a baking tray on the shelf below to catch drips.
Clock and Programmer
The programmer controls the main oven. If the clock is locked, press and hold the '+' key for 5 seconds to unlock. Use the menu button to select functions like alarm, cooking time, or end of cooking time. The clock uses a 24-hour system.
Cleaning and Maintenance
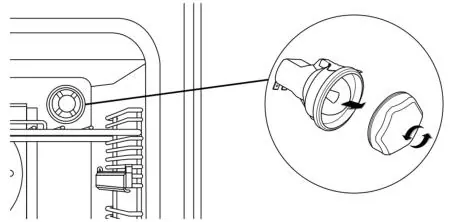
Clean the appliance regularly with warm, soapy water and a damp cloth. Do not use undiluted bleaches, chloride products, wire wool, abrasive cleaners, or steam cleaners. Do not wash cast iron items or pan supports in the dishwasher. To change the lightbulb, switch off the power, unscrew the lens cover anticlockwise, replace the bulb, and refit the cover.
Frequently Asked Questions
If the timer controls are unresponsive, the child-lock may be active; hold the '+' key for 5-10 seconds to deactivate. If the main oven is not working, ensure the programmer is not set to 'Auto' and the clock is set. The cooling fan running after use is normal and helps the appliance cool down.
Technical Data
The appliance is a Class 1 freestanding cooker with an electrical supply of 230-400V ~3N ~ 50 Hz. The total load is 15330W.
Manufacturer information
Belling
Practical help
Common problems
Timer touch controls not responding
The child-lock is likely activated (padlock symbol visible). Press and hold the '+' key for 5-10 seconds until the symbol disappears.
Main oven not working
Ensure the time of day is set on the timer and 'Man' (manual mode) is displayed. Check that both a temperature and a function are selected.
Cooling fan runs for a long time after cooking
This is normal. The fan runs to cool the appliance down to approximately 35°C. Do not switch off the power at the wall until the fan stops.
Before use
- Remove all packaging and wrapping from inside the appliance.
- Wash oven shelves, baking tray, and grill pan in hot soapy water.
- Run the ovens and grill for a short while to burn off manufacturing residues.
- Ensure the appliance is properly earthed.
- Check that the clock is set, as oven functions may not work otherwise.
Specs in practice
- Electrical Supply
- 230-400V ~3N ~ 50 Hz
- Appliance Class
- Class 1 - freestanding cooker
- Standard Oven Light
- 25W
Images and diagrams
- Control Panel: Identifies the dials for cook zones, grill, and oven temperature.
- Hob Functions: Shows the layout of the five electric cooking zones.
- Lightbulb Replacement: Illustrates unscrewing the lens cover anticlockwise to access the bulb.
Model compatibility
- Only use temperature probes recommended for this oven.
- Do not use external timers or remote control systems.
- Do not use steam cleaners.

Manual page author
Emily Carter
User documentation editor
Prepares concise manual descriptions and highlights the most useful setup, operation, and maintenance information for readers.