Automotive / Suspension Kits
Belltech 150210BK Suspension Lift Kit Installation Guide
Comprehensive installation guide for the Belltech 150210BK suspension lift kit for 2019+ GM1500 Silverado and Sierra trucks. Includes step-by-step procedures for front and rear installation, parts list, and safety requirements.
Table of contents
Manual images
Click an image to enlargeQuick guide from the manual
This installation guide is for the Belltech 150210BK suspension lift kit, designed for 2019+ GM1500 Silverado and Sierra vehicles (excluding 2019 Classic body style). Before starting, ensure you have all necessary tools and that the vehicle is parked on a level surface with the parking brake engaged and rear wheels blocked.
Safety Warnings:
- Do not work under a vehicle supported only by a jack. Use jack stands in manufacturer-specified locations.
- Do not drive the vehicle until all work is completed and checked.
- Always use appropriate safety equipment, including eye, face, and hand protection.
- An assistant is highly recommended during installation.
Recommended Tools
- Properly rated floor jack and support stands
- Wheel chocks
- Torque wrench (up to 200 ft/lbs)
- Standard and Metric socket and wrench sets
- Tape measure
- Dead blow hammer
- Marking pen
- Safety glasses
- Reciprocating saw with metal cutting blades
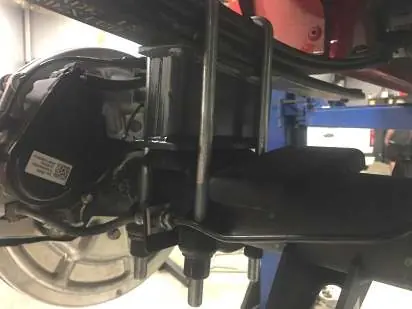
Front Removal and Installation
The front installation involves removing factory components and installing the new lift kit parts. Key steps include:
- Jack up the front of the vehicle and place on jack stands.
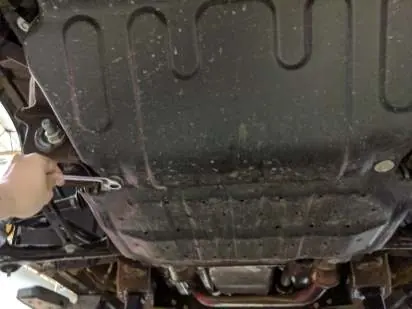
- Remove the factory plastic front skid plate, wheels, sway bar, and tie-rod ends.
- Disconnect brake lines, ABS sensor wires, and brake calipers. Hang calipers to prevent line damage.
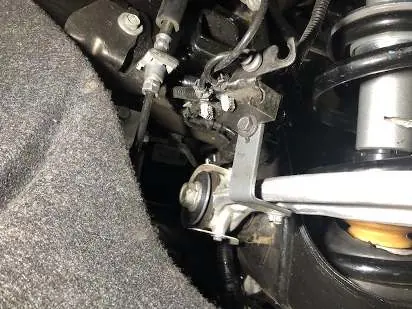
- Remove the axle nut, support the spindle, and separate the upper and lower ball joints.
- Uninstall the strut and lower control arms.
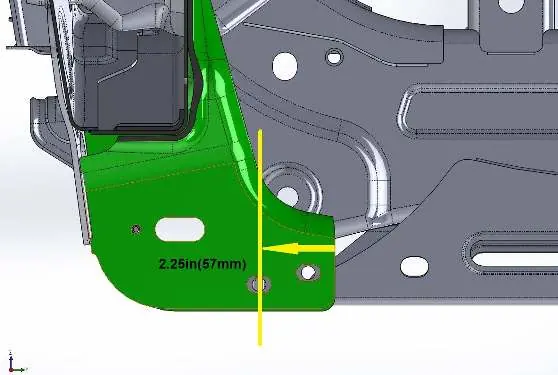
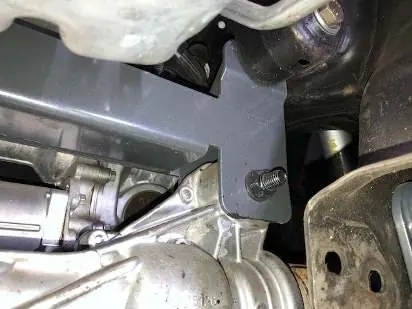
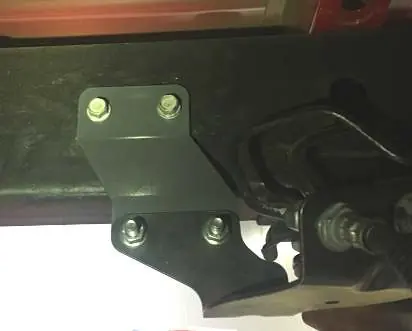
- Remove the OEM crossmember and cut the driver-side mount as shown in Figure 1 to allow for differential clearance.
- Install the new rear crossmember and differential bracket.
- Reinstall the lower control arms and assemble the lift spindle.
- Reconnect all components, including ABS harness, brake lines, and sway bar end links.
Rear Installation
- Chock the front wheels and jack up the rear of the vehicle from the differential.
- Remove the wheels, rear brake line brackets, and factory shock absorbers.
- Remove factory u-bolts and blocks. Lower the axle to install the new 3-inch blocks.
- Install the new u-bolts and tighten in a crossing pattern.
- Replace bump stops with the supplied extenders.
- Install new shock absorbers and extended brake line brackets.
- Reattach brake lines and harness, ensuring there is sufficient slack.
- Install tires/wheels, lower the vehicle, and torque all hardware.
Practical help
Common problems
Ball joint spinning during removal
Use a 10mm wrench to hold the ball joint stud while loosening the nut.
Axle pulling out of differential
Remove the axle nut first to prevent damage; support the spindle during disassembly.
Brake line overstretching
Locate and undo brake line holders to create slack before lowering the axle or spindle.
Before use
- Measure hub to fender heights before starting.
- Park on a smooth, level surface.
- Engage parking brake and block rear wheels.
- Verify all hardware listed in the parts list is present.
- Ensure vehicle is properly supported on jack stands.
Images and diagrams
- Figure 1: Illustrates the specific cut location on the driver-side mount required for differential clearance.
Model compatibility
- Fits 2019+ GM1500 Silverado / Sierra 2WD / 4WD.
- Excludes 2019 Classic Body Style.

Manual page author
David Miller
Documentation analyst
Organizes user manual content into clear summaries, with attention to model details, product context, and everyday usability.