Home Appliances / Vacuum Cleaners
User Manual for Bissell CleanView 1332R Vacuum Cleaner
Quick guide for the Bissell CleanView 1332R vacuum cleaner. Includes assembly instructions, filter maintenance, brush roll cleaning, troubleshooting, and operation tips.
Table of contents
Manual images
Click an image to enlargeQuick guide from the manual
This guide provides essential information for operating and maintaining your Bissell CleanView 1332R vacuum cleaner. Always ensure the dirt tank is locked and both filters are in place before use. If you experience low suction or poor pickup, check for clogs in the hose or brush roll, and ensure the filters are clean.
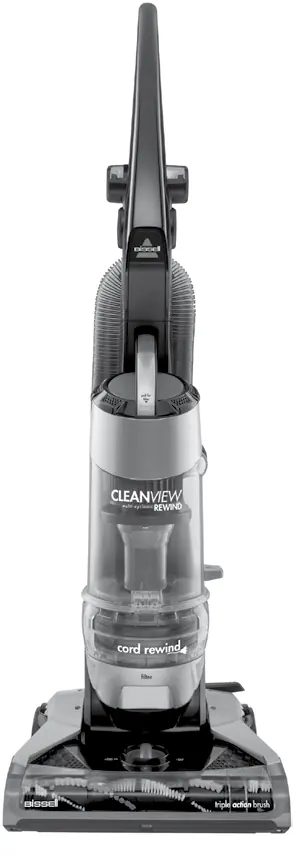
Product overview
The vacuum features a handle, power switch, dirt tank, and various tools including a dusting brush, crevice tool, and extension wand. The powerfoot includes a height adjustment knob for different floor surfaces.
Assembly
Tools required: Phillips-head screwdriver.
- Handle: Slide the handle base into the opening at the top of the vacuum body. Secure it with the two provided screws using a Phillips-head screwdriver.
- Hose and tools: Attach the extension wand clip to the back of the vacuum base. Attach the Twist 'n Snap hose by lining up the tabs on the cuff with the notches on the back of the vacuum and twisting clockwise. Slide the hose wand into the base and fold the hose over the upper hose wrap.
Operations
- Power switch: Depending on the model, the switch is either a rocker switch on the left side or a button on the front of the handle.
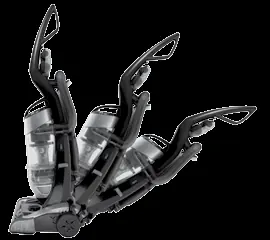
- Handle position: Press the handle release pedal to select between Upright (storage/tools), Normal cleaning, or Low cleaning (under furniture).
- Height adjustment: Use the dial on the foot of the cleaner to select one of five settings based on carpet pile height.
- Automatic cord rewind: Pull the cord out until the yellow line is visible. Do not pull beyond the red line. To rewind, turn the power off, unplug, and press the automatic cord button.
Maintenance and care
- Dirt tank: Empty when dirt reaches the Full line. The tank can be washed in warm water with mild detergent; ensure it is completely dry before reassembly.
- Filters: Check the pre-motor filter monthly. The foam filter is washable in warm water with mild detergent. The post-motor filter should be replaced every three to six months and is NOT washable; tap it against a garbage container to clean.
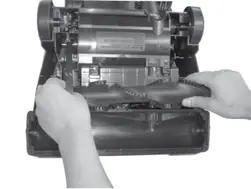
- Brush roll and belt: Regularly check for hair and debris. To clean, unplug the unit, remove the six screws on the bottom, and lift the brush cover. If the belt is worn or broken, replace it with a genuine Bissell style 9 replacement belt (#203-1093).
Troubleshooting
If the vacuum won't turn on, check the fuse or circuit breaker. If it won't pick up dirt, check the height adjustment, ensure the hose is attached, check for clogs, empty the dirt tank, or clean/replace filters. If the vacuum is difficult to push, adjust the height setting to a higher level.
Manufacturer information
Bissell Inc.
Practical help
Common problems
Vacuum cleaner won't turn on
Check for a blown fuse or tripped circuit breaker.
Vacuum cleaner won't pick up dirt
Check height adjustment, ensure hose is attached, check for clogs, empty dirt tank, or clean/replace filters.
Vacuum cleaner is difficult to push
Adjust the powerfoot height setting to a higher level.
Cord will not retract
Check for knots or twists in the cord.
Before use
- Ensure the dirt tank is in the locked position.
- Verify that both pre-motor and post-motor filters are installed.
- Check that the handle is securely attached.
- Ensure the hose wand is firmly attached to the base.
- Check for obstructions in the hose or brush roll.
Specs in practice
- Pre-motor filter
- Foam filter; washable in warm water with mild detergent.
- Post-motor filter
- Pleated filter; NOT washable. Tap to clean.
- Height settings
- 5 settings available for different floor surfaces.
Images and diagrams
- Page 4 provides a detailed parts diagram identifying 27 components.
- Page 5 illustrates the handle and hose assembly steps.
- Page 8 shows how to access the brush roll and drive belt.
Model compatibility
- Use only genuine Bissell style 9 replacement belt (#203-1093).

Manual page author
Michael Turner
Technical manual editor
Reviews PDF manuals for structure, safety notes, and practical product details so readers can find the right information quickly.