Power / Solar Panels
Operating Instructions for Bresser Junior 20x Stereo Microscope 8852000
Quick guide for the Bresser Junior 20x Stereo Microscope (8852000). Learn how to set up, install batteries, observe specimens, and maintain your microscope safely.
PDF source: Deutsch · summary: English
Quick answers from the manual
Quick answer
- The Bresser Junior 20x Stereo Microscope is a battery-operated device for observing small objects. It requires 2x AA batteries for the LED light. p. 6, 10
Key actions
- Install batteries p. 6, 10
- Adjust focus p. 6, 10
First start
- Insert 2x AA batteries into the base compartment, then use the switch to turn on the LED light. p. 6, 10
Show 3 more answers Show less
Problems and fixes
Light not working
Check battery polarity and contact points.
p. 6, 10Technical specifications
| Parameter | Value | Meaning | Pages |
|---|---|---|---|
| Magnification | 20x | Fixed magnification level | p. 1 |
| Power Source | 2x AA batteries | Required for LED illumination | p. 6, 10 |
Where to find it in the PDF
- Parts and Setup p. 3, 6, 10
- Safety and Cleaning p. 4, 7, 8, 11
Table of contents
Manual images
Click an image to enlargeQuick guide from the manual
This microscope is designed for observing small objects. It features LED illumination powered by batteries. Ensure you have 2x AA batteries ready before starting. The device is not suitable for children under 3 years due to small parts and sharp functional edges.
Parts list
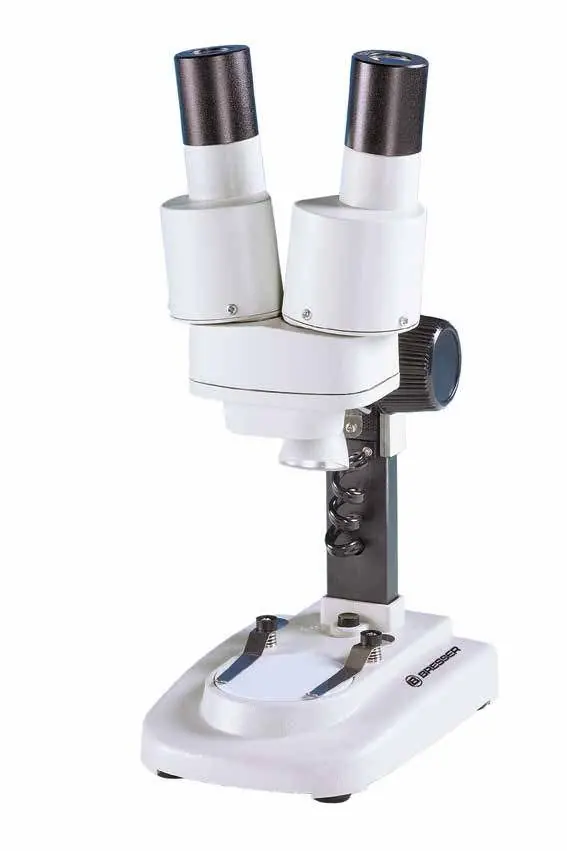
- Binocular view piece
- Stereo objective
- Eyepieces
- LED Illumination
- Microscope stage with object plate
- Stage clips
- Focus knob
- On/off switch
- Battery compartment
Setup and location
Choose a location with sufficient light, such as near a window or under a desk lamp. Place the object you wish to observe in the center of the microscope stage. If the object is large enough, secure it using the stage clips.
Battery installation
To power the LED light:
- Turn off the illumination using the on/off switch.
- Remove both eyepieces from the eyepiece supports.
- Turn the microscope over.
- Loosen the 6 fixing screws on the battery compartment cover and remove the cover.
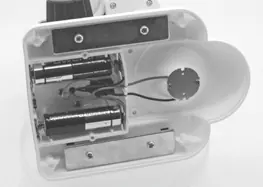
- Insert 2x AA batteries, ensuring the flat negative poles press against the spring terminals and the positive poles touch the flat contact sheets.
- Replace the cover and secure it with the 6 screws.
- Turn the microscope back over and reinsert the eyepieces.
Observation
Look through the binocular view piece and adjust the distance between the eyepieces until you see a clear, circular image. Adjust the sharpness by slowly turning the focus knob.
Cleaning and maintenance
Always disconnect the power source (remove batteries) before cleaning. Clean the exterior only with a dry cloth. Do not use cleaning fluids to avoid damaging electronic components. Clean lenses only with the supplied lens cloth or a soft, lint-free cloth (e.g., microfiber). Do not apply excessive pressure to avoid scratching the lenses. For stubborn dirt, dampen the cloth slightly with spectacle cleaning fluid.
Safety warnings
- Choking hazard: Contains small parts. Not for children under 3 years.
- Electrical safety: Do not disassemble the device.
- Battery safety: Use only recommended batteries. Do not mix brands or capacities. Remove batteries if the device will not be used for a long period. Never recharge non-rechargeable batteries.
- Injury risk: The device contains functional sharp points and edges. Store out of reach of children.
Manufacturer information
Bresser GmbH
Practical help
Common problems
Light does not turn on
Check that the batteries are installed with the correct polarity and that the battery compartment cover is securely fastened.
Image is blurry
Slowly turn the focus knob to adjust sharpness. Ensure the object is centered on the stage.
Before use
- Ensure you have 2x AA batteries.
- Find a well-lit area (window or desk lamp).
- Keep the device away from children under 3 years due to small parts.
- Check that the eyepieces are properly inserted.
Show more Show less
Images and diagrams
- Figure 1 identifies the main components including the binocular view piece, focus knob, and stage.
- Figure 3 illustrates the battery compartment location and the correct orientation for battery installation.
Model compatibility
- Requires 2x AA batteries (not included).

Manual page author
David Miller
Documentation analyst