Health / Laboratory Equipment
User Manual for Bresser Researcher ICD 20x-80x Stereo Microscope
Quick start guide and user manual for the Bresser Researcher ICD 20x-80x stereo microscope. Learn how to set up illumination, adjust focus, replace batteries, and maintain your optical instrument.
PDF source: Deutsch · summary: English
Quick answers from the manual
Quick answer
- The Bresser Researcher ICD is a stereo microscope with 20x-80x magnification. It features LED illumination (incident/transmitted) and can be powered by mains or 3x NiMH AA batteries. p. 4, 7
Key actions
- Adjusting friction p. 5, 8
- Replacing batteries p. 5, 8
First start
- Connect power, remove dust cover, place object, switch on, and adjust focus. p. 4, 7
Show 4 more answers Show less
Problems and fixes
Microscope head slides down
Adjust friction using the provided wrench on the shaft.
p. 5, 8Maintenance and reset
- Clean optical surfaces with a soft, lint-free cloth and alcohol. p. 5, 8
Technical specifications
| Parameter | Value | Meaning | Pages |
|---|---|---|---|
| Magnification | 20x, 40x, 80x | Total magnification | p. 6, 9 |
Where to find it in the PDF
- Parts and Setup p. 4, 7
- Operation p. 5, 8
- Technical Data p. 6, 9
Table of contents
Manual images
Click an image to enlargeQuick guide from the manual
The Bresser Researcher ICD is a stereo microscope designed for optical observation. Before use, ensure the device is placed on a stable, level surface. The microscope can be powered via the mains or by using three NiMH AA 1.2V rechargeable batteries. Always keep the device and accessories out of reach of children, as sharp tools may be used during operation.
Parts Overview
Refer to the diagrams in the manual (Fig. 1-7) to identify the following components:
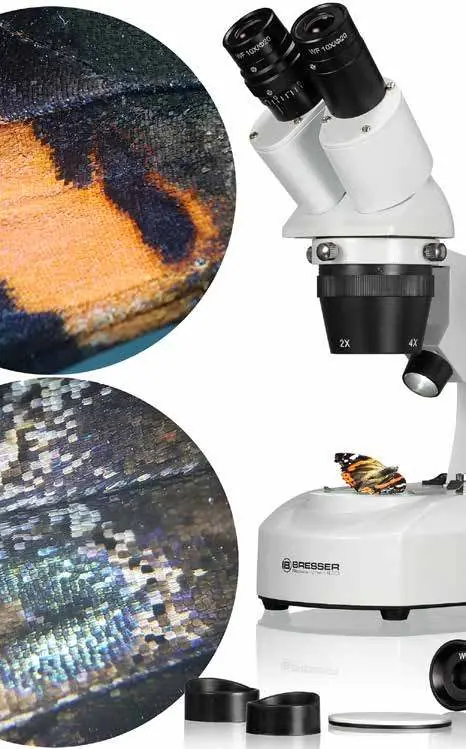
- 1: Eyepieces
- 2: Dioptre scale
- 3: Binocular head
- 4: Focus wheel
- 5: Objective holder with lenses
- 7: Illumination (Incident/Transmitted)
- 8: Microscope stage
- 10: Power supply connection
- 11: Main switch
- 12: Dimmer
- 14: Illumination source switch
- 18: Friction adjustment
- 19: Wrench for friction adjustment
Setup and Illumination
To set up the microscope:
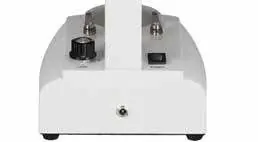
- Place the microscope on a stable surface.
- Connect the power supply to the connection (10) if not using batteries.
- Switch the device on using the main switch (11).
- Use the source switch (14) to select the illumination mode:
- Position I: Incident light (top)
- Position II: Transmitted light (bottom)
- Position III: Both lights
- Position 0: Lights off
- Adjust brightness using the dimmer (12).
Observation and Adjustment
Follow these steps for optimal viewing:
- Preparation: Remove the dust cover (6). Place the object on the stage (8) and secure with clips (9) if necessary.
- Magnification: Rotate the objective holder (5) to select 2x or 4x magnification. Start with the lowest magnification.
- Focusing: Look through the eyepieces (1) and use the focus wheel (4) to sharpen the image.
- Dioptre Compensation: Set the dioptre scale (2) to '0'. Close your left eye and focus with the wheel (4). Then, close your right eye and adjust the focus for the left eye using the dioptre scale (2).
- Eye Distance: Adjust the binocular head by moving the eyepieces until the image is clear and comfortable for your eyes.
Maintenance
- Friction Adjustment: If the microscope head slides down due to its weight, use the provided wrench (19) to adjust the friction on the shaft (18).
- Battery Replacement: If batteries are defective, replace them with three NiMH AA 1.2V (approx. 1200 mAh) batteries. Warning: Do not use non-rechargeable batteries, as this may cause fire or explosion.
- Cleaning: Keep the microscope free of dust and moisture. Clean optical surfaces with a soft, lint-free cloth, using a small amount of alcohol if necessary.
Manufacturer information
Bresser GmbH
Practical help
Common problems
Microscope head slides down
Use the provided wrench (19) to tighten the friction adjustment on the shaft (18).
Image is not sharp
Perform dioptre compensation (set to 0, focus right eye, then adjust left eye with dioptre ring) and use the focus wheel.
No light
Check power connection, ensure the main switch (11) is on, and verify battery charge/installation.
Before use
- Place microscope on a stable, level surface
- Remove the dust protective cover
- Connect power supply or install 3x NiMH AA batteries
- Switch on the main power
- Select desired illumination mode (I, II, or III)
Show more Show less
Specs in practice
- Magnification
- 20x, 40x, 80x (calculated by multiplying objective and eyepiece magnification)
- Illumination
- LED (Incident, Transmitted, or both)
Images and diagrams
- Fig 1: Main components overview
- Fig 3: Illumination controls and dimmer
- Fig 4: Battery compartment location
- Fig 6: Friction adjustment mechanism
Model compatibility
- Only use NiMH rechargeable batteries.
- Do not use standard non-rechargeable batteries.

Manual page author
Michael Turner
Technical manual editor