Health / Medical Devices
User Manual for CA-MI NEW HOSPIVAC 350 / 400 Surgical Aspirator
Quick guide for the CA-MI NEW HOSPIVAC 350 / 400 surgical aspirator. Includes setup, connection diagrams, cleaning instructions, maintenance, and troubleshooting steps.
Table of contents
Manual images
Click an image to enlargeQuick guide from the manual
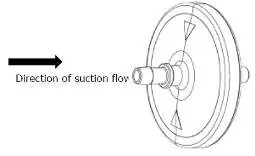
The CA-MI NEW HOSPIVAC 350 / 400 is a surgical aspirator designed for suctioning body liquids. It is intended for hospital and operating theatre use. The device operates at 110-127V~/60Hz. Always ensure the bacteriological filter is installed before use. The device must be used in an upright position to prevent the anti-reflux valve from triggering.
Installation and connections
Place the device on a flat, stable surface. Connect the short silicone tube to the antibacterial filter connector and the other end to the safety trap 'IN' nozzle. Connect another short silicone tube from the safety trap 'OUT' nozzle to the vessel cover 'VACUUM' port. Connect the long silicone tube to the 'PATIENT' port on the lid and attach the conical junction for the probe.

Operation
Press the ON/OFF button to start the device. The device performs an autotest upon startup. Use the vacuum adjustment knob to set the desired pressure. If using the footswitch, connect it to the designated port. For models with a flow deviator, you can switch between two collection tanks by pressing the OUT LEFT or OUT RIGHT buttons.
Cleaning and maintenance
Cleaning: Use a cotton cloth dampened with detergent for external parts. Do not use abrasive or solvent detergents. Ensure no liquids penetrate the membrane keyboard or internal parts.
Sterilization: The jar, cover, and silicone tubes can be autoclaved at 121°C (1 bar relative pressure) for 15 minutes. Ensure the jar is positioned upside down. Do not wash, sterilize, or autoclave the antibacterial filter. Replace the filter if it becomes wet, discolored, or contaminated.
Troubleshooting
- Unit doesn't work: Check the power cable and external power source.
- No aspiration: Ensure the jar cap is screwed on correctly and the lid seal is properly seated.
- Low vacuum: Check if the vacuum regulator is set to minimum, the filter is blocked, tubes are kinked, or the pump motor is damaged.
- Float doesn't close: Ensure the float is not detached or covered in dirty material.
Practical help
Common problems
The suction unit doesn't work
Check if the cable is damaged or if there is an external power source failure.
No aspiration
Check if the jar cap is screwed on correctly or if the lid seal is out of its seat.
Vacuum power is very low or absent
Turn the vacuum regulator clockwise, replace the filter, check for kinked/disconnected tubes, or empty the jar.
The float doesn't close
Ensure the float is not partially detached or covered in dirty material; clean or reinsert it.
Before use
- Inspect the unit for visual damage.
- Check the mains cable integrity.
- Ensure the bacteriological filter is installed.
- Verify the vacuum gauge reaches -90 kPa.
- Ensure the jar is used in an upright position.
Specs in practice
- Vacuum Pressure
- Maximum -90kPa / -0.90 Bar / -675mmHg.
- Power Consumption
- 600VA.
Images and diagrams
- The front panel features a vacuum gauge, ON/OFF button, and vacuum adjustment knob.
- The connection diagram shows the path from the antibacterial filter to the safety trap and then to the vessel.
Model compatibility
- Use only original components and accessories.
- Suction probes must comply with ISO 10993-1.
- Not suitable for MRI environments.

Manual page author
Emily Carter
User documentation editor
Prepares concise manual descriptions and highlights the most useful setup, operation, and maintenance information for readers.