Furniture / Bathroom Furniture
Installation Manual for Casainc 10048-CAB Bath Vanity
Quick installation and operation guide for the Casainc 10048-CAB solid wood bath vanity. Includes assembly steps, LED mirror operation, wiring diagrams, and safety warnings.
Table of contents
Manual images
Click an image to enlargeQuick Guide
This manual provides installation and operation instructions for the Casainc 10048-CAB bath vanity. Before beginning, inspect the product for transit damage and verify all items against the packing list. Professional installation is recommended.
- Packing List: Main cabinet, mirror, basin, and top.
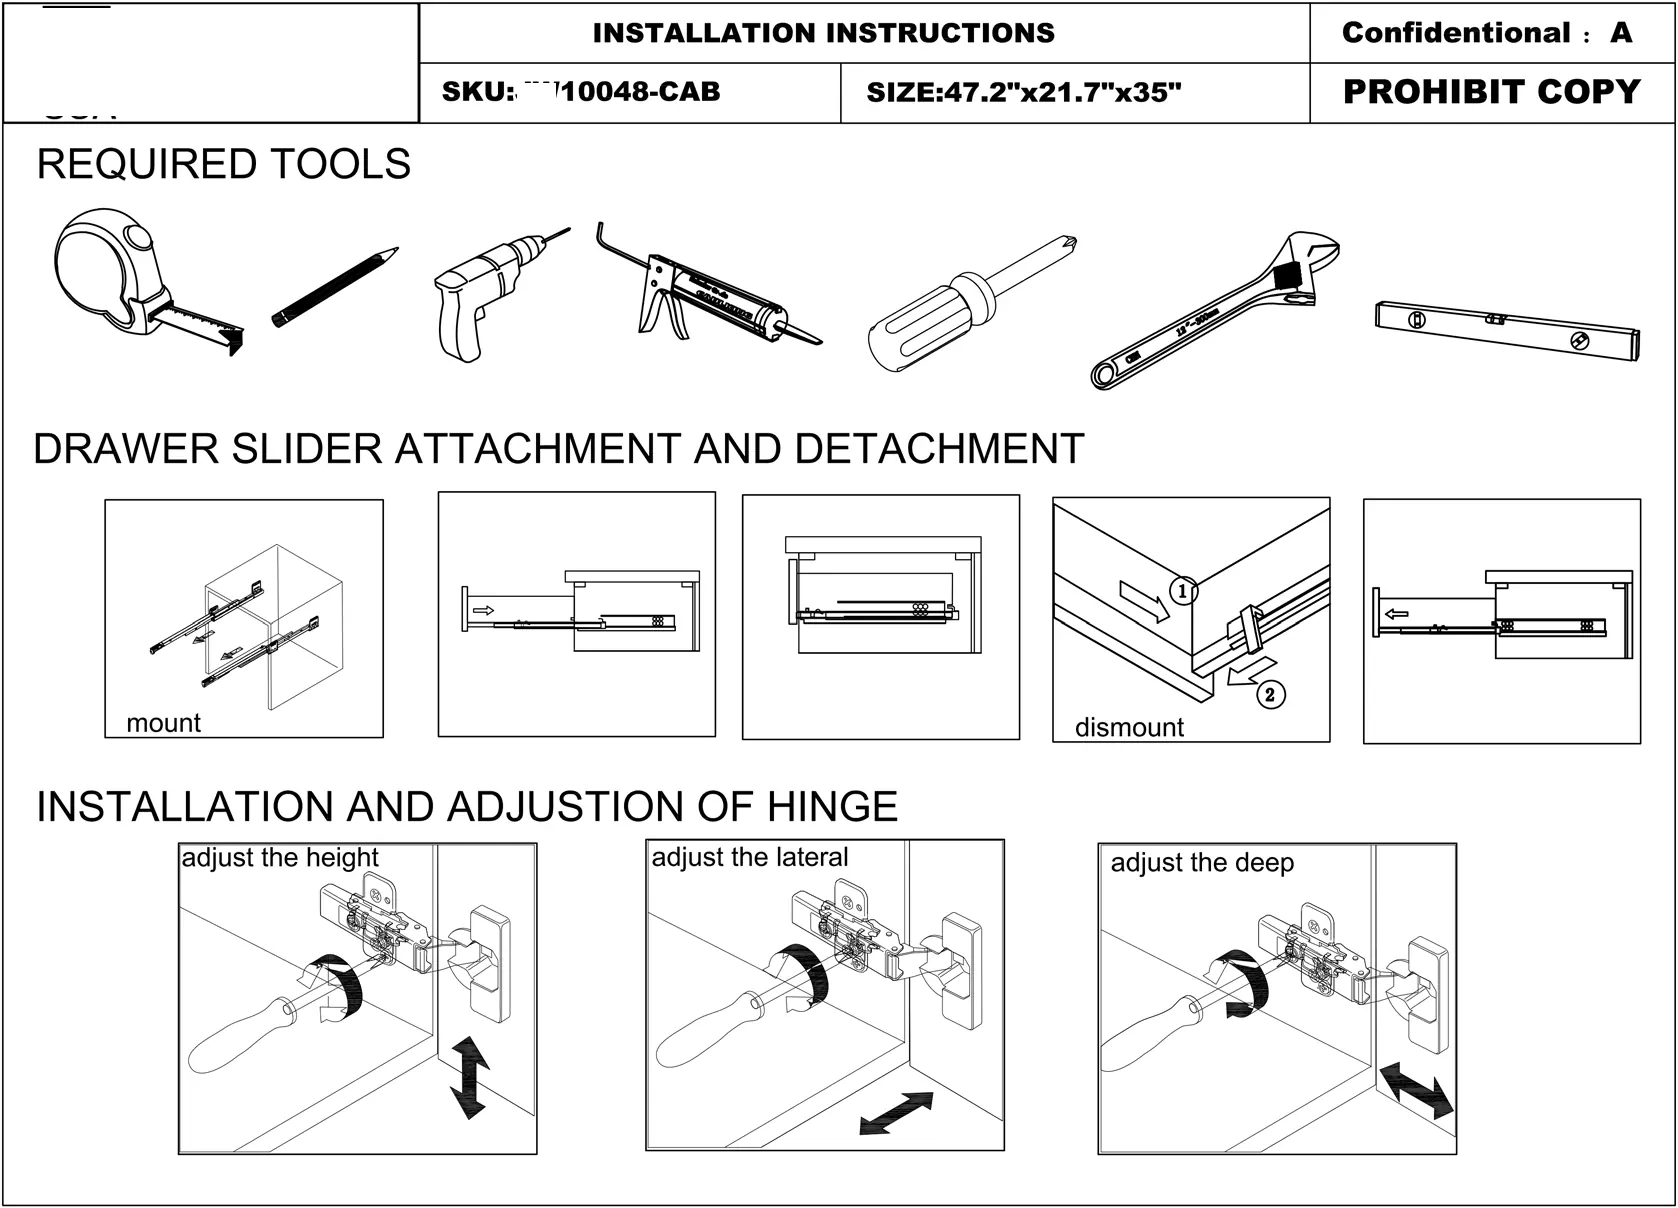
- Required Tools: Tape measure, pencil, drill, glue gun, screwdriver, wrench, and level.
Installation
Follow these steps to install the vanity and mirror:
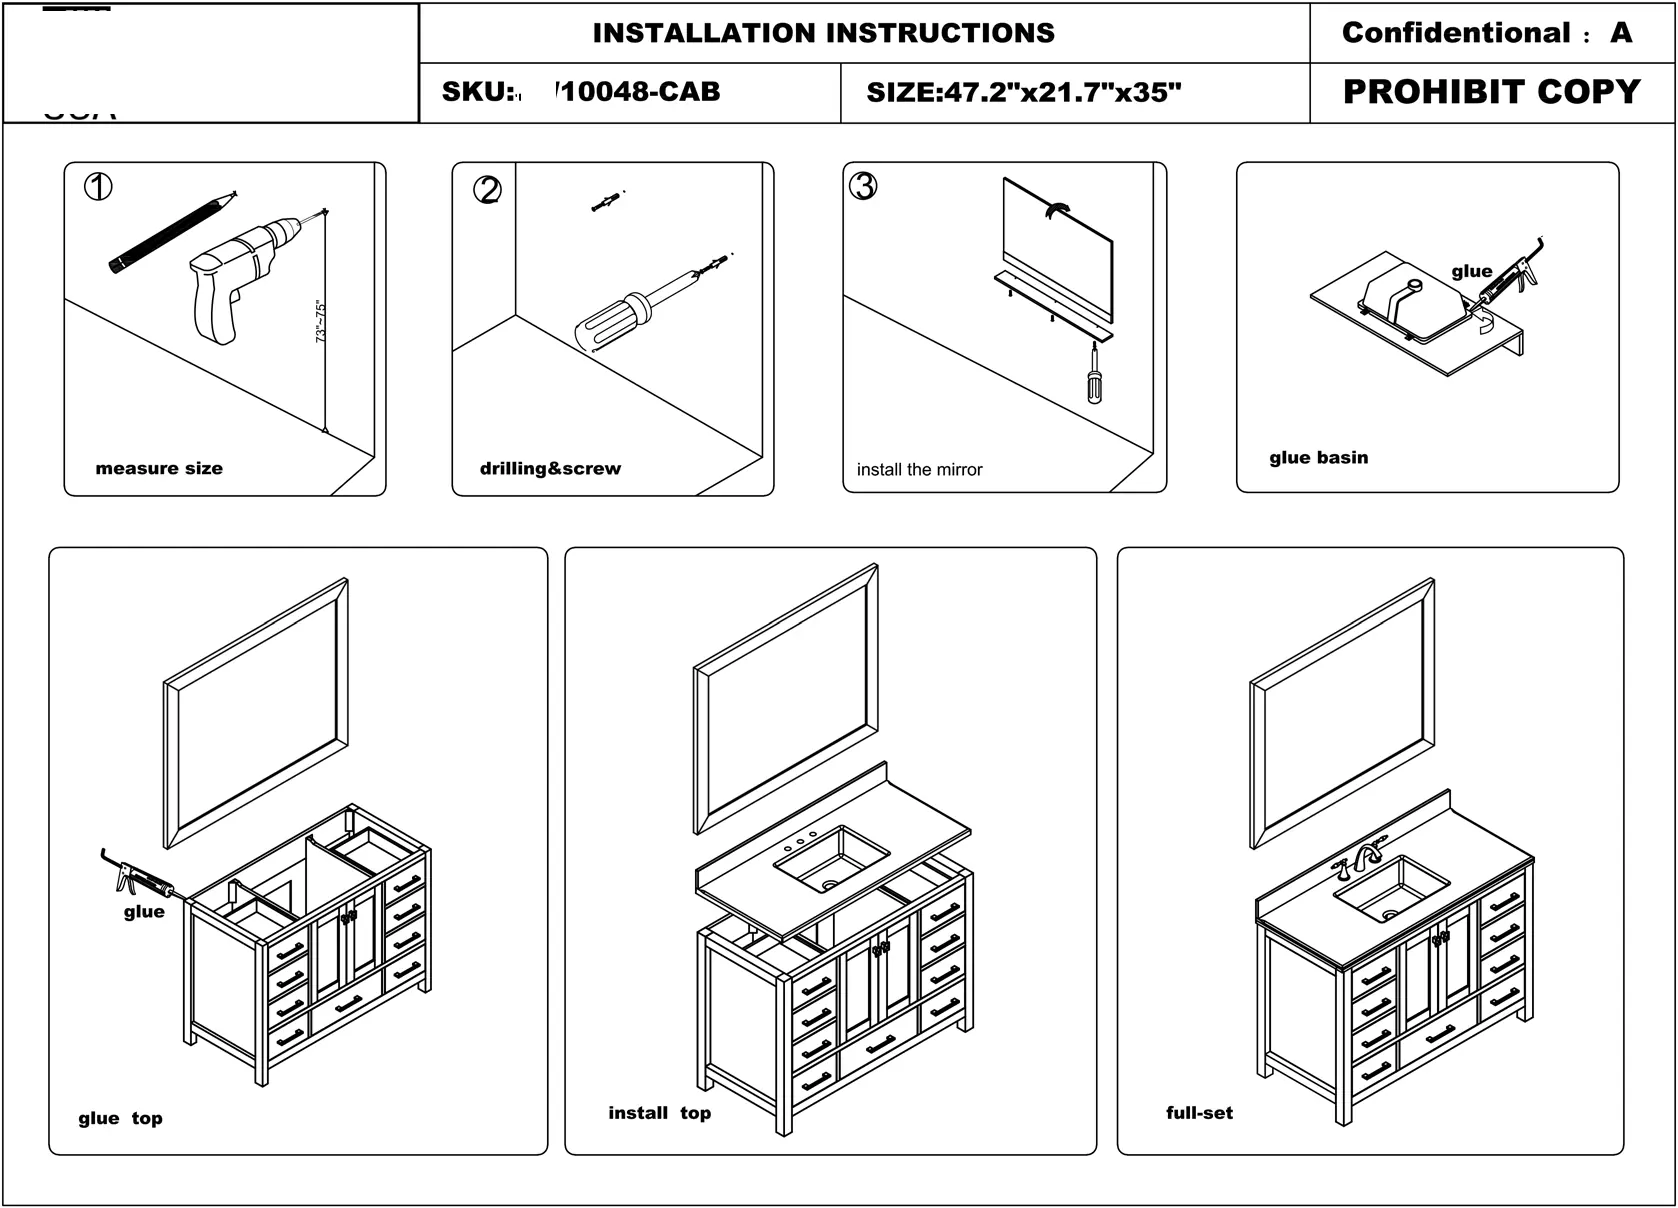

- Preparation: Measure the installation area (73-75 inches height recommended).
- Drilling: Mark and drill holes for mounting. Ensure there are no hidden pipes or cables in the wall.
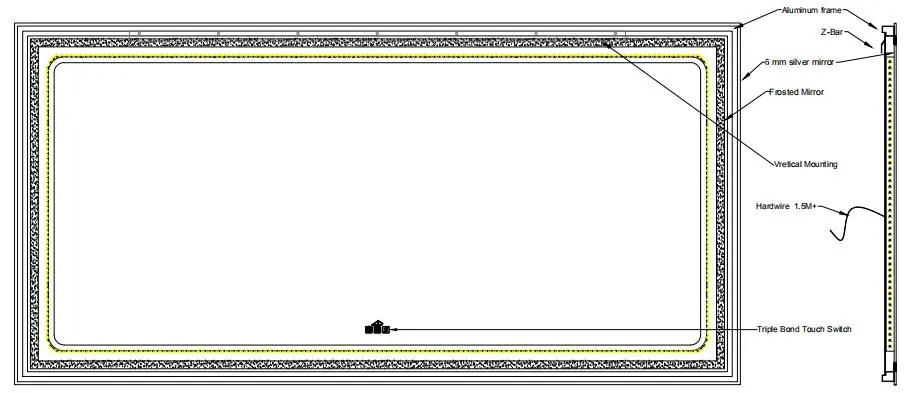
- Mirror Installation: Secure the mirror using the provided Z-bar.
- Basin and Top: Apply glue to the basin and top, then install them onto the cabinet.
- Adjustments: Use the hinge adjustment screws to align the doors (height, lateral, and depth adjustments). Use the drawer slider mechanism to mount or dismount drawers as needed.
LED Mirror Operation
The LED mirror features a touch switch with memory and dimming functions.
- Button 1 (Light): Short press to turn on/off. Long press (3-5 seconds) to activate the dimmer function (cycles from strong to weak and vice versa).
- Button 2 (Color Temperature): Press to cycle through color temperatures: Neutral (3000K+6400K), Cool White (6400K), and Warm Yellow (3000K).
- Button 3 (Anti-fog): Short press to turn the anti-fog function on or off.
Power Source FAQ
The mirror supports specific wiring configurations:
- Direct Wired (Recommended): The LED light and anti-fog pad are controlled by the built-in touch switch.
- Wall Switch: The mirror is bridged to the wall switch. The wall switch must be ON for the touch switch to function.
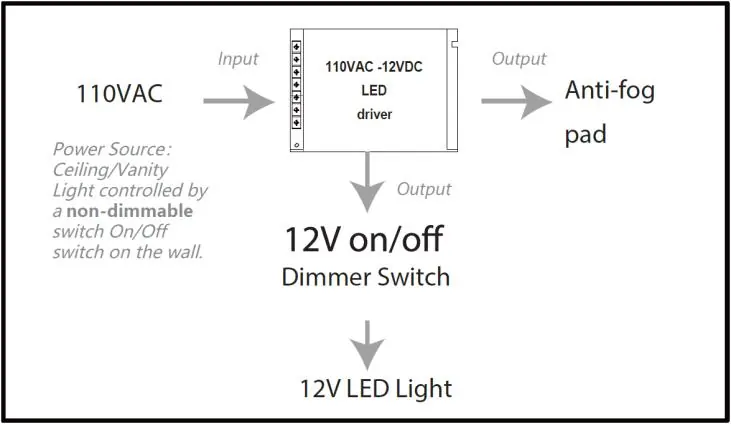
- Wall Dimmer Switch (Not Accepted): Do not use a wall dimmer switch, as it will damage the LED driver.
Safety and Maintenance
- Electrical Safety: Switch off the electrical supply at the main circuit board before installation or maintenance. All fittings must be installed in accordance with current IEE wiring regulations.
- Usage: Suitable for indoor use only. Keep away from curtains and fabrics. Never cover the mirror.
- Maintenance: Regularly check the cord, transformer, and all parts for damage. Do not disassemble the product, as the LED light source is non-changeable.
Customer Support
For assistance, contact Casainc at 001 888-257-3857 or email [email protected]. Visit www.casainc.com for more products.
Official resources from the manual
Practical help
Common problems
Mirror will not turn on
Ensure the wall switch is in the ON position if using a wall switch configuration, or check the direct wiring connection.
LED driver damage
Do not connect the mirror to a wall dimmer switch; this is not supported and will cause damage.
Missing parts
Report any missing items to your local dealer immediately upon receipt.
Before use
- Inspect product for transit damage upon receipt.
- Verify all items against the packing list.
- Ensure wall is free of hidden pipes or cables before drilling.
- Wear eye protection when drilling.
- Switch off electrical supply at the main circuit board.
Specs in practice
- Color Temperature
- 3000K (Warm Yellow), 6400K (Cool White), or Mixed (3000K+6400K).
- Power Source
- 110VAC input, 12VDC output for LED and anti-fog pad.
Images and diagrams
- Hinge adjustment: Shows how to adjust door height, lateral position, and depth using a screwdriver.
- Drawer slider: Illustrates the mounting and dismounting process for the drawers.
- Power flow: Visualizes the connection from 110VAC input to the 12V LED driver.
Model compatibility
- Wall Dimmer Switch: Not compatible; will damage the LED driver.
- Indoor use only: Do not install in hazardous locations.

Manual page author
David Miller
Documentation analyst
Organizes user manual content into clear summaries, with attention to model details, product context, and everyday usability.