Furniture / Bathroom Furniture
Installation and Maintenance Manual for Sensea Perla 110CM 3-Port Mirror Cabinet
Complete installation, usage, and maintenance guide for the Sensea Perla 110CM 3-Port Mirror Cabinet. Includes step-by-step assembly instructions, safety warnings, and care tips.
Table of contents
Manual images
Click an image to enlargeImportant Safety Information
To avoid any risk of toppling, this furniture item must be securely attached to the wall using the provided securing device. Before installation, check the suitability and strength of the wall to ensure it can bear the load of the furniture. If you are not sure of the resistance of the walls in your bathroom, you must add feet, which are sold separately.
Note: Screws, washers, and plugs suited to the type of material of your wall are not included. Please consult a specialized sales assistant to obtain the correct hardware for your wall type.
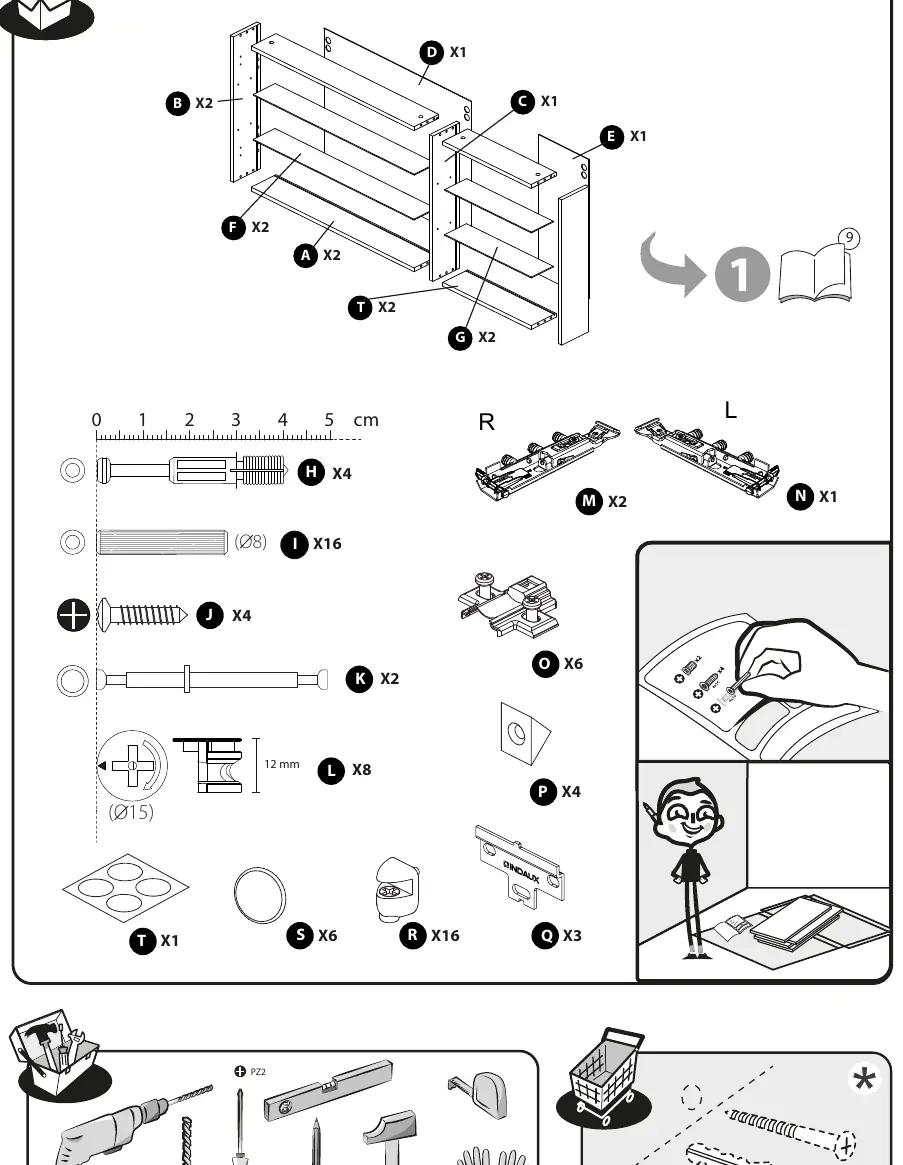
Parts List
Before beginning assembly, ensure all parts are present. The kit includes various panels (A, B, C, D, E, F, G, T), hinges, screws, wall mounting brackets, and other assembly hardware. Refer to the parts diagram on page 6 for a complete inventory of components.
Assembly Instructions
The assembly process involves 32 steps. Key phases include:
- Cabinet Structure: Assemble the main frame using the provided panels and cam locks (Steps 1-16).
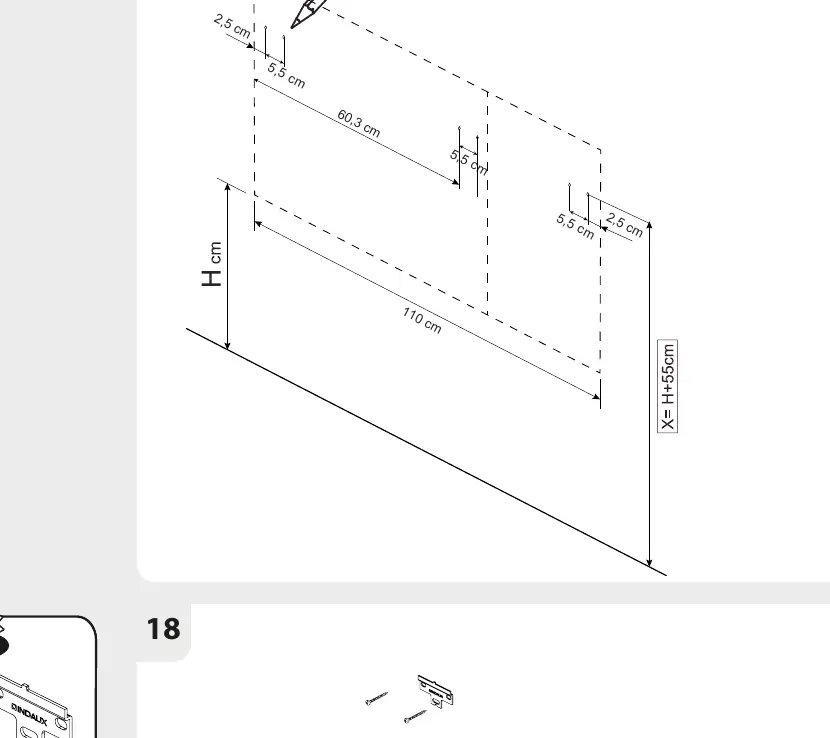
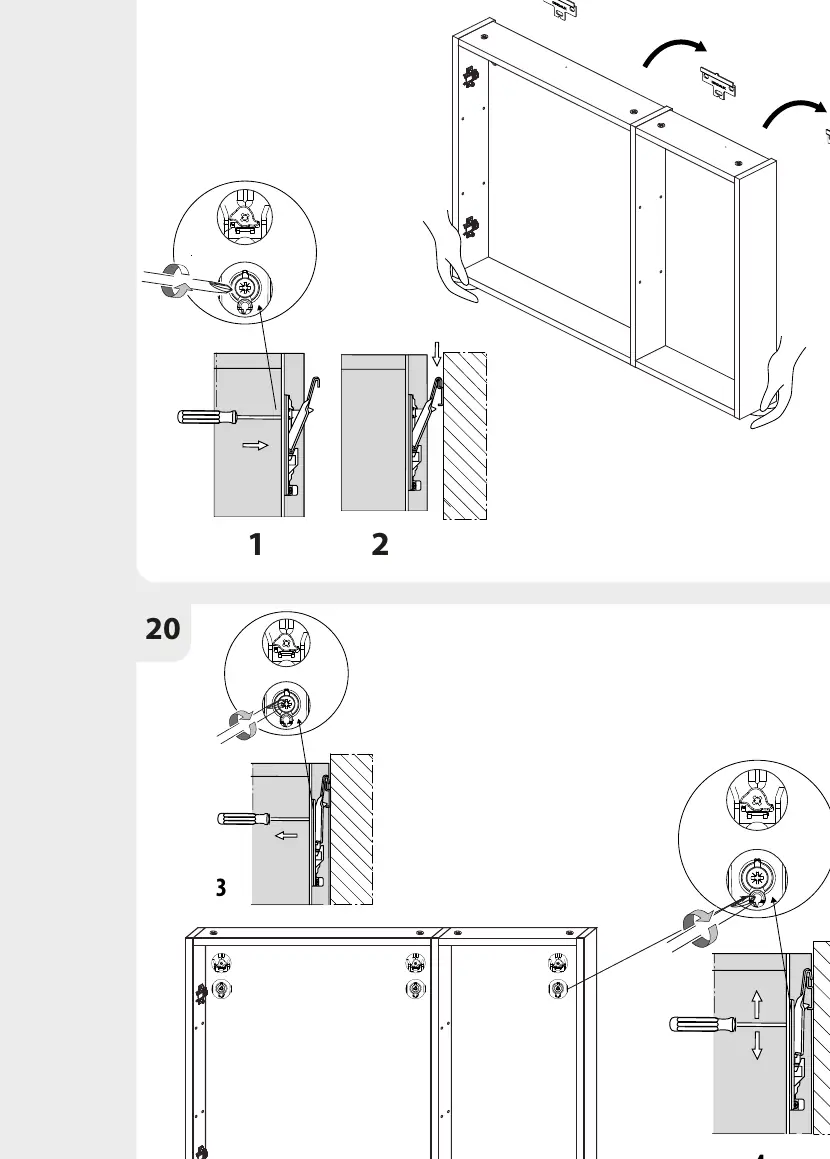
- Wall Mounting: Mark the wall according to the dimensions provided (110 cm width, H height). Use the provided brackets (Q) to secure the cabinet to the wall (Steps 17-19).
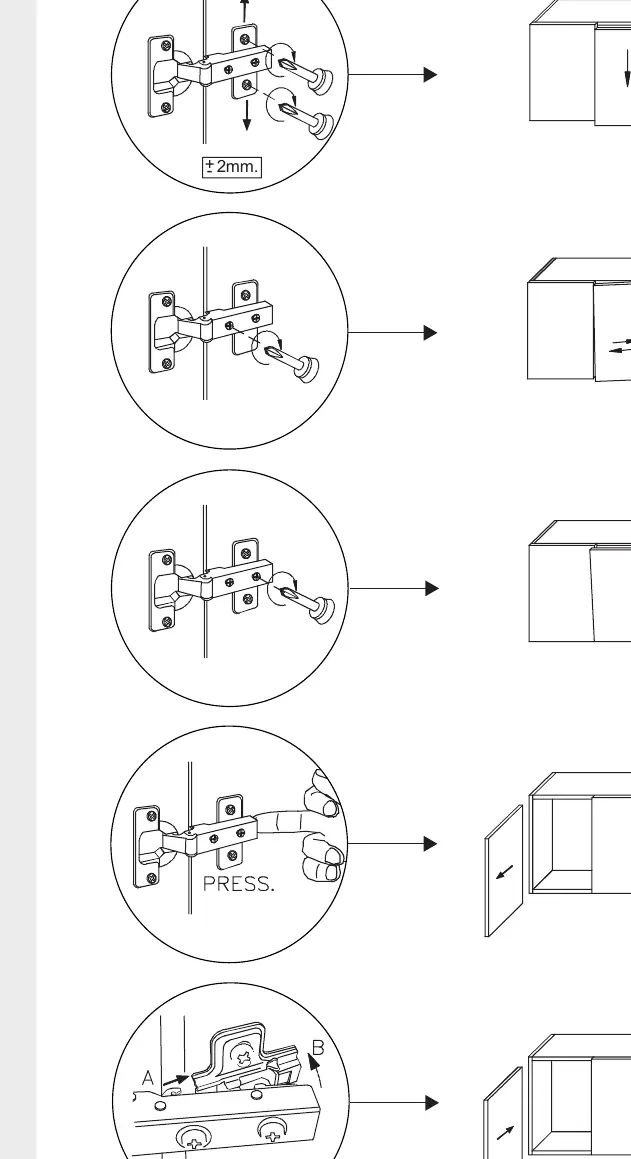
- Door Installation: Attach the doors to the cabinet frame using the hinges (Steps 27-28).
- Final Adjustments: Use the hinge adjustment screws to align the doors properly (Step 29).
Hinge Adjustment
The hinges allow for fine-tuning the door position. You can adjust the doors by ±2mm to ensure they hang straight and close correctly. Use a screwdriver to turn the adjustment screws on the hinge mechanism.
Maintenance and Care
To maintain the cabinet, clean it with a damp cloth. Do not use harsh chemicals or abrasive sponges. The maximum load capacity for the cabinet is 20kg. Ensure the cabinet is kept dry to prolong its lifespan.
Practical help
Common problems
Cabinet instability or risk of toppling
Ensure the cabinet is securely attached to the wall using the provided hardware. If the wall is not strong enough, install optional feet (sold separately).
Doors are misaligned
Use the adjustment screws on the hinges to align the doors (±2mm adjustment range).
Unsure about wall mounting hardware
The kit does not include wall-specific screws and plugs. Consult a specialized hardware store to select the correct fasteners for your specific wall material.
Before use
- Verify all parts are present according to the parts list.
- Ensure you have the necessary tools: drill, level, tape measure, hammer, and screwdriver (PZ2).
- Check wall strength and material to select appropriate mounting hardware.
- Confirm the installation height (H) and mark the wall accurately.
- Ensure the cabinet is not overloaded (Max load: 20kg).
Specs in practice
- Hinge Adjustment
- Allows for ±2mm alignment of the doors.
Images and diagrams
- Page 6: Detailed parts inventory and required tools.
- Page 19: Wall marking and drilling template dimensions.
- Page 20: Securing the cabinet to the wall brackets.
- Page 25: Hinge adjustment guide for door alignment.
Model compatibility
- Requires wall-specific screws and plugs (not included).
- Optional feet can be purchased if wall strength is insufficient.

Manual page author
David Miller
Documentation analyst
Organizes user manual content into clear summaries, with attention to model details, product context, and everyday usability.