Home Appliances / Small Kitchen Appliances
User Manual for Concept KS 3006 Convector Heater
Quick guide for the Concept KS 3006 convector heater. Includes installation steps for wall-mounting or free-standing use, operating instructions, safety precautions, and maintenance tips.
PDF source: CS · summary: English
Quick answers from the manual
Quick answer
- The Concept KS 3006 is a convector heater with adjustable power settings (750W, 1250W, 2000W), a thermostat, and a fan. It can be used as a free-standing unit or wall-mounted. p. 33, 34, 35
Key actions
- Wall mounting p. 36, 37
- Setting temperature p. 37
First start
- The unit may produce a slight smell when first turned on; this is normal and will disappear. p. 37
Show 3 more answers Show less
Maintenance and reset
- Clean inlet and outlet grilles regularly; use a vacuum cleaner to remove dust. p. 38
Technical specifications
| Parameter | Value | Meaning | Pages |
|---|---|---|---|
| Voltage | 220-240 V | Operating voltage | p. 33 |
| Power | 1800-2000 W | Power consumption | p. 33 |
Where to find it in the PDF
- Safety precautions p. 33
- Assembly p. 35, 36, 37
- Operating instructions p. 37
Table of contents
Manual images
Click an image to enlargeQuick guide from the manual
The Concept KS 3006 is a versatile convector heater designed for both free-standing and wall-mounted use. It features adjustable power settings (750W, 1250W, 2000W), a thermostat for temperature control, and an optional fan for faster heating.
Safety precautions
- Do not cover the appliance to prevent overheating.
- Keep a minimum distance of 100 cm from flammable materials like furniture, curtains, and clothing.
- Ensure air inlet and outlet grilles remain unobstructed.
- Do not use the heater near showers, bathtubs, sinks, or swimming pools.
- Always turn off and unplug the appliance before cleaning or when not in use.
- Do not use the heater in environments with explosive gases or flammable substances.
Assembly
Free-standing use
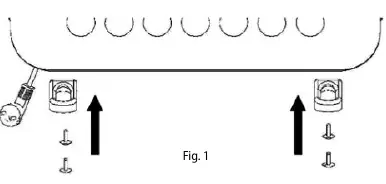
Attach the provided legs to the bottom of the unit to increase stability and ensure proper airflow to the inlet grille. Secure them firmly with the included screws.
Wall-mounted use
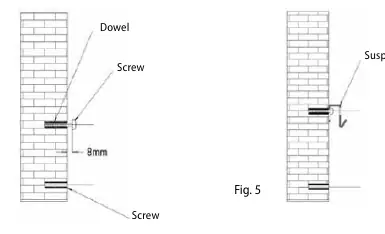
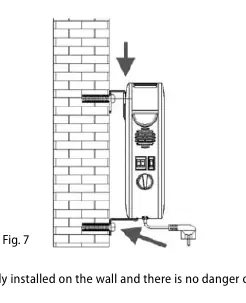
The heater must be mounted on a wall made of non-flammable material. Ensure there is sufficient space around the unit (at least 1m from flammable materials). Follow the drilling template provided in the manual to mark and drill holes for the suspension hooks and spacers. Ensure the unit is securely fastened to the wall.
Operating instructions
1. Place the unit on a stable surface or mount it on the wall. 2. Uncoil the power cable completely. 3. Plug the unit into a mains socket. 4. Use the mode selector to choose the desired power output (750W, 1250W, or 2000W). 5. Adjust the thermostat regulator to set the desired room temperature. The unit will cycle on and off to maintain this temperature. 6. Use the fan switch for faster heating.
Cleaning and maintenance
Always allow the unit to cool down before handling. Clean the surface with a damp cloth; do not use abrasive detergents or hard objects. Regularly clean the inlet and outlet grilles to prevent overheating. Dust inside the unit can be removed with a vacuum cleaner. Never submerge the unit in water.
Practical help
Common problems
Slight smell when first turned on
This is normal due to dust on the heating element and will vanish after a short time.
Before use
- Check that the voltage matches the product label.
- Ensure the unit is on a stable, heat-resistant surface.
- Keep a minimum distance of 100 cm from flammable materials.
- Ensure air inlet and outlet grilles are unobstructed.
- Fully uncoil the power cable.
Show more Show less
Images and diagrams
- Figure 1: Attaching legs for free-standing use.
- Figure 2: Minimum safety distances for wall mounting.
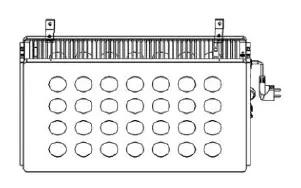
- Figure 3-7: Wall mounting procedure including drilling, hook installation, and spacer attachment.
Model compatibility
- Use only the supplied mounting kit for wall installation.
- Do not use with external timers or automatic switches.

Manual page author
Michael Turner
Technical manual editor