Furniture / Chairs & Seating
Assembly Guide for Costway TP 10471 2-in-1 Play Tent and Playpen
Assembly guide for the Costway TP 10471 2-in-1 Play Tent and Playpen. Includes a detailed parts list, step-by-step assembly instructions for the frame and fabric cover, and essential safety warnings.
Table of contents
Manual images
Click an image to enlargeQuick Guide
This document provides instructions for assembling the Costway TP 10471 2-in-1 Play Tent and Playpen. Ensure you have all parts listed before beginning assembly. The process involves two main parts: assembling the frame and attaching the fabric cover. Always assemble on a flat, stable surface and keep small parts away from children.
Parts List
Before starting, verify that you have all the necessary components:
- Tubes: Various lengths (labeled a, b, c, e)
- Connectors: T-connectors and other joints
- Fabric: Playpen cloth cover, sheer curtains, and cushion
Assembly Instructions
Part 1: Frame Assembly
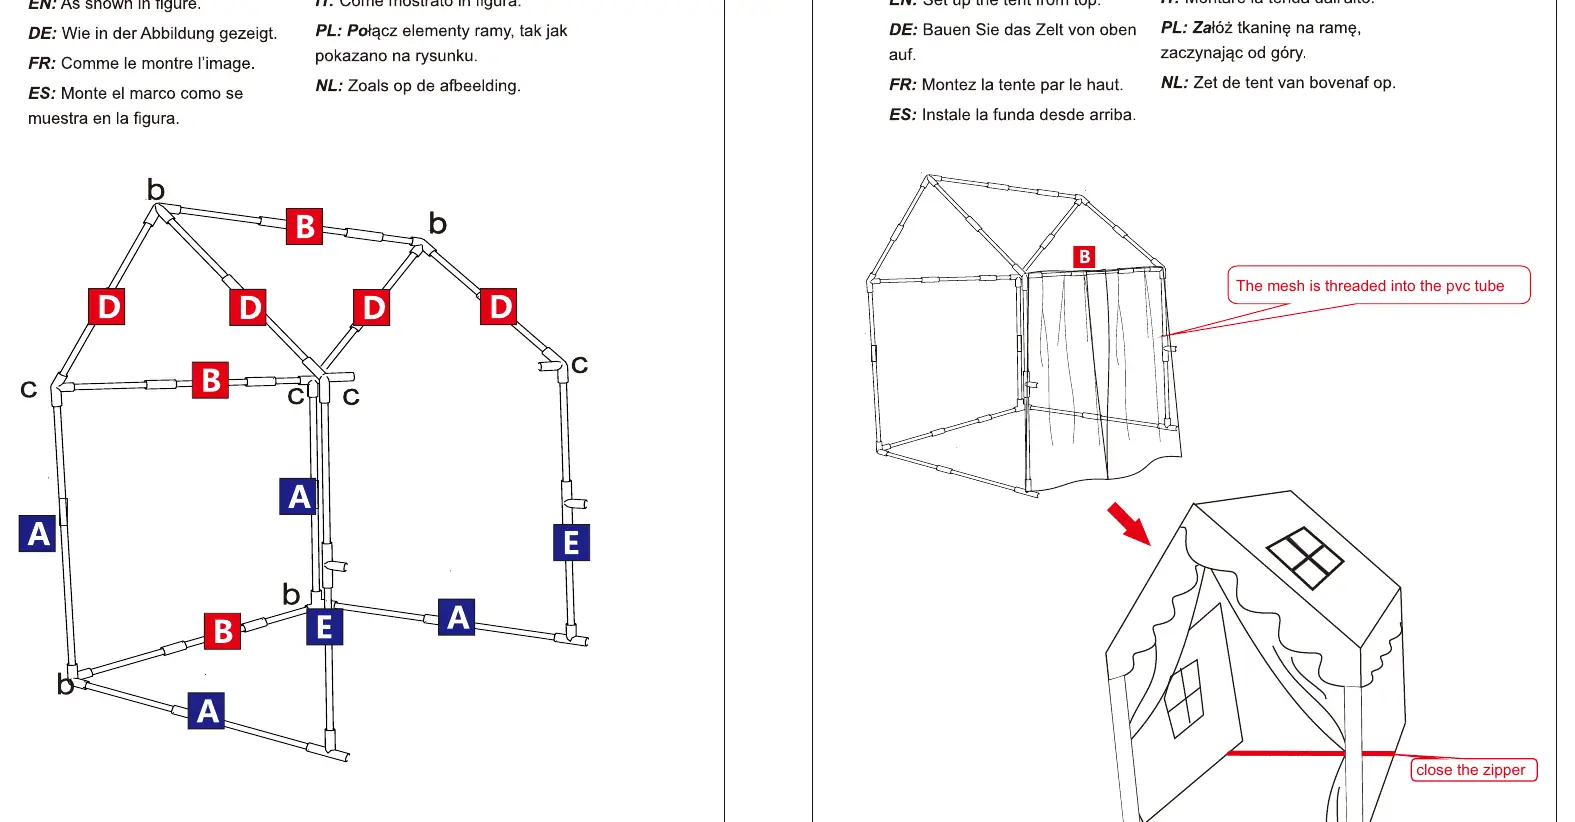
- Identify the tubes and connectors based on the parts list.
- Connect the tubes using the provided connectors to form the base and structure of the playpen.
- Ensure all tubes are fully inserted into the connectors for stability.
Part 2: Fabric Assembly
- Once the frame is assembled, drape the playpen cloth cover over the frame.
- Ensure the mesh is threaded correctly into the PVC tubes.
- Secure the cover by closing the zippers.
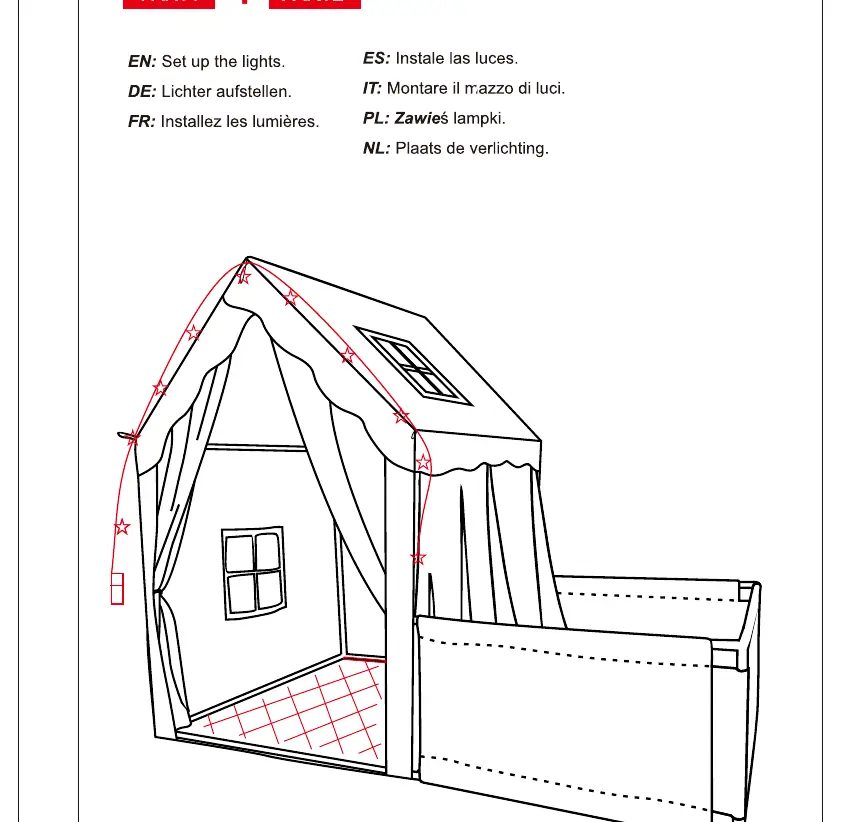
- Attach any additional accessories like sheer curtains or cushions as desired.
Safety Warnings
- Choking Hazard: Contains small parts. Keep away from children under 3 years.
- Assembly: Must be assembled by adults only.
- Stability: Ensure the product is placed on a flat, stable surface.
- Usage: Do not move the product while in use.
Manufacturer information
Costway
Practical help
Common problems
Mesh does not fit properly
Ensure the mesh is threaded correctly into the PVC tube before attempting to close the zipper.
Structure feels unstable
Verify that all tubes are fully inserted into the connectors and the unit is placed on a flat, level surface.
Before use
- Verify all parts are present according to the parts list.
- Ensure assembly area is flat and stable.
- Keep small parts away from children during assembly.
- Check that all tubes are fully seated in connectors.
Images and diagrams
- Part 1 diagrams illustrate the connection of tubes and joints to build the frame.
- Part 2 diagrams illustrate the placement of the fabric cover and the zipping process.

Manual page author
David Miller
Documentation analyst
Organizes user manual content into clear summaries, with attention to model details, product context, and everyday usability.