Lighting / LED Lamps
Installation Guide for Type B LED Hazardous Rated Lamp
Comprehensive installation and wiring guide for Type B LED Hazardous Rated Lamps. Includes step-by-step instructions for retrofitting various HID luminaires, safety warnings, and compatibility information.
Table of contents
Manual images
Click an image to enlargeQuick Guide
This document provides installation instructions for retrofitting existing HID luminaires with Type B LED Hazardous Rated Lamps. The process involves disconnecting the existing ballast circuitry, connecting the new LED lamp directly to incoming power, and applying the provided modification label. Installation must be performed by a qualified electrician.
Safety Warnings
- Risk of electrical shock or fire: Ensure the luminaire matches the features and dimensions indicated in the guide and that the input rating of the retrofit kit does not exceed the luminaire's rating.
- Qualified Personnel Only: Installation requires familiarity with safety procedures and electrical systems.
- Power Disconnection: Always disconnect electrical power to the luminaire at the supply source before beginning.
- Cooling: Allow the luminaire and lamp to cool before proceeding to avoid burn risks.
- No Alterations: Do not make or alter any open holes in the enclosure of wiring or electrical components during installation.
General Installation Procedure
- Preparation: Disconnect power. Gather tools: slotted screwdriver, adjustable wrench, wire cutter, and wire stripper.
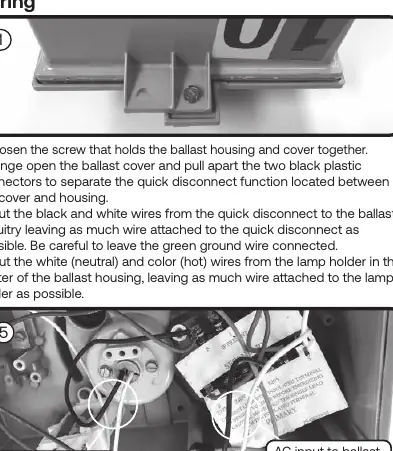
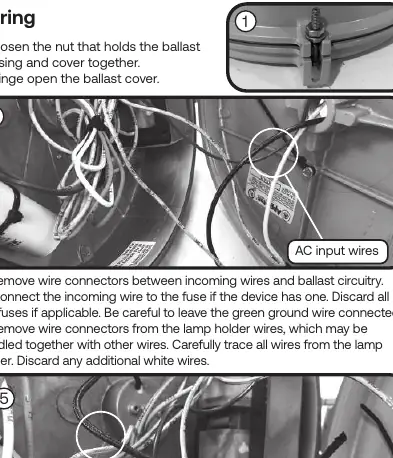
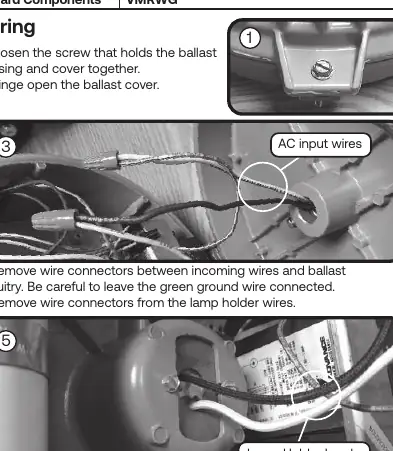
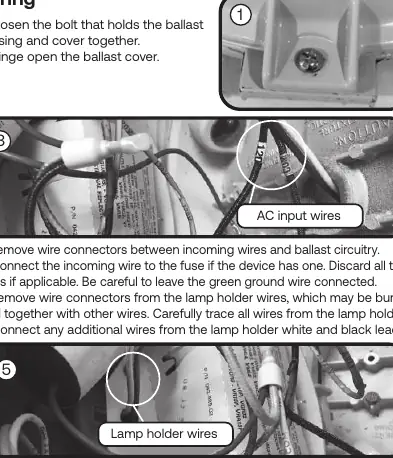
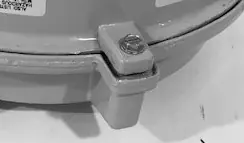
- Access: Loosen the screw/bolt holding the ballast housing and cover together. Hinge open the ballast cover.
- Wiring Modification: Disconnect existing wires from the ballast circuitry. Cut the existing lamp holder wires, leaving enough length to connect to the new wires. Ensure the green ground wire remains connected.
- Connection: Strip 3/8 inch from the wires. Connect the lamp holder wires to the incoming power wires using the provided wire connectors (white to white, black to black/color).
- Assembly: Reconnect the ballast housing hinge pin to the cover hinge. Close and secure the ballast housing, ensuring no wires are pinched.
- Lamp Installation: Remove the old HID lamp. Install the new LED lamp, ensuring it is properly seated. Reinstall any optical assembly or guards.
- Labeling: Refer to the Luminaire Fittings Reference Table to select the correct new label. Clean the area and apply the label to a visible location on the housing.
- Completion: Restore power to the luminaire.
Luminaire Compatibility
This retrofit kit is designed for specific luminaires. Refer to the Luminaire Fittings Reference Table in the manual to confirm compatibility for the following brands:
- GE Lighting Filtr-Gard
- Crouse-Hinds Champ VMV
- Appleton Mercmaster III & II
- Hubbell Killark VM Series
- Holophane Petrolux II PETL
- Thomas & Betts Hazlux 3 Series
Practical help
Common problems
Luminaire not compatible
Verify the luminaire model against the Luminaire Fittings Reference Table provided in the manual.
Wiring confusion
Ensure the green ground wire remains connected. Cut existing lamp holder wires and use the provided connectors to join them to incoming power.
Burn risk
Allow the luminaire and lamp to cool completely before attempting installation.
Before use
- Verify luminaire compatibility using the reference table.
- Ensure power is disconnected at the supply source.
- Confirm input rating of the retrofit kit does not exceed luminaire rating.
- Ensure a qualified electrician is performing the installation.
- Gather required tools: slotted screwdriver, adjustable wrench, wire cutter, wire stripper.
Images and diagrams
- Wiring diagrams illustrate the process of disconnecting existing ballast circuitry and connecting the new LED lamp directly to incoming power.
Model compatibility
- Compatible with specific GE, Crouse-Hinds, Appleton, Hubbell, Holophane, and Thomas & Betts luminaires.
- Installation must be in accordance with applicable electrical codes.

Manual page author
David Miller
Documentation analyst
Organizes user manual content into clear summaries, with attention to model details, product context, and everyday usability.