Automotive / Towing Accessories
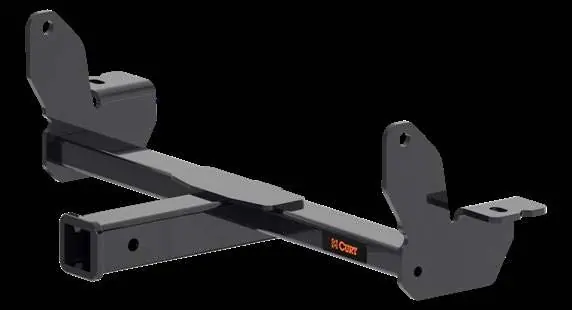
Installation Manual for CURT 31091 Front Receiver Hitch
A comprehensive installation guide for the CURT 31091 Front Receiver Hitch. This manual covers required tools, weight capacities, step-by-step mounting procedures, fishwiring techniques, and torque specifications.
Quick answers from the manual
Quick answer
- The CURT 31091 is a front receiver hitch. Installation involves removing factory tow hooks, cleaning frame weldnuts, using fishwire to position hardware, and torquing fasteners to 110 ft-lbs (1/2" hardware) and 79 ft-lbs (M12 hardware). p. 1, 2, 4
Key actions
- Torque 1/2" fasteners to 110 ft-lbs. p. 4
- Torque M12 fasteners to 79 ft-lbs. p. 4
Problems and fixes
Debris in weldnuts
Use spray lubricant, compressed air, or a wire brush to clean the hole.
p. 2Maintenance and reset
- Perform periodic inspection of the trailer hitch to ensure all mounting hardware remains tight and structural components are secure. p. 1
Technical specifications
| Parameter | Value | Meaning | Pages |
|---|---|---|---|
| Gross trailer weight (GTW) | 5,000 lbs | Maximum trailer weight | p. 1 |
| Tongue weight (TW) | 500 lbs | Maximum downward force | p. 1 |
| Straight line pull | 9,000 lbs | Maximum pulling capacity | p. 1 |
Where to find it in the PDF
- Installation Manual p. 1, 2, 3, 4
Table of contents
Manual images
Click an image to enlargeQuick guide from the manual
The CURT 31091 is a front-mounted receiver hitch. Installation is rated as Moderate difficulty. Before beginning, ensure you have all required tools and safety gear. Never exceed the vehicle manufacturer's recommended towing capacity.
Tools required
- Ratchet and socket extensions
- 18mm socket and 18mm boxed end wrench
- 3/4" socket
- Tape measure and tape
- Pry bar
- Paint marker
- Reciprocating saw or cutoff wheel (for air dam trimming)
- Safety glasses
Installation steps

- Preparation: Remove existing M12 bolts and tow hooks using an 18mm socket and wrench. Save the M12 flange nuts. Remove the rearmost wire harness clip on the driver side using a pry tool.
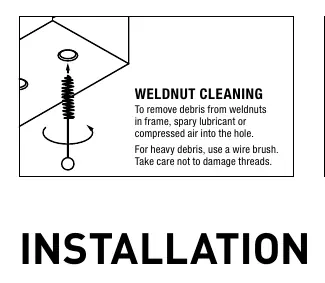
- Weldnut Cleaning: If debris is present in the frame weldnuts, use a wire brush, lubricant, or compressed air to clean them without damaging threads.
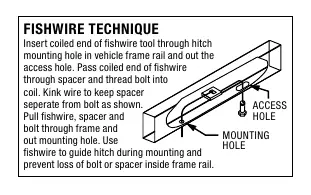
- Fishwiring: Use the provided fishwire to guide the carriage bolt and spacer through the frame access holes. Refer to the "Fishwire Technique" diagram in the manual to ensure proper installation.
- Spacer Placement: Tape the round hole spacer to the bottom of the frame on both sides. Ensure spacers sit flat against the frame.
- Trimming: Temporarily raise the hitch to check for fitment. If necessary, mark and trim the lower plastic fascia (approx. 3-1/4" wide by 1" tall).
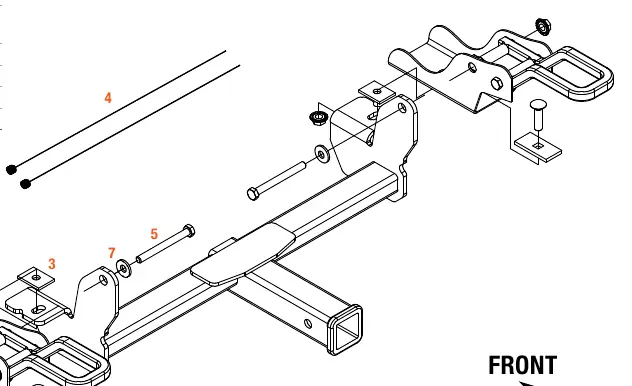
- Mounting: Raise the hitch into position. Insert M12 hex bolts and conical-toothed washers through the hitch and tow hook holes. Loosely install factory M12 flange nuts. Pull carriage bolts through lower mounting holes and secure with serrated-flange nuts.
- Torqueing: Tighten all 1/2" fasteners to 110 ft-lbs and all M12 fasteners to 79 ft-lbs.
Safety and maintenance
Periodic inspection of the trailer hitch is required to ensure all mounting hardware remains tight and structural components are secure. Always wear safety glasses during installation.
Practical help
Common problems
Debris in frame weldnuts
Use a wire brush, spray lubricant, or compressed air to clean the holes before attempting to thread bolts.
Hitch does not fit due to plastic fascia
Temporarily raise the hitch to determine if trimming is needed. Mark a 3-1/4" wide by 1" tall notch on the lower plastic fascia and cut using a reciprocating saw.
Difficulty keeping spacers in place
Use tape to secure the round hole spacer to the bottom of the frame before fishwiring the bolt through.
Before use
- Wear safety glasses.
- Verify you have all tools: 18mm socket/wrench, 3/4" socket, torque wrench, etc.
- Clean frame weldnuts of debris.
- Check vehicle manufacturer's towing capacity.
- Ensure all hardware is torqued to specified values.
Specs in practice
- GTW (Gross Trailer Weight)
- Maximum weight of the trailer and its cargo combined (5,000 lbs).
- TW (Tongue Weight)
- The downward force that the trailer tongue exerts on the hitch (500 lbs).
- Straight line pull
- Maximum pulling capacity of the hitch (9,000 lbs).
Images and diagrams
- Assembly diagram showing the orientation of spacers, bolts, and nuts.
- Fishwire technique diagram illustrating how to thread the bolt through the frame rail.
- Conical toothed washer orientation showing the correct order of assembly.
Model compatibility
- Designed for specific vehicle frames; requires removal of factory tow hook bolts.
- May require trimming of the lower air dam depending on the vehicle configuration.

Manual page author
David Miller
Documentation analyst
Organizes user manual content into clear summaries, with attention to model details, product context, and everyday usability.