Industrial / Electrical
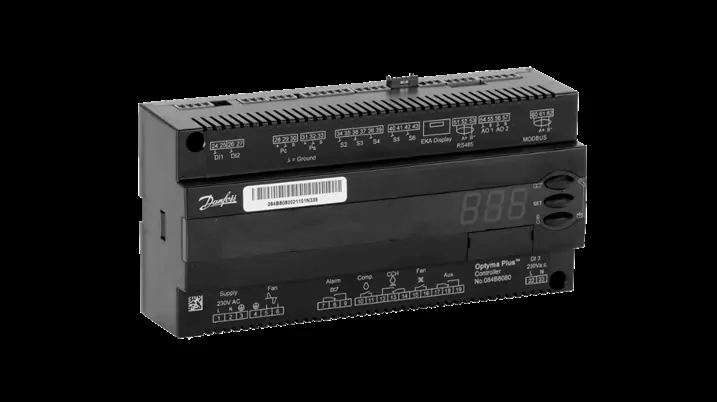
Danfoss Optyma Plus 084B8080 Control Unit
Quick setup and configuration guide for the Danfoss Optyma Plus 084B8080 control unit. Learn how to navigate the menu, set parameters, select refrigerants, and activate or deactivate unit functionalities.
Table of contents
Manual images
Click an image to enlargeQuick guide from the manual
This document provides the essential procedures for setting up and configuring the Danfoss Optyma Plus 084B8080 control unit. It covers the initial hardware preparation, menu navigation, parameter configuration, and system activation.
Device overview and navigation
The control unit features a display and three buttons for operation:
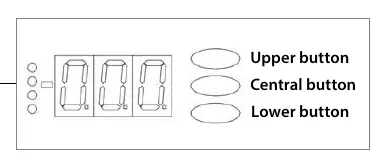
- Upper button: Used for menu navigation and changing values.
- Central button: Used to access parameters and confirm values.
- Lower button: Used for menu navigation and changing values.
To enter settings mode, press and hold the Upper button for 5 seconds until r05 appears on the display.
Initial setup and DI1 terminal block
The DI1 terminal block acts as an external stop/start hard-wired link. To remove or connect it:
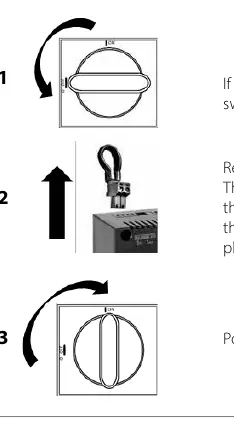
- Ensure the condensing unit is powered off using the main switch.
- Open the hinged door of the unit and remove the two screws on the cover plate to access the terminals.
- Remove or connect the DI1 terminal block as required.
- Power the unit back on using the switch.
Configuration and parameter settings
Follow these steps to configure the unit:
Deactivating functionalities
To deactivate the unit, navigate to parameter r12 and set the value to 0. Confirm the selection using the central button.
Selecting the refrigerant
Navigate to parameter o30 and select the value corresponding to your refrigerant type:
- R134a: 3
- R507A: 17
- R404A: 19
- R407A: 21
- R407F: 37
- R513A: 36
- R448A: 40
- R449A: 41
- R452A: 42
Setting condensing unit type
Navigate to parameter c33 to set the Pump Down cut-out value. This value depends on the application and refrigerant (e.g., 0.9 bar for R513A scroll compressors).
Inverter models
If using an Optyma Plus INVERTER, use parameter r23 to set the evaporating pressure based on the evaporation temperature (dew point).
Activating the control unit
Once configuration is complete:
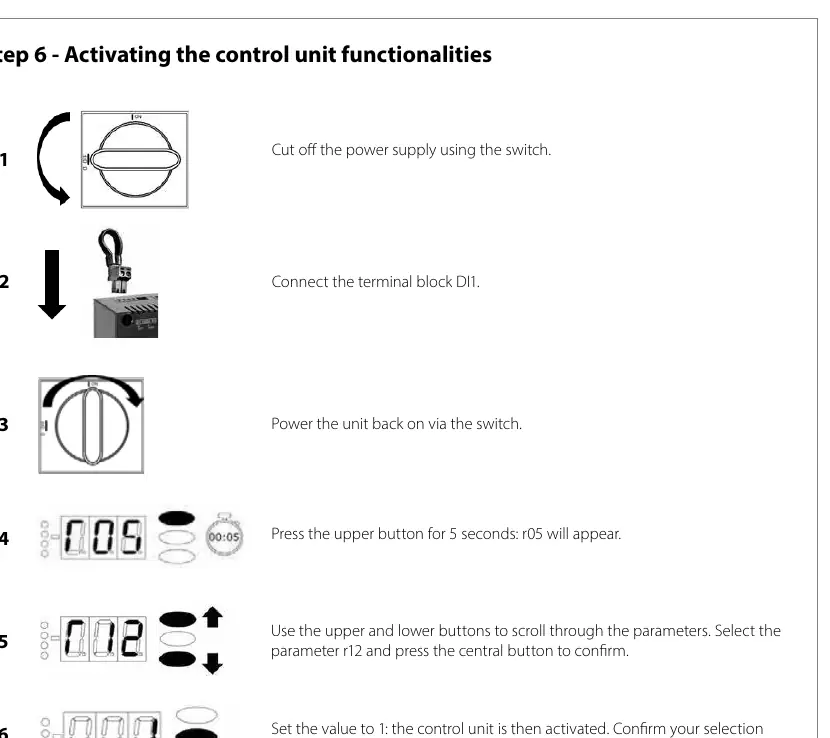
- Ensure the DI1 terminal block is connected.
- Power the unit on.
- Press the Upper button for 5 seconds to enter settings mode (r05).
- Navigate to parameter r12.
- Set the value to 1 to activate the control unit.
- Confirm with the central button. The unit is now ready to start.
Manufacturer information
Danfoss A/S
Practical help
Common problems
Unit will not start
Ensure the DI1 terminal block is properly connected and parameter r12 is set to 1.
Cannot change settings
Ensure you are in settings mode by holding the Upper button for 5 seconds until r05 appears.
Before use
- Ensure power is disconnected before removing or installing the DI1 terminal block
- Identify the correct refrigerant type for your system
- Verify if the unit is an Inverter model to apply correct pressure settings
- Ensure the cover plate is secured after accessing terminals
Images and diagrams
- DI1 terminal block location and removal procedure
- Button layout for menu navigation and parameter confirmation
Model compatibility
- Specific refrigerant codes must be used for parameter o30
- Inverter models require additional configuration via parameter r23

Manual page author
David Miller
Documentation analyst
Organizes user manual content into clear summaries, with attention to model details, product context, and everyday usability.