Electronics / Audio
Operating Instructions for Dual 496 Turntable
Comprehensive operating instructions for the Dual 496 turntable. This guide covers unpacking, installation, tonearm balancing, stylus pressure adjustment, pitch control, and maintenance procedures.
PDF source: Deutsch · summary: English
Quick answers from the manual
Quick answer
- The Dual 496 is a 2-speed automatic direct-drive turntable. Setup requires removing transport screws, balancing the tonearm, and setting the stylus pressure according to your cartridge specifications. p. 7, 11
Key actions
- Balance the tonearm p. 7, 11
- Set stylus pressure p. 7, 11
First start
- Remove transport screws, place platter, balance tonearm, and set tracking force. p. 7, 11
Show 4 more answers Show less
Problems and fixes
Tonearm not balancing
Adjust the counterweight until the tonearm remains in a horizontal position when released.
p. 7, 11Maintenance and reset
- Lubrication is factory-applied; do not oil the unit yourself. Contact a Dual dealer for service. p. 8, 12
Technical specifications
| Parameter | Value | Meaning | Pages |
|---|---|---|---|
| Speeds | 33 1/3 and 45 rpm | Electronically adjustable speeds. | p. 8, 12 |
| Stylus Pressure | 0-30 mN | Infinitely variable tracking force. | p. 8, 12 |
Where to find it in the PDF
- English Instructions p. 11, 12
Table of contents
Manual images
Click an image to enlargeQuick guide from the manual
The Dual 496 is a 2-speed automatic direct-drive turntable. Before operating, ensure all transport safety screws are removed and the tonearm is correctly balanced. The unit supports 33 1/3 and 45 rpm speeds and features adjustable pitch control.
Unpacking and installation
Before using the turntable, you must prepare it for operation:
- Remove all transport packaging and protective sheets.
- Locate the transport safety screws (marked with a red stripe). Loosen them by turning counter-clockwise until they slide downward (approx. 15 mm).
- Tighten the safety screws clockwise to secure the chassis in the spring-supported position.
- Place the platter directly on the motor.
- Remove the tonearm counterbalance from the packaging and screw it onto the rear end of the tonearm.
Start and operation
Automatic Start:
- Select the correct platter speed (33 1/3 or 45 rpm).
- Unlock the tonearm and move the cue control lever to the up position.
- Move the start switch to the "start" position. The tonearm will move to the lead-in groove and lower automatically.
Manual Start:
- Move the cue control lever to the up position.
- Move the tonearm by hand over the desired point on the record.
- Tap the cue control lever to lower the tonearm.
Balancing the tonearm
Precise tonearm balance is essential for proper tracking:
- With the tonearm locked on the support, turn the turntable by hand to ensure it is free.
- Set the tracking force and anti-skating controls to "zero".
- Unlock the tonearm and lift it from the support.
- If the tonearm does not remain in a horizontal position, adjust the counterweight until it balances perfectly.
- Once balanced, set the tracking force and anti-skating to the recommended values for your cartridge.
Stylus pressure and antiskating
Each cartridge requires a specific stylus pressure. Once the tonearm is balanced, turn the stylus force scale to the recommended value (0-30 mN). The anti-skating mechanism should be set to the same value as the stylus pressure to prevent uneven wear and distortion.
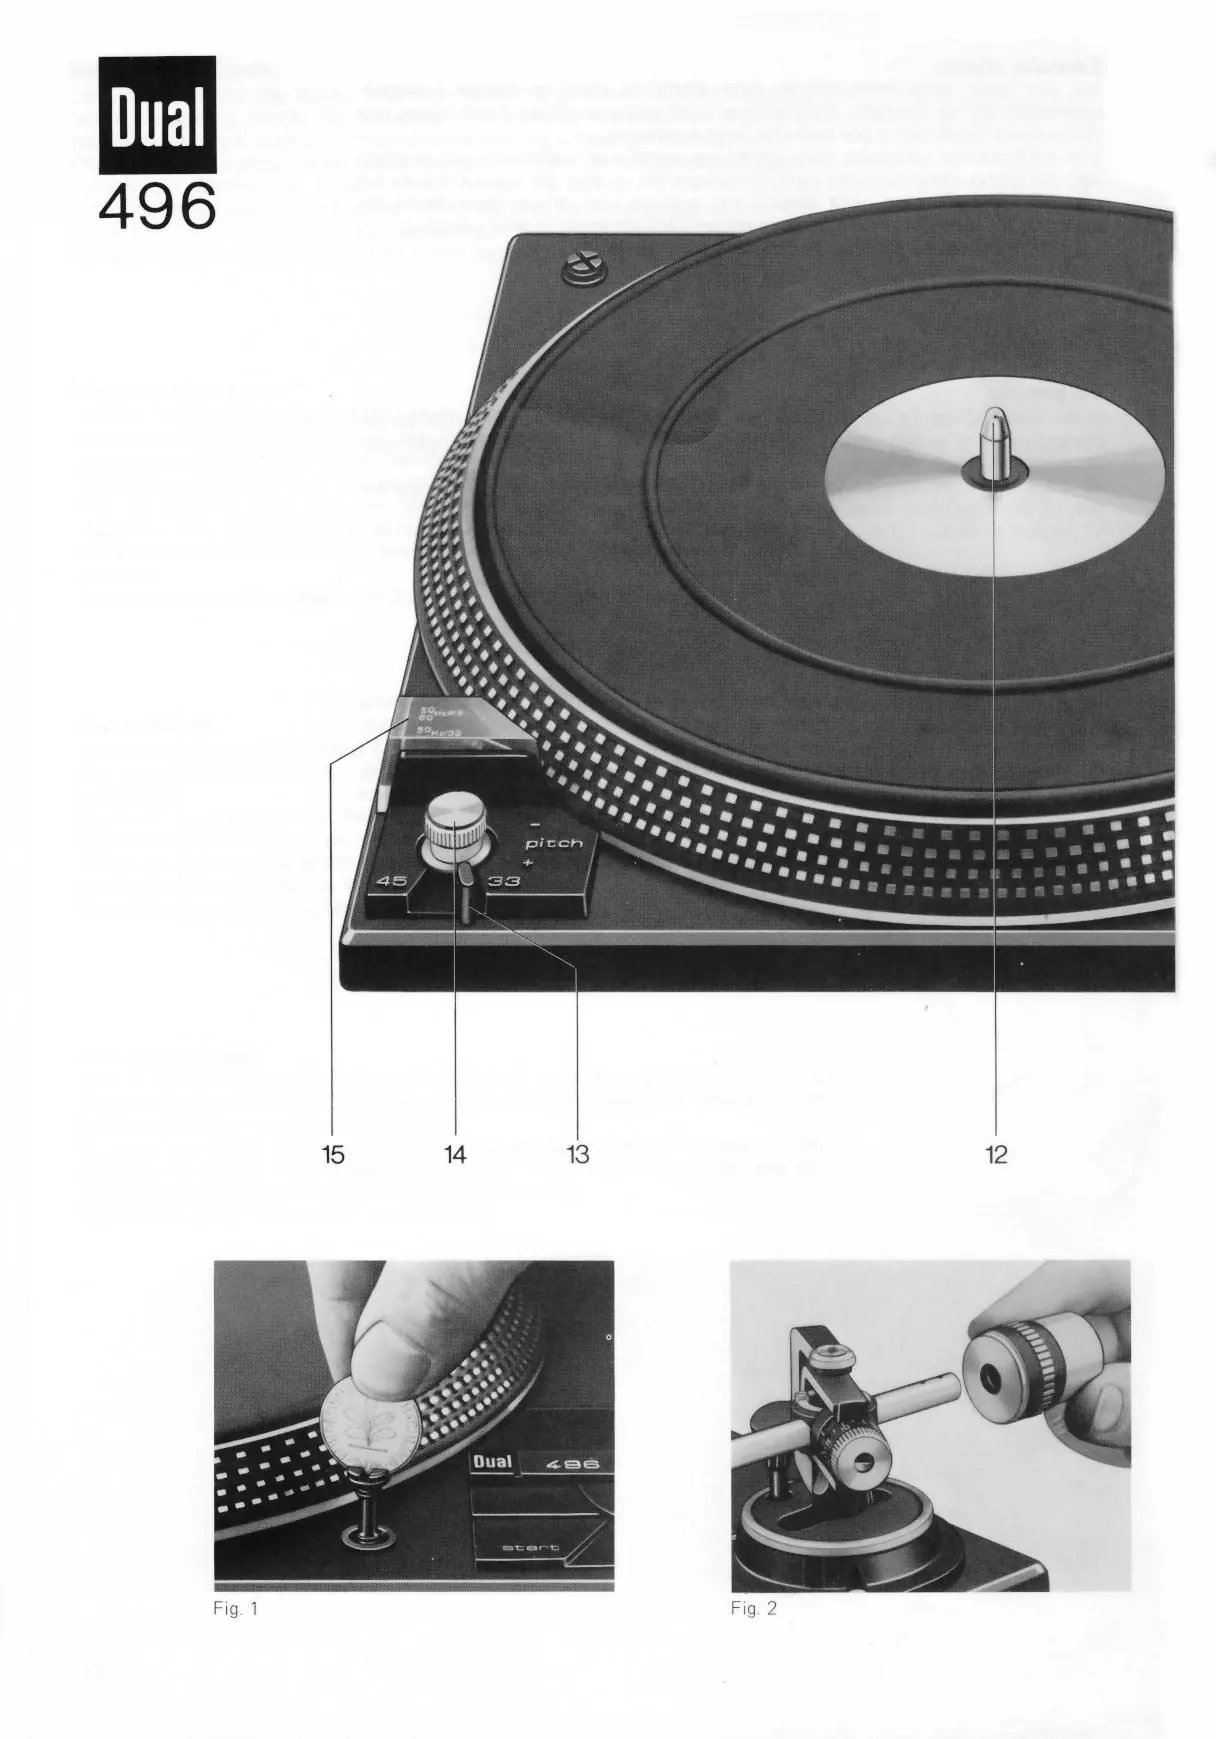
Pitch control
The pitch control knob allows for fine adjustment of the platter speed. This is useful for matching the pitch of recorded music to a live instrument or adjusting the duration of a recording.
Maintenance
The turntable is lubricated at the factory and should not require additional oiling under normal conditions. If the unit requires service, contact an authorized Dual service station. Always use original Dual replacement parts. When transporting the unit, remove the platter and secure the tonearm.
Technical specifications
- Speeds: 33 1/3 and 45 rpm (electronically adjustable).
- Stylus Pressure: 0-30 mN (0-3 g), continuously variable.
- Platter: Non-magnetic, dynamically balanced, 1.1 kg, 270 mm diameter.
- Power: AC 50 or 60 Hz.
Manufacturer information
Dual
Practical help
Common problems
Tonearm does not balance horizontally
Adjust the counterweight at the rear of the tonearm until the arm floats freely in a horizontal position.
Distortion during playback
Check the anti-skating setting. It should match the stylus pressure setting.
Stylus wear
Inspect the stylus after approximately 300 playing hours. Replace if damaged or worn.
Before use
- Remove all transport packaging.
- Loosen and then tighten transport safety screws to release the chassis.
- Place the platter on the motor.
- Install the tonearm counterbalance.
- Balance the tonearm.
- Set the tracking force and anti-skating.
Show more Show less
Specs in practice
- 33 1/3 and 45 rpm
- The two standard playback speeds for vinyl records.
- 0-30 mN (0-3 g)
- The adjustable range for stylus tracking force.
- Pitch Control
- Allows fine-tuning of playback speed by approximately 10%.
Images and diagrams
- Fig 1: Transport safety screw adjustment.
- Fig 2: Installing the tonearm counterbalance.
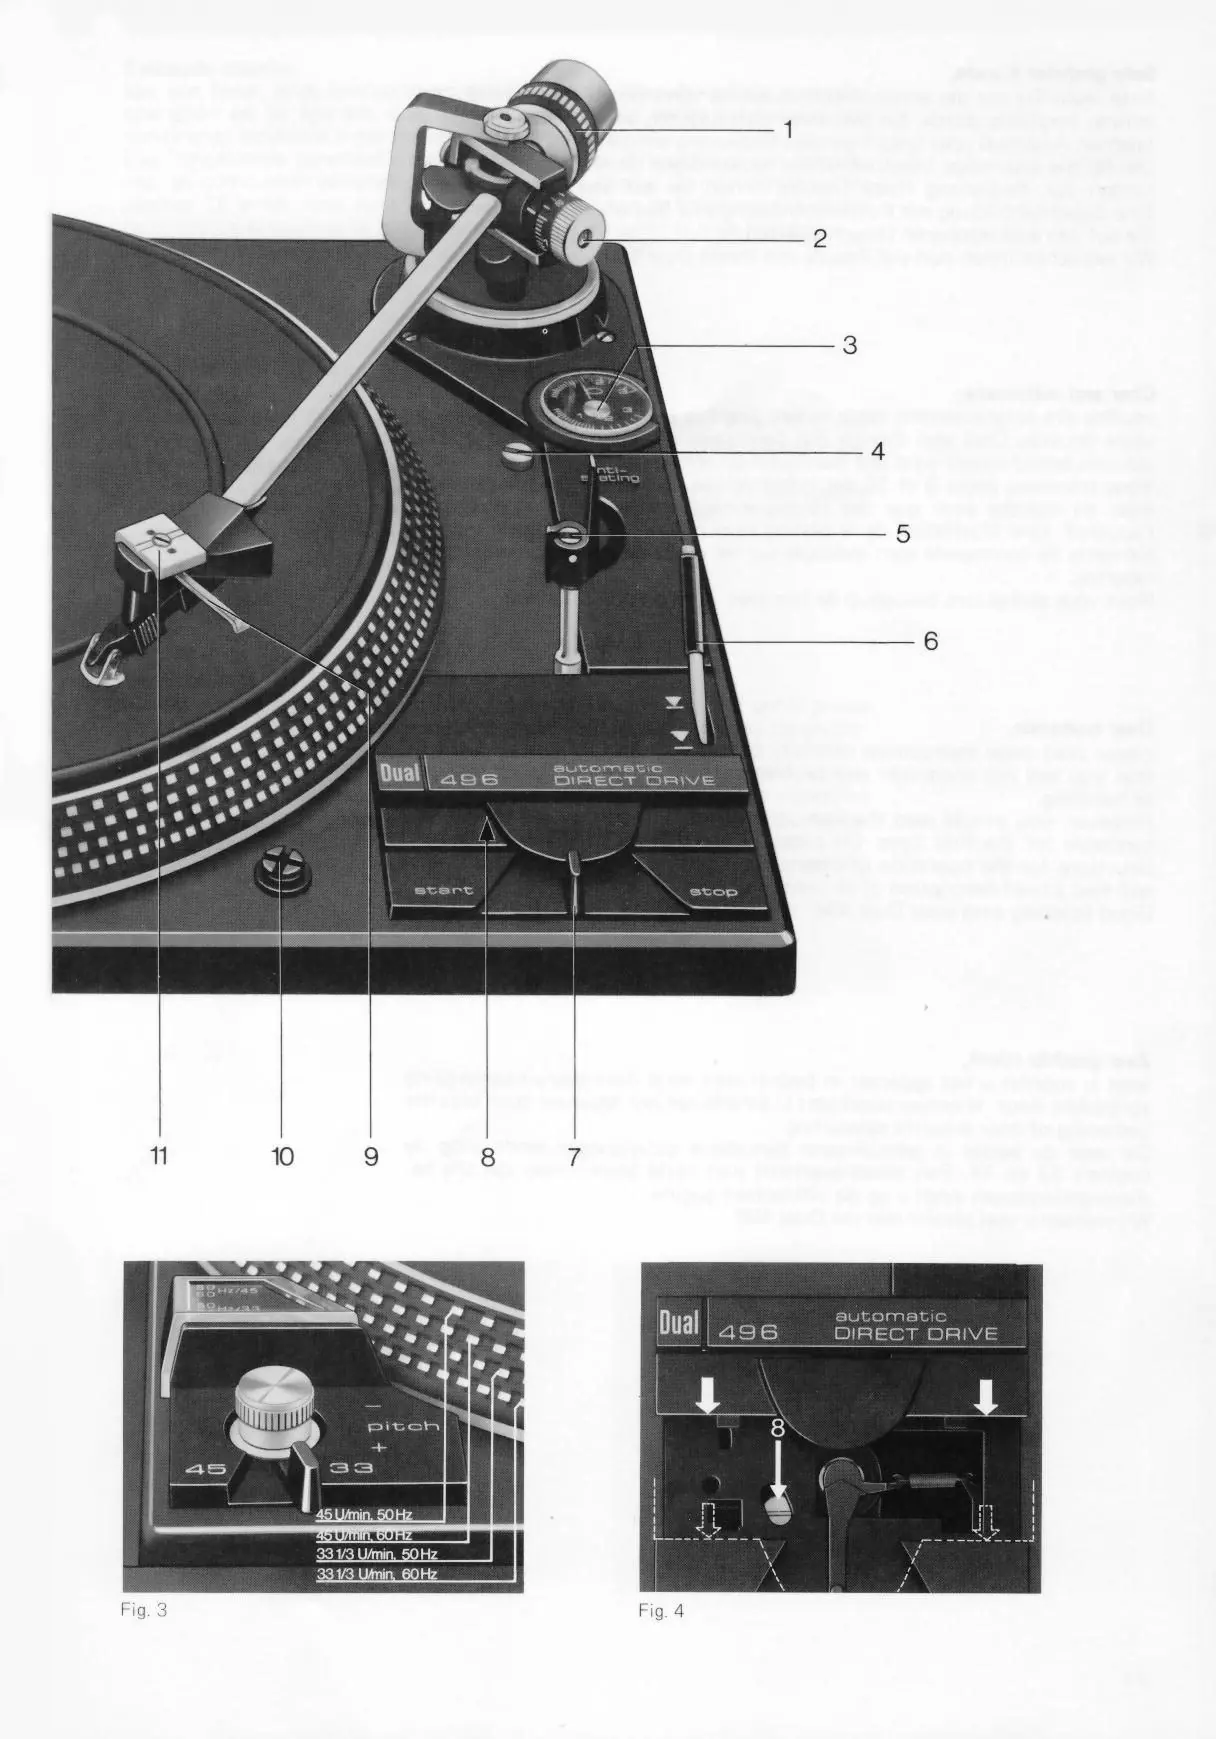
- Fig 3: Pitch control knob and speed selector.
- Fig 4: Tonearm indexing adjustment.
Model compatibility
- Compatible with cartridges having 1/2 inch screw-type attachment.
- Designed for stylus pressures from 5 mN (0.5 g) upwards.

Manual page author
Emily Carter
User documentation editor