Power / Solar Systems
User Manual for ECO-WORTHY 1170W 48V Off Grid Solar Kit
Quick guide for the ECO-WORTHY 1170W 48V Off Grid Solar Kit. Includes installation steps for the inverter and battery, wiring diagrams, safety precautions, and troubleshooting for common error codes.
Table of contents
Manual images
Click an image to enlargeQuick guide from the manual
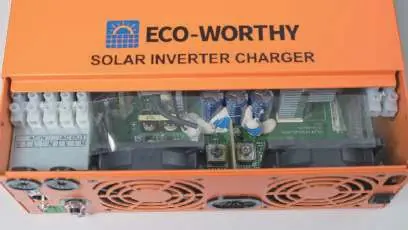
This manual provides instructions for installing and wiring the ECO-WORTHY 1170W 48V Off Grid Solar Kit, which includes a 3500W All-in-one (AIO) inverter and 48V 50Ah server rack batteries. Before starting, ensure all switches are in the OFF position and use insulated tools.
Safety Precautions
- Wear insulated gloves and safety goggles. Remove all metal jewelry.
- Hazardous voltages are present inside the unit; do not disassemble.
- Keep the AIO out of reach of children.
- Do not install in damp, oily, flammable, explosive, or dusty environments.
- Mains input and AC output terminals carry high voltage—never touch them.
- Before wiring, disconnect the PV array, AC mains, and battery by opening nearby fuses or circuit breakers.
- Use a torque wrench to tighten battery-terminal screws to the specified torque.
Product Overview
The kit includes:
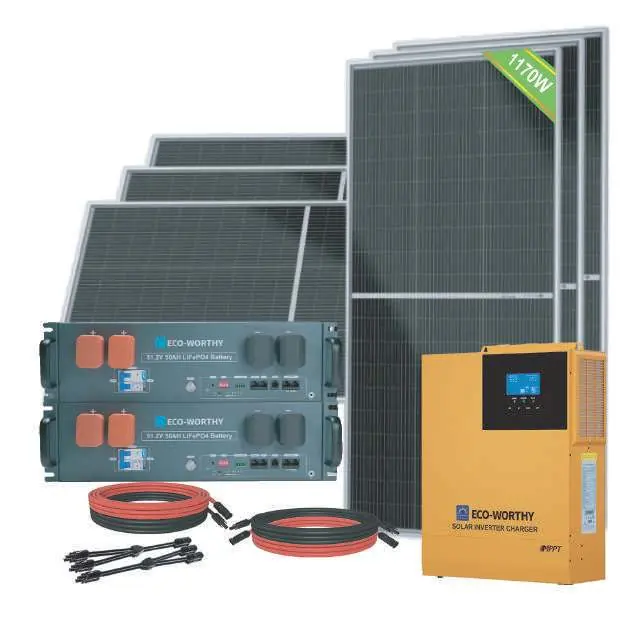
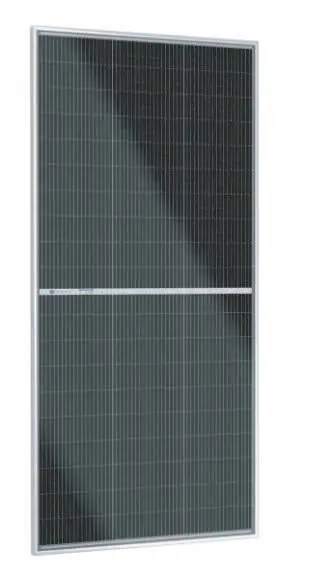
- 6 x 195W 18V Bifacial MONO Solar Panels
- 1 x 48V 3500W Inverter
- 1 or 2 x 48V 50Ah Server Rack Batteries
- Solar extension cables and battery-inverter cables
- Z Brackets and necessary hardware
Installation Guide
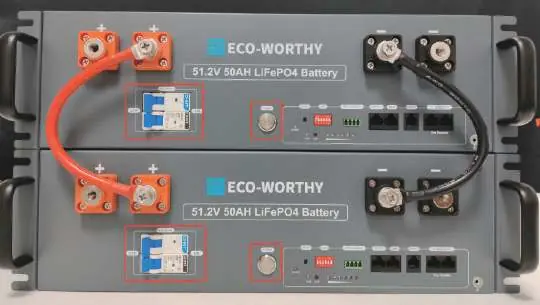
Battery Parallel Connection
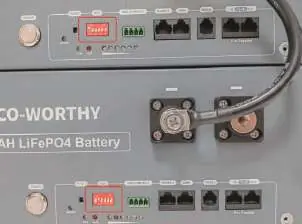
If using multiple batteries, connect them in parallel using the supplied M8 red-and-black battery cables while the battery power switch and circuit breakers are OFF. Set the six-position DIP switch on each battery unit according to the ID table provided in the manual (e.g., ID 1 is Master, ID 2 is Pack 2) and connect the inter-battery communication cables.
AIO & Battery Connection
- Prepare the M6-to-M8 battery cables with copper lugs.
- Verify all switches on the AIO and battery are OFF.
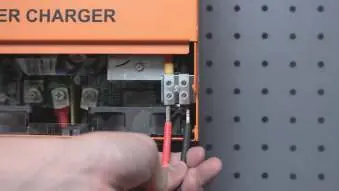
- Remove the terminal cover on the AIO.
- Insert the M6 copper lugs into the BAT- terminals of the AIO and tighten firmly.
- Connect the M8 copper lugs to the corresponding positive and negative terminals on the server rack battery (red to positive, black to negative).
AIO & Solar Panel Connection
- Prepare the single-ended MC4 cables.
- Connect the bare-wire ends to the AIO's PV terminals (red to PV+, black to PV-).
- Mate the MC4 connectors: insert the male MC4 plug into the female MC4 plug of the PV array, and the female MC4 plug into the male MC4 plug of the PV array.
Troubleshooting
If the AIO screen displays fault codes, refer to the following:
- Battery Unable to start: Switch on battery and press RESET for 6s, or charge with 54-57.6V.
- Communication fail: Check communication cable type, DIP switch settings, and AIO protocol settings.
- AIO Error [06] (Battery Over-Voltage): Discharge battery until voltage falls below the recovery point.
- AIO Error [13][14] (Bypass Overload): Reduce connected load and restart the AIO.
- AIO Error [17] (Short-Circuit): Examine load connections and power-cycle the unit.
Technical Support
For further assistance, contact ECO-WORTHY:
- Email: [email protected]
- US/CA: 1 866 939 8222
- UK: +44 7553 406988
- DE: +49 6175 6514 999
- Website: www.eco-worthy.com
Official resources from the manual
Manufacturer information
ECO-WORTHY
Practical help
Common problems
Battery unable to start
Switch on battery and press RESET for 6 seconds; if that fails, charge the battery with 54-57.6V.
Communication failure between battery and AIO
Verify communication cable type, check DIP switch settings, and ensure AIO protocol settings are correct.
AIO Error [06] (Battery Over-Voltage)
Discharge the battery until the voltage falls below the over-voltage recovery point.
AIO Error [13][14] (Bypass Overload)
Reduce the connected load and restart the All-in-one machine.
Before use
- Wear insulated gloves and safety goggles.
- Remove all metal jewelry (rings, watches).
- Verify that the battery power switch, all circuit breakers, and all inverter switches are in the OFF position.
- Ensure the battery is positioned level and secure.
- Inspect battery connections for looseness, corrosion, or overheating.
Specs in practice
- Rated Output Power
- 3500W (Inverter capacity).
- Max. PV Open Circuit Voltage
- 500 VDC (Do not exceed this voltage).
- Battery Rated Voltage
- 48V (51.2V nominal).
Images and diagrams
- DIP Switch Settings: Used to assign IDs to batteries when connected in parallel.
- AIO Connection: Shows the location of BAT terminals and PV terminals for wiring.
Model compatibility
- Battery Type: Supports lead acid or lithium batteries.
- Parallel Battery Limit: Up to 32 batteries can be connected in parallel.

Manual page author
Michael Turner
Technical manual editor
Reviews PDF manuals for structure, safety notes, and practical product details so readers can find the right information quickly.