Power / Solar Systems
User Manual for ECO-WORTHY 1200W Solar Power Kit
Quick guide for the ECO-WORTHY 1200W Off-Grid Solar Panel Kit. Includes installation steps for the hybrid inverter, battery connection, solar panel mounting, and troubleshooting tips.
Table of contents
Manual images
Click an image to enlargeQuick Guide from the Manual
This solar kit is designed for off-grid electricity supply. Crucial Safety Note: Do not connect solar panels to the inverter until the inverter has been completely connected to the 24V battery bank. Always disconnect all power sources before performing any installation or wiring. Wear protective gear and use insulated tools.
Product Overview
The 1200W complete kit includes:
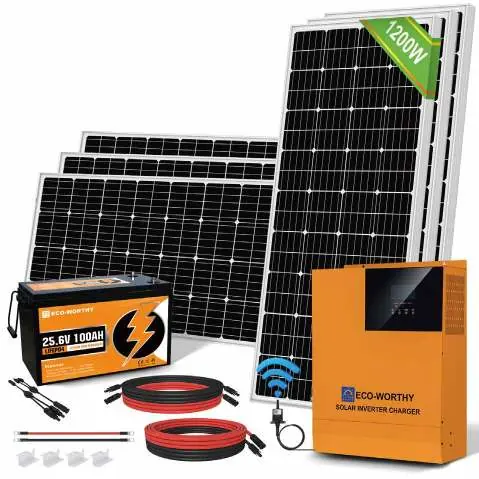
- 6x 195W Monocrystalline Solar Panels
- 1x 3000W 24V 80A MPPT Hybrid Charger Inverter
- 1x 25.6V 100Ah Lithium Battery
- Necessary cables (Solar extension, battery cables, solar-controller cables)
- Y-connectors and Z-bracket mounting sets
Inverter Charger Installation
The inverter should be installed in a dry, cool area (ambient temperature 30°F to 105°F / 0°C to 40°C). Ensure all connections are clean and tight to prevent arcing.
Connecting Inverter to Battery
- Connect the negative cable to the negative (-) battery post using a ring terminal.
- Connect the other end of the negative cable to the negative (-) battery input terminal on the inverter.
- Ensure the battery is connected to the inverter before proceeding with any other connections.
Solar Panel Installation
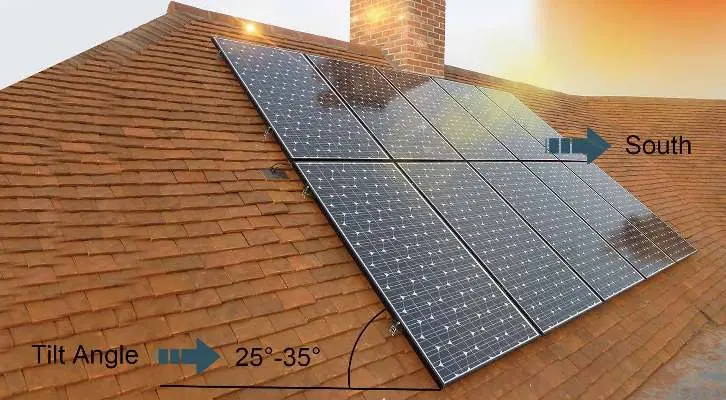
Panels should be placed in direct sunlight, clear of shading. For Northern Hemisphere installations, face panels true south at an angle equal to your latitude.
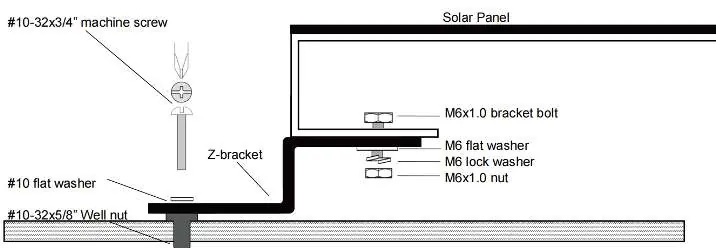
Mounting with Z-Brackets
Z-brackets are used for flat surface mounting (e.g., RV or cabin roofs). Use a well-nut (expansion nut) in pre-drilled holes to secure the panel and prevent water leakage. Ensure the rubber flange is flushed on the roofline.
Wiring Connections
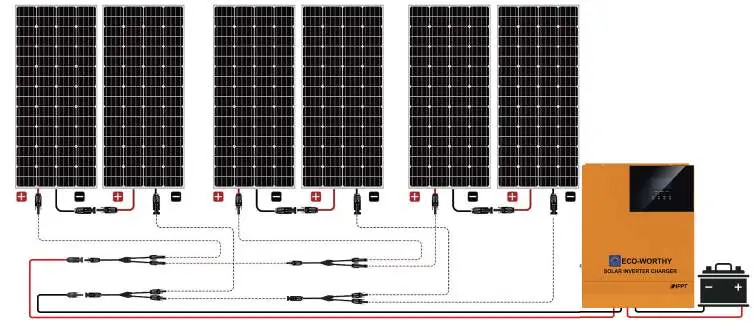
To build a 24V DC system with 6 panels:
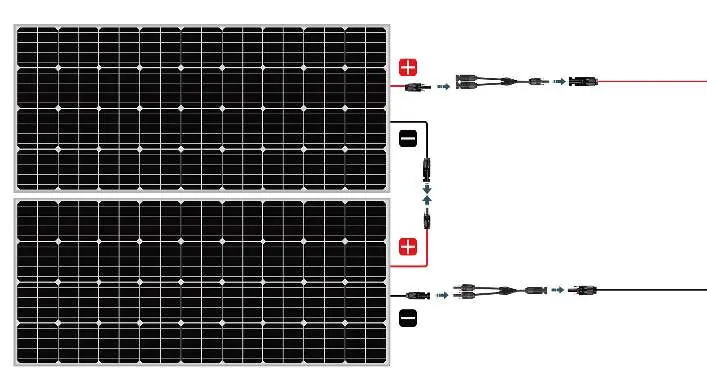
- Wire panels in 3 groups of 2 in series.
- Connect the 3 groups in parallel using Y-branch connectors.
- Wire the positive and negative posts from the Y-branches to the P&N posts of the inverter charger using the provided MC4-copper cable.
Testing and Troubleshooting
Test all electrical components before commissioning. Use a digital multimeter to check open-circuit voltage (Voc) and short-circuit current (Isc) of the modules while exposed to the sun but disconnected from the load.
Common Troubleshooting
- No charging display: Check for reverse connections, ensure panel voltage is higher than battery voltage, and check for obstructions/shading.
- Low charging current: Can be caused by incorrect panel voltage, shading, or the battery entering floating charge state.
- Load not turning on: Check load mode settings, battery power levels, or loose load wiring.
Maintenance
- Clean solar panel glass surfaces with water and a soft sponge/cloth as needed.
- Inspect electrical and mechanical connections every six months for security and corrosion.
- Ensure surfaces are free from dust, dirt, and debris.
- Check and maintain battery electrolyte levels if using flooded wet cell batteries (if applicable).
Manufacturer information
ECO-WORTHY
Practical help
Common problems
Photovoltaic panel does not display charging
Check for correct wiring, reverse connections, and ensure panel voltage is higher than battery voltage. Remove any obstructions causing voltage drops.
Charging current is low
Check for shading or foreign objects on panels. Ensure panel voltage is correct. Note that current decreases when the battery enters floating charge state.
Load does not turn on
Verify load working mode settings, check for insufficient battery power, or inspect load wiring for disconnections.
Before use
- Disconnect all power sources before starting installation
- Wear appropriate clothing and protective eyewear
- Ensure the installation area is well-ventilated
- Use properly insulated tools
- Remove metal items like rings and watches
- Test panel voltage with a voltmeter before handling
Specs in practice
- 3000W 24V Inverter
- Hybrid unit combining an 80A MPPT solar charger and a 3000W pure-sine-wave inverter.
- 25.6V 100Ah Battery
- LiFePO4 rechargeable battery with 2560Wh total capacity.
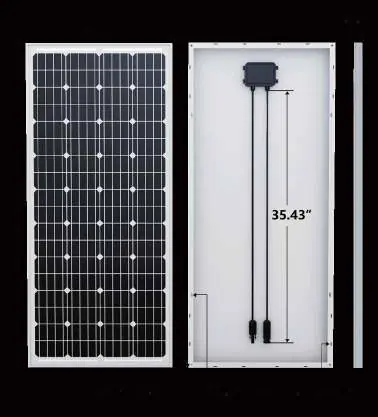
- 195W Solar Panel
- Monocrystalline panel with 19V Vmp and 10.27A Imp.
Images and diagrams
- Wiring diagram for 6 panels: 3 groups of 2 in series, connected in parallel via Y-connectors
- Z-bracket mounting detail showing well-nut and screw assembly
- Battery to inverter connection using ring terminals
Model compatibility
- Inverter only functions when a 24V battery bank is connected
- Do not connect solar panels to the inverter until the battery is fully connected
- Z-bracket set does not include well-nuts

Manual page author
Emily Carter
User documentation editor
Prepares concise manual descriptions and highlights the most useful setup, operation, and maintenance information for readers.