Industrial / Data Loggers
User Manual for Elitech Tlog 10 Series Data Logger
Quick guide for the Elitech Tlog 10 Series data logger. Learn how to configure parameters, start/stop logging, download data, and manage battery life.
Table of contents
Quick guide from the manual
The Elitech Tlog 10 series is a range of data loggers designed for cold chain logistics, including refrigerated transport, medical cabinets, and laboratories. This guide covers the essential steps to configure, operate, and retrieve data from your device. Always ensure the device is configured via the ElitechLog software before first use to synchronize the local time.
Device Overview
The logger features an LCD screen and two buttons for operation. Key components include:
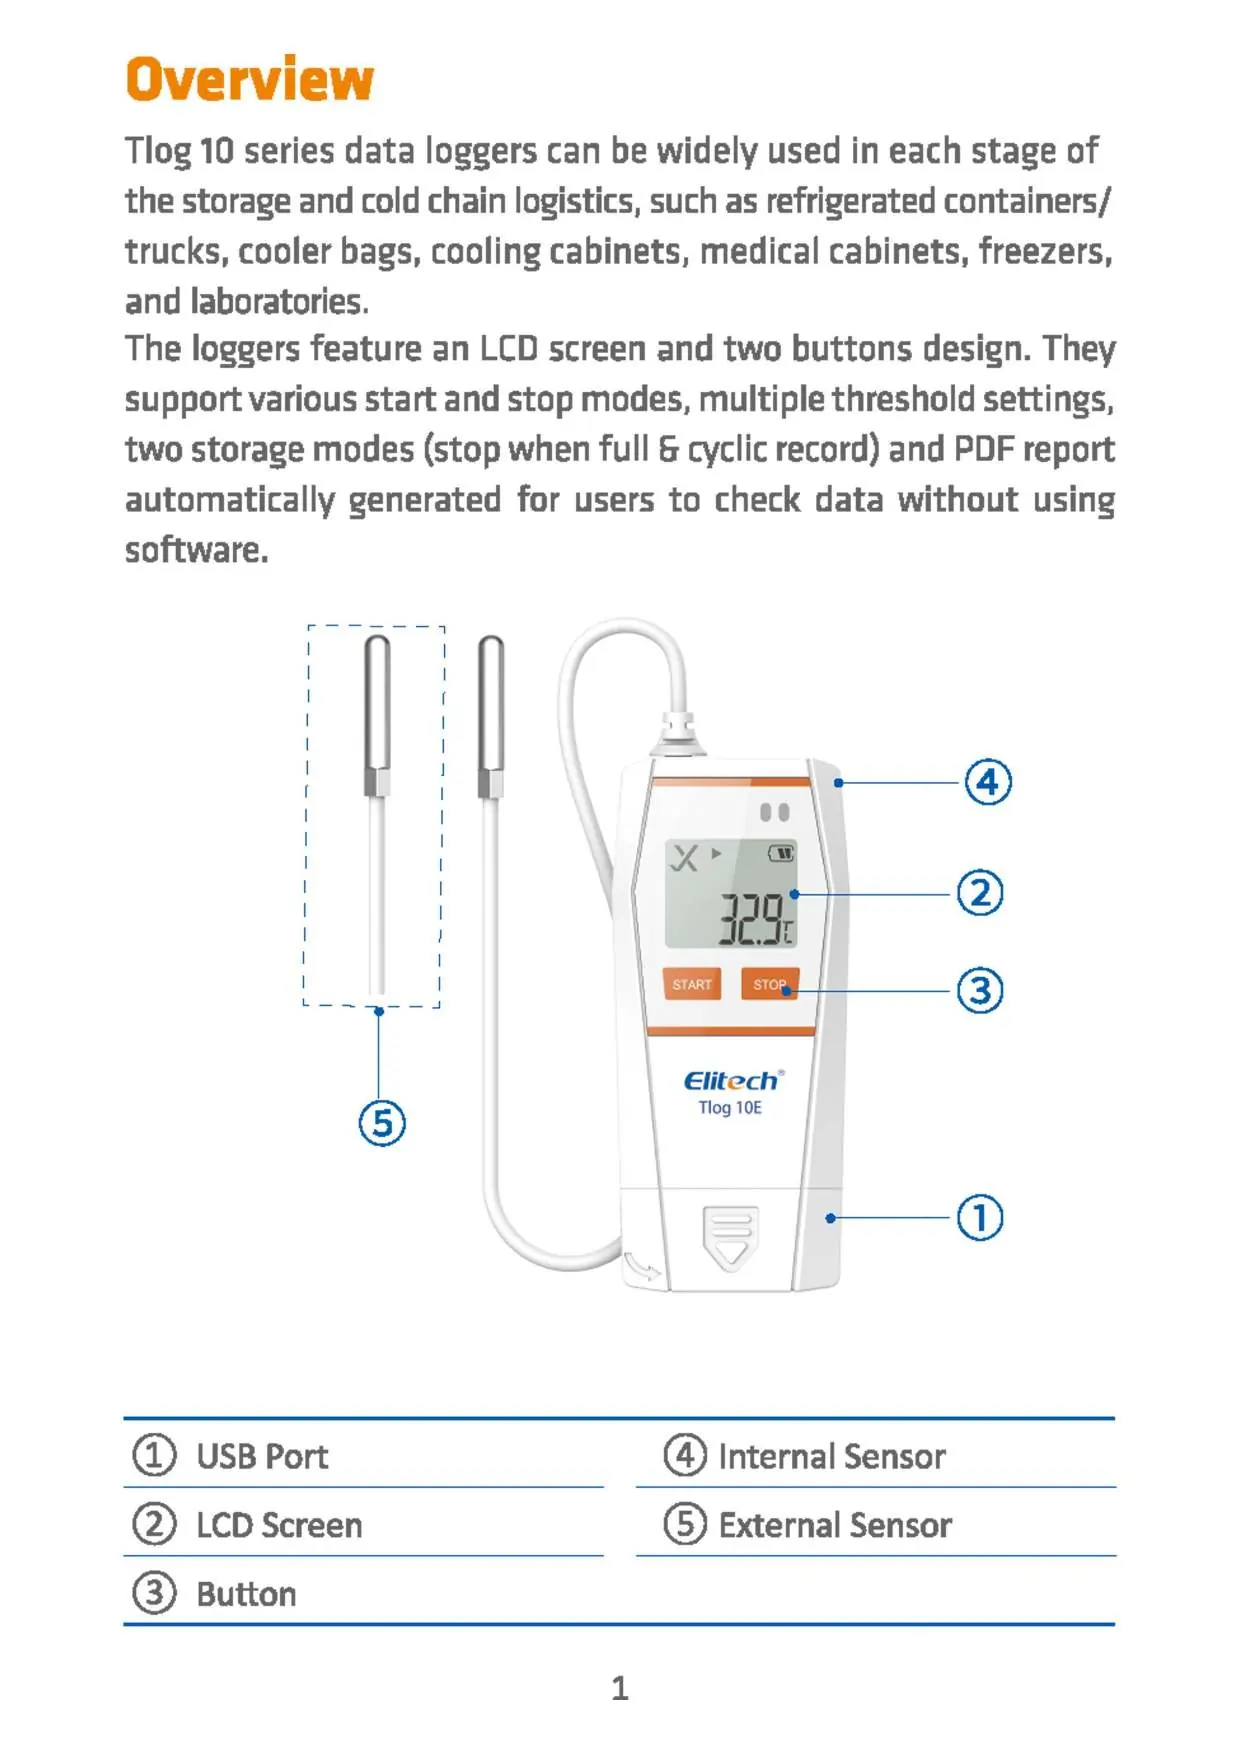
- USB Port: Located at the bottom for computer connection.
- LCD Screen: Displays current readings and status icons.
- Buttons: Used for starting, stopping, and marking events.
- Sensors: Depending on the model, the device uses either an internal sensor or an external probe.
Specifications
The Tlog 10 series supports various configurations based on the specific model:
- Memory: 32,000 points maximum.
- Logging Interval: Adjustable from 10 seconds to 24 hours.
- Protection Level: IP65.
- Battery: 3.0V disposable lithium battery CR2450.
- Data Interface: USB port.
- Report Type: Automatically generated PDF report.
Operation
1. Install Software
Download and install the free ElitechLog software (compatible with macOS and Windows) from www.elitechlog.com/softwares.
2. Configure Parameters
Connect the logger to your computer's USB port. Wait until the USB icon appears on the LCD. Open the ElitechLog software:
- To use default settings, click Quick Reset under the Summary menu to synchronize the time.
- To customize settings, click the Parameter menu, enter your preferred values, and click Save Parameter.
Warning: Always click Quick Reset or Save Parameter after battery replacement or for first-time use to avoid time zone errors.
3. Start Logging
- Press Button: Press and hold the left button for 5 seconds until the arrow icon appears on the LCD.
- Auto Start: The logger starts automatically after being unplugged from the computer (Immediate Start) or at a set date/time (Timed Start).
4. Mark Events
Double-click the left button to mark the current temperature and time. You can mark up to 10 groups.
5. Stop Logging
- Press Button: Press and hold the right button for 5 seconds until the square icon appears on the LCD.
- Auto Stop: The logger stops automatically when the memory is full.
- Software: Use the Stop Logging button in the ElitechLog software.
6. Download Data
Connect the logger to the computer via USB. You can access the data in two ways:
- Without Software: Open the removable storage device named 'ElitechLog' and copy the auto-generated PDF report.
- With Software: Click Export in the ElitechLog software to select your preferred file format.
7. Re-use the Logger
To re-use the device, stop the current logging session, download the data, and repeat the configuration process. Note that all previous data will be deleted upon re-configuration.
Official resources from the manual
Practical help
Common problems
USB icon not appearing on LCD
Ensure the device is properly connected to the computer's USB port.
Time or time zone errors
Click 'Quick Reset' or 'Save Parameter' in the ElitechLog software to sync the logger's time with your computer.
Logger not starting immediately
If the arrow icon is flashing, the logger is configured with a start delay and will begin logging after the set time elapses.
Data failed to auto-upload
Manually click the 'Download' button within the ElitechLog software.
Before use
- Download and install the ElitechLog software.
- Connect the logger to the computer via USB.
- Verify the USB icon is visible on the LCD screen.
- Configure parameters or perform a Quick Reset to sync time.
- Save parameters to the device before disconnecting.
Specs in practice
- Protection Level
- IP65 rating indicates the device is dust-tight and protected against water jets.
- Battery Life
- Approximately 2 years for storage; lasts up to 180 days with a 10-minute logging interval.
Images and diagrams
- 1: USB Port for data transfer and configuration.
- 2: LCD Screen for monitoring status and readings.
- 3: Buttons for manual start, stop, and event marking.
- 4: Internal Sensor for temperature/humidity monitoring.
- 5: External Sensor probe (on applicable models).
Model compatibility
- Software is compatible with both macOS and Windows.
- The Tlog 10 series includes models with internal sensors (Tlog 10, 10H) and external sensors (Tlog 10E, 10 EH).

Manual page author
Michael Turner
Technical manual editor
Reviews PDF manuals for structure, safety notes, and practical product details so readers can find the right information quickly.