Home Appliances / Refrigerators
User Manual for Euromaid 145L and 200L Chest Freezer
Quick guide for the Euromaid 145L (ECFR145W) and 200L (ECFR200W) chest freezers. Includes installation, temperature settings, maintenance, and troubleshooting.
Table of contents
Manual images
Click an image to enlargeQuick guide from the manual
This manual covers the operation and safety of the Euromaid 145L (ECFR145W) and 200L (ECFR200W) chest freezers. Key safety precautions include keeping ventilation openings clear, not using mechanical devices to accelerate defrosting, and avoiding damage to the refrigerant circuit. Always wait at least four hours after installation before connecting the appliance to allow the compressor oil to settle.
Overview of the appliance
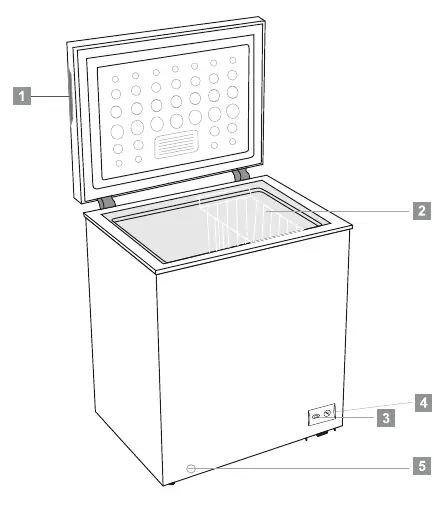
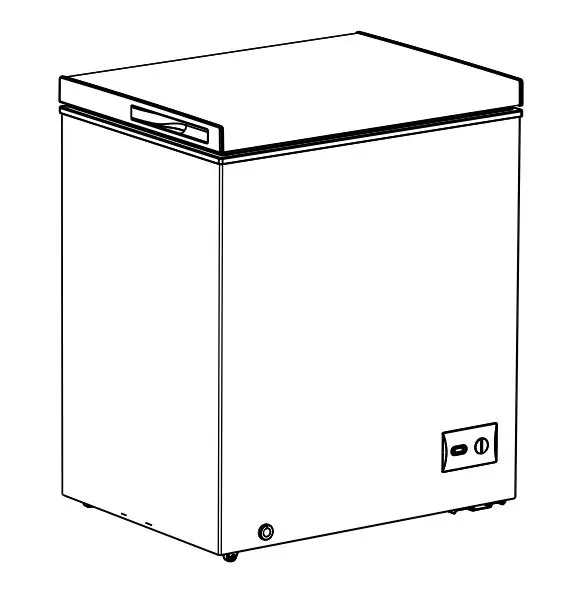
The chest freezer features a recessed handle for opening, an internal basket for storage, an indicator light, a thermostat knob for temperature control, and a drain hole for defrosting.
Installation
Ensure the appliance is installed away from heat sources like radiators or direct sunlight. Maintain the following clearances for optimal performance: 10cm on the sides, 10cm at the back, and 70cm at the top. The appliance must be leveled and the mains plug must remain accessible after installation. Verify that the local voltage and frequency match the rating plate before plugging in.

Daily use
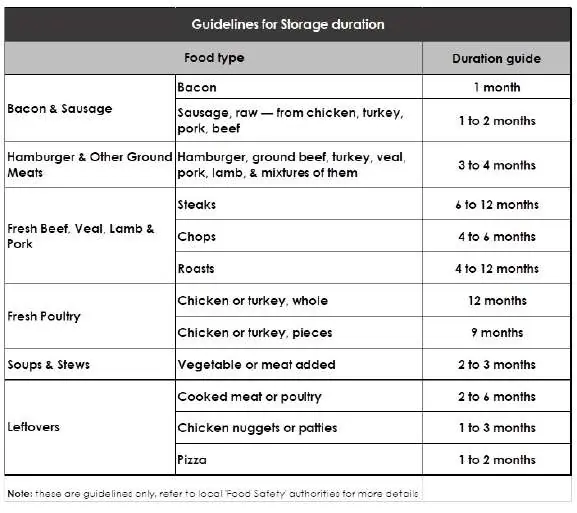
The temperature is controlled via the thermostat knob. Position 1 is the least cold, Position 5 is normal, and Position 7 is the coldest. Position Max is for fast freezing; reset to your desired setting after 24 hours. Do not store hot items in the freezer. When freezing fresh food, do not exceed the maximum capacity specified on the rating plate. Always mark the date of freezing on packages to ensure older items are consumed first.
Cleaning and maintenance
Before cleaning, switch off and disconnect the appliance. Do not use abrasive cleaners, steam cleaners, or sharp metal objects to remove frost. Regularly clean the condenser at the back with a soft brush or vacuum cleaner to maintain efficiency. To defrost, unplug the unit, remove the drain plug, and place a tray under the drain hole. Rotate the drain dial 180 degrees to allow water to flow out.
Troubleshooting
If the appliance does not work, check the plug, fuse, and socket. If it freezes too much, adjust the thermostat to a warmer setting. If food is not freezing enough, check the thermostat setting, ensure the door is not left open, and verify the appliance is not near a heat source. For unusual noises, move the appliance slightly or check if components are touching the wall.
Technical specifications
The models operate on 220-240V, 50Hz. The 145L model has a rated current of 0.55A, and the 200L model has a rated current of 0.70A. Both models use R600a refrigerant and are rated for Climate Class T (ambient temperature +16°C to +43°C).
Warranty
The product comes with a manufacturer's warranty provided by Glen Dimplex Australia Pty Limited and Glen Dimplex New Zealand Ltd. Warranty claims require proof of purchase and the product serial number. For service advice, contact the Customer Care Centre in Australia at 1300 556 816 or New Zealand at 09 274 8265.
Practical help
Common problems
Appliance does not work
Check if the plug is inserted, check the fuse, or consult an electrician if the socket is defective.
Appliance freezes too much
Turn the temperature regulator to a warmer setting temporarily.
Food is not frozen enough
Adjust the thermostat, ensure the door is closed, remove warm food, or move the appliance away from heat sources.
Unusual noises
Move the appliance slightly or bend components away if they are touching the wall or other parts.
Before use
- Unpack and check for damage.
- Wait at least 4 hours before connecting to power.
- Ensure 10cm clearance on sides/back and 70cm on top.
- Clean the interior with lukewarm water and neutral soap.
- Verify voltage matches the rating plate.
Show more Show less
Specs in practice
- Climate Class T
- Suitable for ambient temperatures between +16°C and +43°C.
- Refrigerant R600a
- Flammable natural gas; handle with care during transport and installation.
- Rated Current
- 0.55A for 145L model; 0.70A for 200L model.
Images and diagrams
- 1: Recessed handle
- 3: Indicator light
- 4: Thermostat knob
- 5: Drain hole
Model compatibility
- Designed for domestic use only.
- Not suitable for outdoor/alfresco areas.
- Must be installed by a qualified person in accordance with local codes.

Manual page author
Michael Turner
Technical manual editor