HVAC / Storage Tanks
User and Installation Manual for Ferroli ECOUNIT F 1C/2C Hot Water Storage Tank
Comprehensive user and installation guide for the Ferroli ECOUNIT F 1C and 2C series hot water storage tanks. Includes installation instructions, electrical heating element setup, maintenance procedures, and technical specifications.
Table of contents
Manual images
Click an image to enlargeQuick guide from the manual
This document provides installation, operation, and maintenance instructions for the Ferroli ECOUNIT F 1C and 2C hot water storage tanks. Installation and maintenance must be performed by qualified personnel. Ensure the tank is filled with water before switching on the electrical heating element to prevent damage.
Product Description
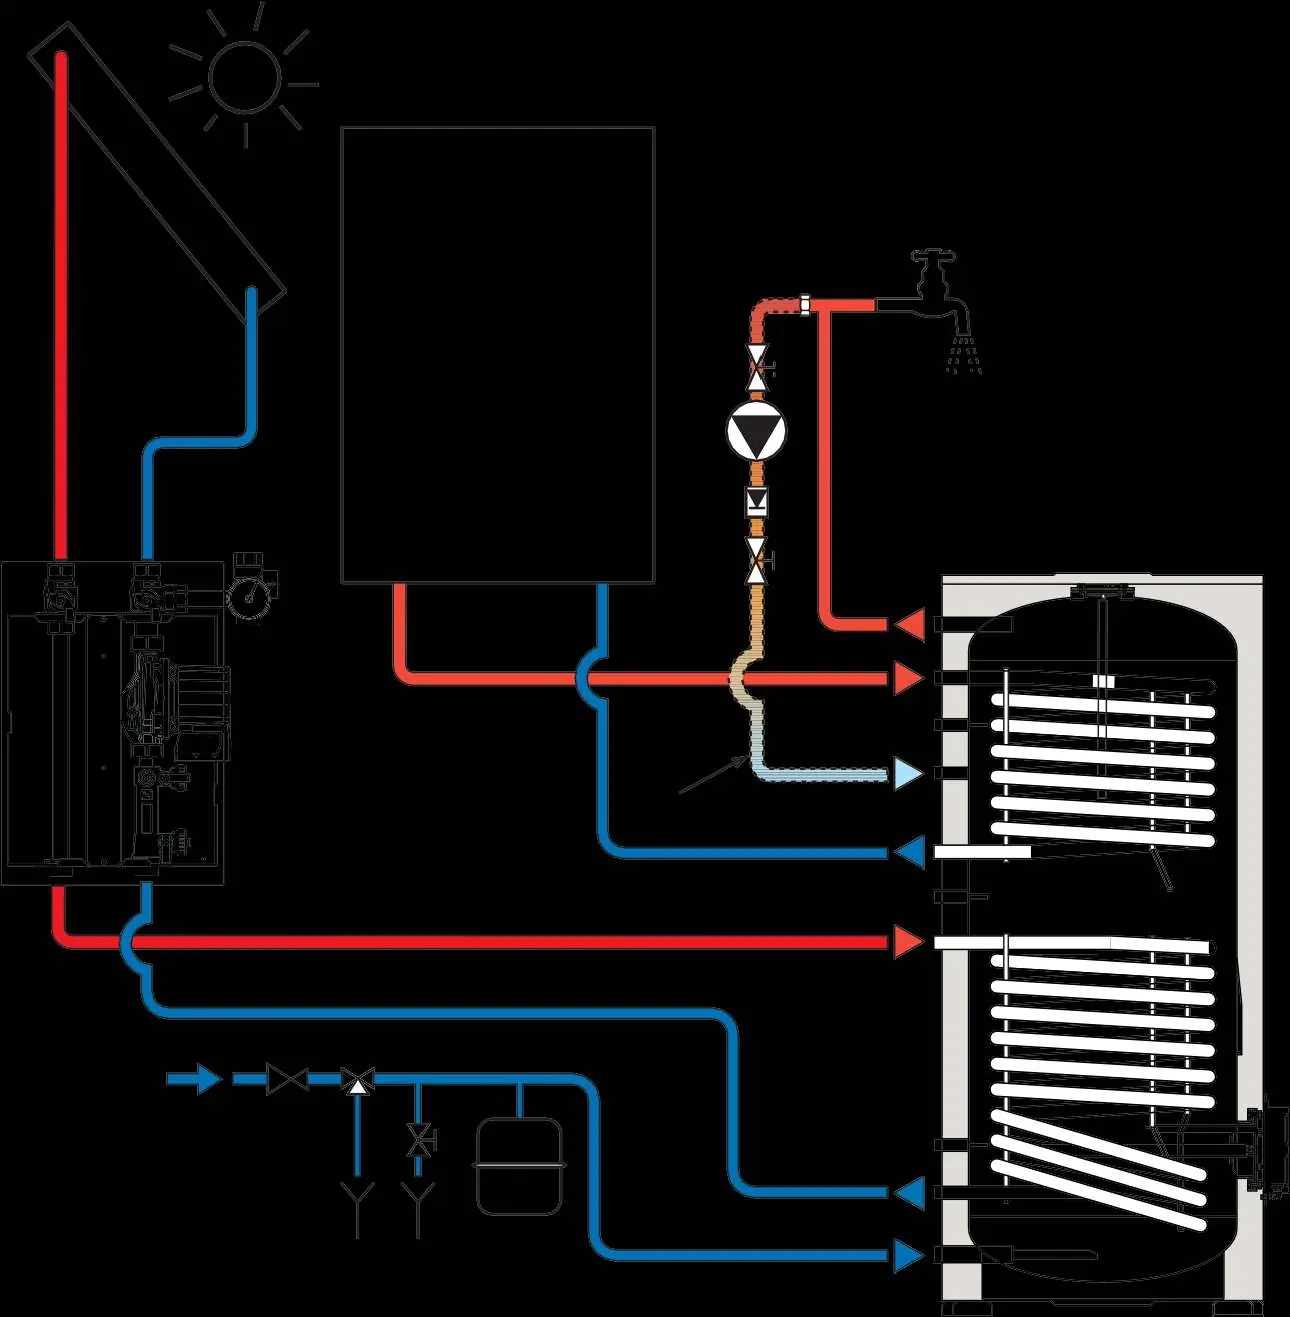
The ECOUNIT F is a vertical hot water storage tank. The 1C version features a single coil, while the 2C version features two coils, allowing for connection to additional heat sources like solar energy.
Installation
- Location: Install in a location protected from frost, near the heat source to minimize heat loss.
- Plumbing: Connect according to the diagrams provided. Install a safety valve on the cold water inlet. If mains pressure is high, install a pressure reducer.
- Expansion Tank: If a pressure reducer is installed, a DHW expansion tank (minimum 5% of the storage tank volume) is required.
- Recirculation: The tank is designed for connection to a recirculation pipe. If not used, seal the connection with a plug.
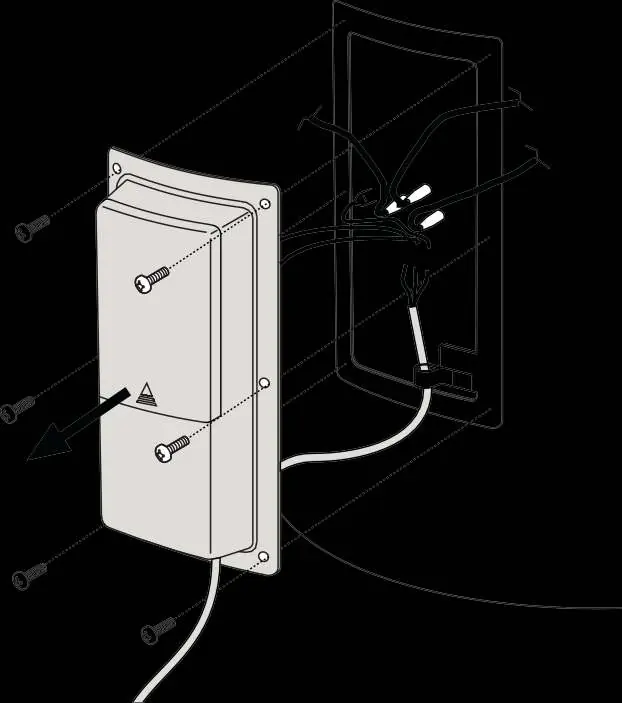
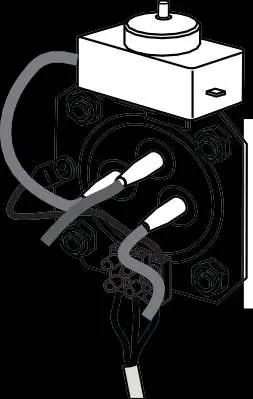
Electrical Heating Element
The unit can be equipped with a 1500W, 230V electrical heating element. Warning: Never switch on the heating element if the tank is empty, as this voids the warranty. The thermostat is adjustable from 15°C to 75°C and includes a safety device that triggers if the temperature exceeds 93°C.
Operation
Before first use, fill the tank via the cold water inlet and vent the system by opening hot water taps. To drain the tank, close the cold water supply, connect a hose to the drain valve, and open a hot water tap to allow air entry.
Maintenance and Cleaning
- Cleaning: Use a damp cloth with mild soap. Do not use abrasive cleaners or solvents.
- Anode Check: Inspect the magnesium anti-corrosion anode at least once a year. Replace if necessary to protect the tank from corrosion.
- Internal Cleaning: Periodically inspect the tank interior. Drain the unit, remove the cover and flange, and clean with a water jet and non-metallic tools.
Practical help
Common problems
Water dripping from safety valve
This is normal during the heating phase. Connect the valve outlet to a drain using a siphon.
Heating element not working
Ensure the tank is full of water. Do not switch on if empty. Check thermostat settings.
Corrosion inside the tank
Check the magnesium anode annually and replace it if it is worn out.
Before use
- Ensure the installation site is frost-protected.
- Install a safety valve on the cold water inlet.
- Install a pressure reducer if mains pressure is high.
- Fill the tank completely with water before connecting the electrical power.
- Vent the system by opening hot water taps.
Specs in practice
- Electrical Heating Element
- 1500W, 230V. Adjustable temperature range 15-75°C.
- Safety Valve
- Must be set to or higher than the maximum pressure indicated in the technical tables.
- Magnesium Anode
- Protects the tank from corrosion; requires annual inspection.
Images and diagrams
- Hydraulic scheme 1C: Shows connections for hot water, cold water, recirculation, and safety valve.
- Electrical connection: Shows wiring of the heating element and thermostat.
Model compatibility
- 1C models: Single coil.
- 2C models: Double coil (includes solar energy connection).

Manual page author
Emily Carter
User documentation editor
Prepares concise manual descriptions and highlights the most useful setup, operation, and maintenance information for readers.