Home Appliances / Refrigerators
Instruction Manual for FORNO Maderno 60" 2-Piece Convertible Refrigerator/Freezer
Comprehensive user guide for the FORNO Maderno 60" 2-Piece Convertible Refrigerator/Freezer. Includes installation instructions, control panel operation, temperature settings, maintenance, and troubleshooting.
Quick answers from the manual
Quick answer
- The FORNO Maderno 60" is a convertible refrigerator/freezer. It requires a 115V/60Hz power supply, specific clearance for ventilation, and must be leveled using the adjustable bottom feet. p. 1, 7, 11
Key actions
- Install handles p. 13
- Level the appliance p. 11, 12
- Set temperature p. 15, 16
First start
- Wait at least 4 hours before connecting to allow the oil to flow back in the compressor. p. 8
Show 4 more answers Show less
Problems and fixes
Appliance not working
Check power cord, fuse, or if in defrost cycle.
p. 22
Temperature too warm
Check if doors are open too long or if there is insufficient clearance.
p. 23Maintenance and reset
- Clean the appliance at least every two months. p. 19
Technical specifications
| Parameter | Value | Meaning | Pages |
|---|---|---|---|
| Power Supply | 115V/60Hz | Standard single phase AC | p. 7 |
Where to find it in the PDF
- Installation p. 10, 11, 12, 13
- Controls p. 15, 16, 17
- Troubleshooting p. 22, 23
Table of contents
Manual images
Click an image to enlargeQuick guide from the manual
This manual provides essential information for the installation, operation, and maintenance of the FORNO Maderno 60" 2-Piece Convertible Refrigerator/Freezer. Before first use, ensure the appliance is placed on a level surface, wait at least 4 hours before connecting to power to allow the compressor oil to settle, and ensure adequate ventilation around the unit.
Description of the appliance
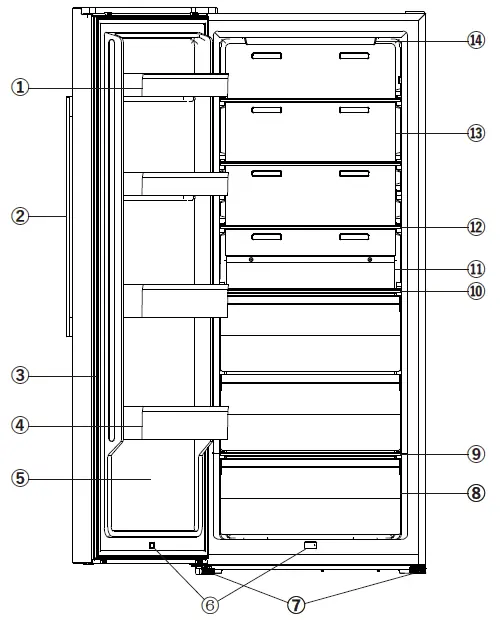
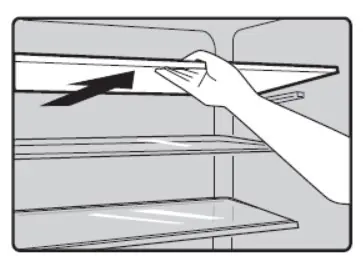
The refrigerator features various storage options including door shelves, glass shelves, and a crisper drawer. The display panel allows for temperature control and mode selection. Note that due to product modifications, your specific unit may vary slightly from the illustrations.
Installation
Proper installation is critical for performance and longevity:
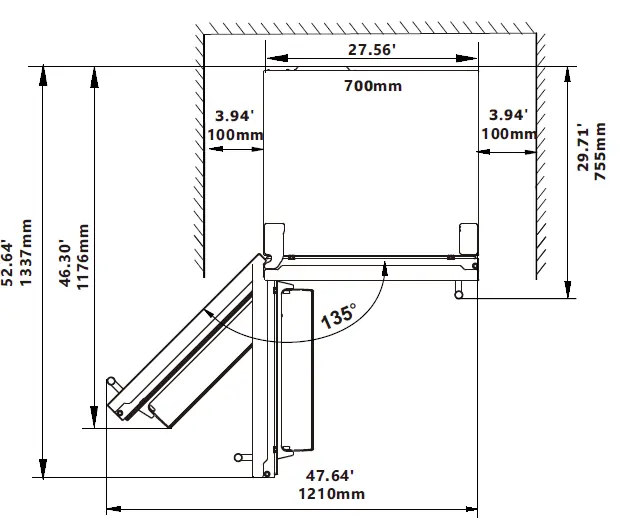
- Clearance: Maintain at least 1.96" (50mm) at the back, 3.94" (100mm) at the top, and 3.94" (100mm) at the sides.
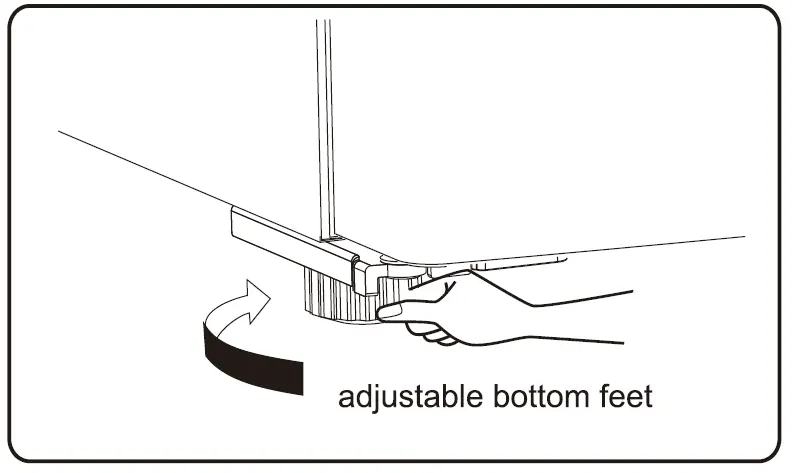
- Leveling: Use the adjustable bottom feet to level the appliance.
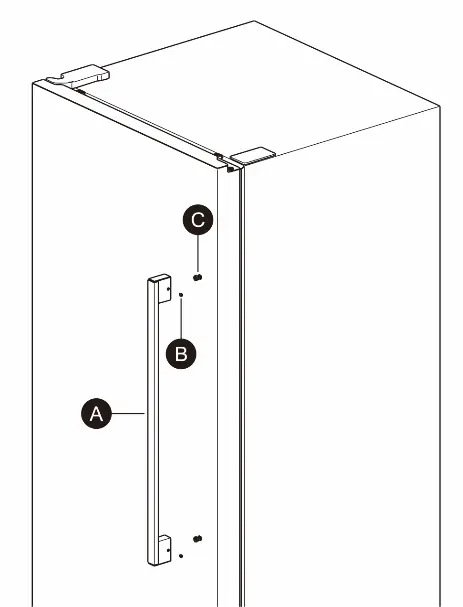
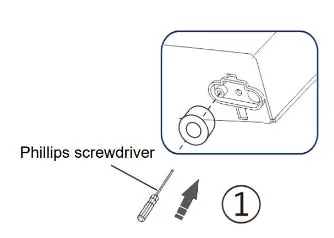
- Handles: Install the provided handles using the included supports and screws.
- Ventilation: Ensure the unit is not placed near heat sources and that ventilation openings are clear.
Display controls
The control panel allows you to manage the refrigerator settings:
- Power: Press and hold for 3 seconds to enter/exit standby mode.
- Freezer/Fridge conversion: Press and hold for 3 seconds to switch modes.
- Temperature: Press the TEMP button to adjust settings.
- Modes: Includes Energy Saving, Super Freeze, and Super Cool functions.
- Demo Mode: Used for store displays; prevents cooling.
Cleaning and care
Clean the appliance at least every two months. Turn off and unplug before cleaning. Use a mild detergent and warm water. Avoid abrasive cleaners, sharp objects, or steam cleaners. Ensure the interior is completely dry before plugging back in.
Troubleshooting
Before calling for service, check the following:
- Appliance not working: Check power connection and fuses.
- Odours: Clean the interior and check for spoiled food.
- Noise: Ensure the unit is level and not touching the wall.
- Motor runs continuously: Check temperature settings and door usage.
Practical help
Common problems
Appliance not working
Check if the power cord is plugged in properly and check the fuse or circuit of your power supply.
Odours from compartments
The interior may need to be cleaned, or some food/containers may be causing the odour.
Noise from the appliance
Check if the cabinet is level, the back of the appliance is touching the wall, or if items inside are rolling.
Motor runs continuously
This is normal if the temperature is set too cold, a large quantity of warm food was stored, or doors are opened too frequently.
Before use
- Check for any shipping damage.
- Ensure the appliance is placed on a level, hard surface.
- Wait at least 4 hours before connecting to power.
- Ensure adequate ventilation around the unit.
- Clean the interior before storing food.
Show more Show less
Specs in practice
- Climate Class
- Indicates the ambient temperature range for optimal performance (SN to T).
Images and diagrams
- Cutout dimensions for proper installation.
- Handle installation steps using provided hardware.
- Adjustable bottom feet for leveling.
- Control panel layout and button functions.
Model compatibility
- Requires 115V/60Hz power supply.
- Must use a dedicated power socket.

Manual page author
Emily Carter
User documentation editor